The hidden reason your grinder chute still clogs after cleaning
Ever found yourself sweating over a messy, stubborn clog in your coffee grinder chute, only to have it jam again a few days later? I remember the frustration clearly—hours spent meticulously cleaning, only to see the blockage reappear as if by magic. It’s enough to make any coffee enthusiast feel defeated, questioning if they’re missing some secret trick. Well, here’s the lightbulb moment I had: the problem isn’t simply about grime or residue. Sometimes, that pesky clog sneaks back because of a hidden culprit lurking inside the grinder.
Today, I’m going to share how to identify and fix that invisible obstruction that causes persistent jams—even after what seems like a thorough clean. We’re talking about uncovering the real culprit behind those frustrating clogs and how you can solve it once and for all.
Why Your Grinder Clogs Keep Coming Back Even After Cleaning
Many of us believe that regular cleaning is enough to prevent jams, but here’s the thing—there’s a hidden reason your grinder chute still clogs after you’ve scrubbed every surface. It turns out, residual oils and tiny coffee particles can get trapped in spots you might overlook—particularly around the burrs and inside the chute’s corners. These nano-residues build up over time, creating a sticky layer that catches new grounds and causes blockages.
What tripped me up early on was a careless assumption: if I wiped the visible parts, I was good to go. But that wasn’t true. I was missing the tiny, almost invisible remains tucked away in hard-to-reach areas. According to coffee gear expert James Hoffmann, residual oils in grinders can cause static and clumping, which exacerbate clogging issues (source: [The Coffee Geek](https://espressotechguide.com/why-your-grinder-burrs-are-truly-dull-or-just-dirty)). So, cleaning isn’t just about scrubbing surfaces; it’s about deep cleaning the internal crevices where oils and fines hide.
Have you ever experienced a clog that reared its ugly head shortly after cleaning? If so, you’re not alone. Many enthusiasts overlook this hidden buildup, leading to recurring frustrations.
In the next section, I’ll walk you through the exact steps I took to finally banish those stubborn blockages for good. Ready to put an end to frequent jams and enjoy smoother grinding? Let’s dive into the practical solutions that changed the game for me—and likely will for you too.
Disassemble Your Grinder with Precision
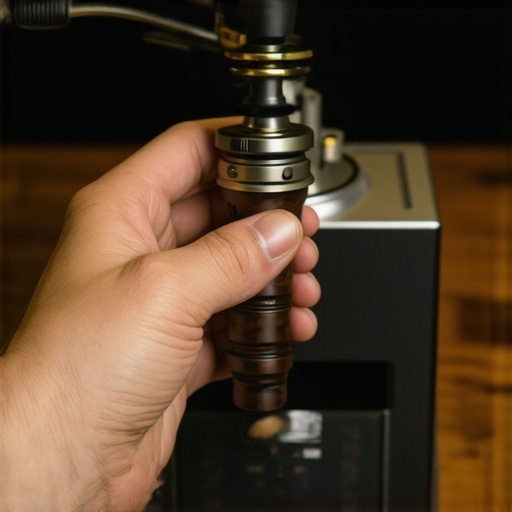
Begin by unplugging your grinder and removing the hopper and burrs. Use a screwdriver to carefully detach the burr assembly, taking note of how parts fit together. This step is crucial because residual oils and fines can hide beneath burrs and inside the chute corners. During my first attempt, I neglected this and only cleaned visible surfaces, which led to frequent jams.
Brush Away Residue Like a Pro
Use a dedicated small brush or a soft toothbrush to scrub the burrs, chute walls, and internal crevices. Pay special attention to the corners where coffee fines accumulated. Avoid using water or cleaning solutions at this stage to prevent damage. I found that a firm, controlled brushing dislodged a significant amount of oily buildup that standard wiping missed. This action dramatically reduced static and clumping causes.
Deep Clean with Grain Alcohol or Specialized Cleaners
Inject a small amount of food-grade grain alcohol or a commercial grinder cleaning tablet into the burrs and inside the chute. Run the grinder for a few seconds to let the solvent flush out oils and fines. Then, wipe away any remaining residue with a clean cloth. This process dissolves stubborn oils that promote blockages. I used grain alcohol once and watched the oils lift out of the intricate crevices, leaving the grinder feeling like new.
Reassemble Carefully and Calibrate
Reattach the burrs and hopper, ensuring everything is aligned properly. Use the zero-point check to verify the grinder’s calibration. Proper alignment prevents grounds from getting stuck in the chute. After reassembling, grind a small amount of coffee to test for smooth flow—if the jam persists, revisit cleaning deeper in those hard-to-reach cracks.
Implement Preventative Maintenance Regularly
Schedule a deep cleaning every few weeks, especially if you use oily or flavored beans. Use a dedicated brush and deep-clean materials to preserve your grinder’s performance. This diligent upkeep stops oils from migrating and building up inside the chute, preventing future clogs. Remember, a clean grinder ensures your espresso tastes fresh and consistent, free from channeling caused by residual buildup.
When it comes to creating the perfect coffee experience at home, many enthusiasts rely on common beliefs that may actually hinder their progress. One prevalent misconception is that more expensive equipment automatically guarantees superior results. While premium gear can offer benefits, understanding the nuances—like grind quality, milk temperature, and calibration—is essential for truly elevated brewing. For instance, selecting the right grinder involves more than just price; factors like burr type and grind consistency critically impact extraction quality. You can explore how to choose the right coffee grinder to refine your setup.
Many assume that milk frothers alone transform your coffee experience. However, the key lies in mastering steaming techniques, milk temperature, and texture, which often get overlooked. Check out these milk frothers that truly make a difference for professional-quality foam.
Home espresso machines are frequently labeled as simple or foolproof, but the real challenge is in calibration and maintenance. Small misalignments or overlooked cleaning routines can cause uneven extractions or bitter shots. Deepen your knowledge with mastering home espresso tips and avoid common pitfalls.
Another often-missed nuance is the calibration of grinders and espresso machines in tandem. Properly dialing in your equipment ensures consistent results and prevents wasted beans or over-extraction. Learn the detailed process in checking your grinder’s zero point safely.
Are you falling for any of these misconceptions? Let’s dig deeper into what truly makes a difference. Remember, the devil is in the details—precise adjustments and understanding advanced nuances can elevate your coffee game from good to exceptional. Feel free to ask questions or share your experiences in the comments. For tailored advice, consider reaching out through contact us—I’m here to help enthusiasts unlock the full potential of their equipment.Maintaining your coffee equipment isn’t just about quick cleanings; it requires investment in specific tools and adopting proven routines to ensure consistent performance over time. One of my personal favorites is a **precision burr cleaning brush**, designed to reach those tiny crevices where residual oils and fines hide. Unlike generic brushes, these are crafted with firm yet gentle bristles that dislodge stubborn build-up without damaging delicate burr surfaces. I avoid using water or harsh cleaning solutions on burrs, as they can cause corrosion—opt instead for a dry brush and periodic deep cleans using grain alcohol, which effectively dissolves oils and grime, extending your grinder’s lifespan.
Discovering the Hidden Lessons in Coffee Gear Maintenance
One of the most impactful lessons I learned was that top-tier equipment isn’t enough—you need to understand the intricacies of cleaning and calibration. For instance, I used to believe that wiping the visible parts was sufficient, but I soon realized that residual oils and fines often hide in tiny crevices, causing persistent issues like clogging or inconsistent shots. This realization pushed me to disassemble my grinder and brew system periodically, revealing a layer of grime I never noticed before. Deep cleaning with grain alcohol or specialized cleaners can unveil hidden buildup, transforming your equipment’s performance. The most valuable insight? Patience and attention to detail can elevate your coffee game more than any shiny gadget.
Tools and Resources That Shaped My Coffee Journey
My essential toolkit includes a dedicated burr cleaning brush, which reaches those tiny areas standard brushes can’t access. I also trust high-quality cleaning tablets, such as those recommended by professional baristas, to dissolve stubborn oils without damaging the machine. For learning, I rely on resources like mastering home espresso tips—they provide step-by-step guidance that truly made a difference. Additionally, reputable sources like gear selection guides helped me choose equipment that perfectly aligns with my brewing style, saving time and frustration.
Your Next Coffee Break Starts Now
Embracing these insights and tools can dramatically improve your coffee craftsmanship. Remember, the journey to exceptional coffee isn’t just about the equipment; it’s about understanding and caring deeply for your gear. Every tweak, every deep clean, brings you closer to that perfect shot, flavor, and texture you’ve envisioned. Don’t be afraid to experiment, ask questions, or reach out for personalized advice—your perfect coffee experience is waiting to be unlocked. Have you ever experienced a breakthrough after a deep clean or calibration? Share your story below and inspire fellow enthusiasts to elevate their home barista game.