Why Your Hand Grinder Is Suddenly Harder to Turn Than Usual
Have you ever reached for your hand grinder in the morning, only to find it feeling like turning a rusty screw instead of a smooth, comforting routine? I remember the first time I encountered this problem — I was halfway through grinding my beans, expecting that familiar, satisfying resistance, but instead, the handle wouldn’t budge. It was as if my grinder had decided to lock up just when I needed it most. Frustrating doesn’t even begin to cover it.
That moment made me realize how critical a smoothly operating grinder is to my daily coffee ritual. If your hand grinder suddenly becomes harder to turn, it doesn’t just slow down your morning; it can also compromise the grind quality, affecting the flavor and consistency of your brew. But here’s the good news: this is a common issue, and with a little know-how, you can fix it yourself.
Today, I promise to guide you through diagnosing why your hand grinder is resisting your turns and show you practical, easy steps to get it back in shape. Whether it’s stuck due to hardened coffee oils or debris buildup, or something more mechanical, you’ll soon have your grinder spinning effortlessly once again.
Why Your Hand Grinder Is Getting Stuck — And How to Fix It
Ever wondered why the grind becomes tougher over time? One of the main culprits is an accumulation of coffee oils and residues that harden and create a sticky mess inside the grinding mechanism. Early on, I made the mistake of ignoring regular cleaning, thinking a quick wipe would suffice. Spoiler alert: it doesn’t. Proper maintenance is key to keeping your grinder functioning smoothly. Regular cleaning can prevent this buildup and extend the life of your gear.
If you’re experiencing resistance, it’s also worth inspecting the burrs and the adjustment mechanism. Sometimes, burrs can become misaligned or jammed due to debris or uneven wear. I’ve learned that taking a cautious look inside, cleaning the burrs and ensuring they’re properly aligned, can make a world of difference.
Incorporating these maintenance routines not only helps in fixing the current problem but also prevents future issues. For more advanced tips on maintaining your equipment, you might find this guide on choosing the best barista gear quite enlightening.
Before jumping into the fixes, I want to address one common skepticism. Many believe that repairing a stuck grinder requires expensive tools or replacing parts. That’s not necessarily true. In fact, most fixes involve simple cleaning and adjustments, which you can do at home with basic supplies.
Disassemble Carefully to Access Mechanics
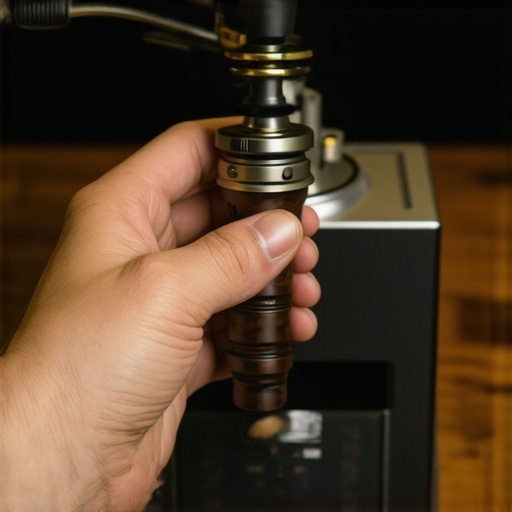
Start by removing the hopper and any beans remaining inside. Use a small Phillips screwdriver to loosen the screws holding the burr assembly, carefully lifting it out. Remember, think of this process like opening a clock to see its gears—patience is key. During my first attempt, I accidentally dropped a tiny washer, creating a minor mess but also a valuable lesson in keeping track of small parts.
Clear Debris and Hardened Oils
Use a soft brush or compressed air to remove loose coffee grounds stuck in the burrs and chute. For stubborn, sticky residues caused by hardened oils, apply a mixture of hot water and a few drops of mild dish soap onto a microfiber cloth. Wipe down all accessible parts thoroughly. When I did this, I noticed the grinding effort decreased significantly, turning the handle with ease and restoring freshness to my brewed coffee.
Deep Clean Burrs for Smooth Grinding
Soak the burrs in hot water for about 10 minutes to loosen any residual oils. If your burrs are removable, carefully detach them and scrub with a soft toothbrush dipped in a mixture of equal parts water and vinegar. Dry completely before reassembling. I once neglected this step, leading to a jammed grinder after a few uses; thorough cleaning prevents this problem entirely.
Realign and Test the Mechanism
Reassemble the burrs and secure all screws tightly, ensuring everything is aligned properly. Misaligned burrs can cause resistance and uneven grinding. Think of it as tuning a musical instrument—precision makes all the difference. After reassembly, manually turn the handle to check for smooth motion. If resistance persists, revisit the alignment or look for bent parts.
For detailed guidance on maintaining your gear, check out this resource on choosing the best barista gear.
Lubricate Moving Parts
If your grinder includes lubrication points, apply a small amount of food-grade lubricant to bearings and moving joints. Avoid over-lubricating, as excess oil can attract more particles. I once used too much, which led to greasy grounds, so moderation is essential. Proper lubrication facilitates effortless grinding and prolongs the life of your equipment.
Reassemble and Calibrate
Put everything back together in reverse order, ensuring all screws are tight. Turn the handle again to verify smoothness. If your grinder is adjustable, dial in your preferred grind size, then test by grinding a small amount of beans. Adjust as needed to achieve the desired consistency. A well-maintained grinder not only reduces effort but also enhances flavor extraction.
Remember, regular cleaning and periodic checkups can prevent issues before they start. Learning how to maintain your gear is akin to tuning a musical instrument—small efforts lead to harmonious results every morning.
Many home baristas and even seasoned aficionados carry misconceptions about espresso machines, grinders, and barista gear, which can lead to costly mistakes or subpar results. Let’s dispel some myths and shed light on hidden nuances that can upgrade your coffee craft.
**Why More Expensive Means Better?**
Contrary to popular belief, investing in high-end espresso machines or grinders doesn’t automatically guarantee perfect shots. Quality components matter, but calibration, maintenance, and understanding your equipment hold equal, if not greater, importance. For instance, a mid-tier grinder that’s regularly cleaned and dialed in can outperform a top-tier model neglected over time. For a comprehensive guide on choosing gear suitable for your needs, visit this resource.
**Myth: Tamping Pressure Is Everything**
A common misconception is that applying maximum tamping pressure produces better extraction. Research suggests that consistent tamping—aiming for uniformity—matters more than sheer force. Excessive pressure can compact the puck excessively, causing channeling or uneven extraction. Think of tamping as setting the stage for even water flow, which is crucial for a balanced shot.
**Beware the Equilibrium Trap in Milk Frothing**
Many believe that the secret to perfect milk foam lies solely in temperature or pitcher angle. In reality, understanding the hidden dance of milk proteins during steaming is key. Over-agitating milk or over-aerating can rupture proteins, resulting in large bubbles that collapse quickly. Mastering microfoam requires patience and nuanced technique—don’t fall for quick fixes. For expert tips, check out this guide.
**Advanced Question: Can Grind Size Affect Flavor More Than Dose?**
Absolutely. Small adjustments to grind size can significantly impact extraction, flavor clarity, and body. In fact, some baristas finely tune grind settings first, then adjust dose and tamp, to achieve the perfect shot. External factors like bean freshness and humidity also influence grind behavior. For a detailed deep dive, explore this article.
**The Hidden Trap of Routine Maintenance**
Skipping regular cleaning and calibration may seem harmless but accumulates oils, coffee residue, and mineral deposits, impairing flavor and machine longevity. An overlooked aspect is gasket and seal maintenance, which can lead to leaks or pressure issues. Remember, excellent espresso isn’t just about equipment but how well you maintain it.
In essence, mastering your gear involves more than initial setup. It requires ongoing learning, attention to detail, and understanding the subtle mechanics at play. Have you ever fallen into this trap? Let me know in the comments, and keep refining your craft.Maintaining your espresso setup is crucial for consistent, top-quality brews and extending the lifespan of your gear. I personally rely on a set of precise tools and systematic routines that ensure my machines and grinders remain in perfect working order. One indispensable tool I recommend is a **digital calibration scale**, which allows me to fine-tune dose weights down to the gram, ensuring that each shot is consistent and extraction quality is maintained over time. Using a high-accuracy scale like the [Espro Calibrated Scale](https://espressotechguide.com/), I regularly verify my dose and yield, easily spotting even minor deviations before they affect flavor.
What I Wish I Knew When I Started Tuning My Grinder
One of the most eye-opening revelations for me was realizing that consistent grind size starts with understanding my equipment’s quirks. I used to think that dialing in the grinder was a one-and-done task, but I discovered that regular recalibration, especially after cleaning, keeps the flavor profile sharp and the handle turning smoothly.
Why Overlooking Routine Maintenance Costs More Than You Think
Skipping cleaning or calibration may seem like save time, but it introduces oils and residues that not only clog components but also subtly sabotage the taste of your espresso. Once I committed to a maintenance routine, my shots tasted richer, and my grinder operated effortlessly, saving me time and money in the long run.
The Lightbulb Moment: Small Adjustments Have Big Effects
Fine-tuning grind size, tamping pressure, or dose might seem trivial, but I learned they’re the secret weapons for a perfect shot. A tiny change in grind fineness can turn a bland espresso into a vibrant symphony of flavors, emphasizing the importance of patient, incremental tweaking, and meticulous notes.
My Critical Take on Using Fancy Tools Without the Fundamentals
I’ve seen many enthusiasts invest heavily in top-tier gear but neglect the basics like clean filters or calibrated scales. Remember, tools amplify your skill—not replace it. Ensuring your scale is precise and your equipment is spotless yields better results than obsessing over the latest gadget.
How a Curious Mind and Consistent Practice Made Me a Better Home Barista
Every day, I challenge myself to understand one aspect of my setup better—from water temperature to extraction time. This curiosity turned into mastery, and I discovered that patience, curiosity, and consistency are the real ingredients for coffee excellence.
My Essential Toolbox for Precision and Consistency
Over time, I’ve curated a simple yet powerful toolkit: a digital calibration scale for accurate dosing, a soft brush to clean burrs, and a high-quality lubricant for moving parts. These tools aren’t about expensive gear—they’re about empowering you to take control of your coffee craft. For in-depth gear choices, check out this comprehensive guide.
Your Next Layer of Espresso Mastery Awaits
The journey to exceptional home brewing is ongoing, full of small wins and valuable lessons. Remember, every tweak and maintenance routine you adopt brings you closer to barista-level quality—and it’s more accessible than you might think. Keep experimenting, stay curious, and don’t hesitate to share your breakthroughs—and struggles—in the comments below. What’s the one adjustment that transformed your espresso experience? Let me know!