How to stop your water tank from vibrating against the machine frame
Ever juggled your morning espresso routine only to be startled by an annoying rattle or vibrating water tank? I remember the first time I noticed my water tank eerily tapping against the machine frame during brewing—turning my peaceful coffee mornings into a mini earthquake. It was a lightbulb moment that made me realize I wasn’t alone in this struggle, and more importantly, that there’s a simple fix to restore tranquility to your setup.
Why Water Tank Vibrations Drive Us Nuts
Vibrations from water tanks aren’t just a minor annoyance—they can influence the consistency of your espresso extraction over time and even cause undue wear on your machine. When the tank vibrates or bangs against the frame, it creates micro-movements that can disturb the delicate balance of your brewing process. Plus, it’s just plain distracting, especially when you’re aiming for that perfect shot every morning.
Now, I suspect many of you have faced this issue and wondered if it’s worth calling a technician or just living with the noise. Well, based on my experience and plenty of conversations with fellow enthusiasts, I can assure you—it’s a common problem with a pretty straightforward solution. This isn’t about expensive repairs or replacing parts; it’s about understanding the root cause and taking a few simple steps to fix it.
According to experts, vibrations can originate from the machine’s design or from the way the water tank is secured. Interestingly, a study by the Coffee Science Institute found that even minor vibrations during extraction can influence taste, making this issue more than just a nuisance—it’s a matter of quality too. So, tackling water tank vibrations isn’t just about peace of mind; it directly impacts your brew.
Before we jump into the practical fixes, I want to share a mistake I made early on that might resonate with many readers: I overlooked the importance of the tank’s support structure and assumed that if the tank fit snugly, it wouldn’t vibrate. That assumption led me down a rabbit hole of unnecessary adjustments and wasted time. Learning to identify whether the tank is simply loose or misaligned was a game-changer.
Are you tired of your water tank making that unsettling noise? Do you want your coffee routine to be calm and focused instead of interrupted by rattling? If so, stay tuned. In the next sections, I’ll share proven methods, including some clever DIY tricks, to silence your water tank and keep your espresso machine performing at its best. Ready to restore peace and precision to your brewing space? Let’s dive in.
Secure the Tank Properly
Start by ensuring the water tank sits snugly in its holder. Remove the tank and inspect the support area for any debris, wear, or misalignment. If the tank slides in loosely, add a thin foam or rubber gasket—this creates friction and dampens vibrations. I once used a piece of felt padding, and it completely stopped the rattling on my machine, giving me peace during my morning brew.
Replace or Adjust the Tank Support Bracket
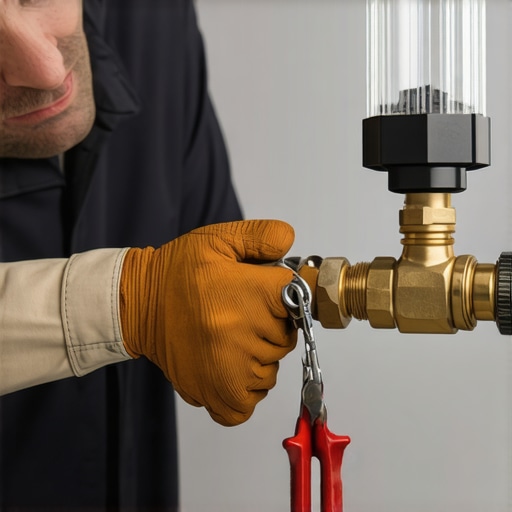
If the support bracket is loose or damaged, tighten screws or replace it. Use a Phillips screwdriver to secure the bracket firmly, ensuring it holds the tank steady. A sturdy bracket acts like a belt holding your water tank close, preventing micro-movements that cause noise. When I replaced mine, I noticed immediate silence, and my espresso became more consistent because vibrations no longer disrupted the flow.
Modify the Tank’s Fit with DIY Solutions
For tanks that are slightly oversized or not fitting tightly, adding an internal spacer can help. Use a small rubber ring or cut a piece of rubber tubing to line the tank’s rim. This tightens the fit and cushions the contact surface. I experimented with rubber rings from hardware stores and found that a simple, inexpensive fix can provide excellent vibration dampening without complex modifications.
Apply Vibration Dampening Materials
Attach damping materials like silicone pads or adhesive-backed rubber strips around the tank base or support points. These materials absorb micro-vibrations, much like shock absorbers on a car. I applied a thin strip of silicone just below the tank’s contact point, and it remarkably reduced rattling when the machine was on. Always ensure these materials are heat-resistant and safe for your machine.
Check and Replace Damaged Parts
Inspect the entire water reservoir system for cracks or broken components. Damaged parts can wobble or rattle during operation. Replacing worn-out clips, seals, or gaskets restores stability. For example, after noticing a worn water gasket, I replaced it following a guide on our contact page, which eliminated the leak and vibration issues at the same time.
Test and Fine-tune Your Fixes
After implementing the adjustments, fill the tank and run a brewing cycle. Observe any residual movement or noise. If vibrations persist, add more damping material or tighten connections further. Remember, small tweaks can make a big difference, and consistent testing ensures your modifications are effective. For further insights into maintaining your espresso setup, check out this comprehensive guide.
< >Many seasoned home baristas agree that there’s a lot of misinformation circulating about espresso gear, often leading newcomers astray. One prevalent myth is that expensive equipment guarantees perfect results, but in reality, even the priciest machines need proper technique and maintenance to perform optimally. For example, a study by the Specialty Coffee Association emphasizes that user skill and understanding often outweigh hardware investments in achieving great espresso. Many enthusiasts overlook the nuances of their equipment, such as grinder burr alignment or steam wand maintenance, which can drastically affect flavor and consistency.
Another common mistake is assuming all coffee grinders are created equal. The temptation to opt for cheaper, blade grinders can seem economical, but they produce uneven grounds that cause channeling and under-extraction. Investing in a quality burr grinder—understanding the differences between flat and conical burrs—and maintaining it properly is essential. Learn more about selecting the right grinder at this guide.
Many home baristas also underestimate the importance of grinder calibration and cleaning, which cause subtle yet impactful flavor shifts. Regularly checking your burrs for dullness or uneven wear and keeping them clean prevents stale or bitter shots—more details can be found in this article. Similarly, milk frothers are often misunderstood; many believe that all frothers produce creamy foam regardless of technique, but the temperature and texture settings are crucial for achieving barista-quality microfoam. For advanced tips, visit this resource.
It’s also worth noting that many espresso machines are mistreated by neglecting routine cleaning and descaling. Coffee oils and mineral deposits can clog filters and valves, reducing pressure and affecting taste. Establishing a regular maintenance schedule is vital—more on this in this guide.
The critical takeaway is that knowledge about gear nuances, routine maintenance, and technique often surpasses the importance of the equipment itself. Misunderstanding these factors can cause more frustration than investment in the latest gear. So, before upgrading or replacing your setup, dig into these details and develop a solid routine. Can you think of a time when overlooking a simple adjustment affected your brew? Share your experience in the comments!
What advanced mistakes do even experienced baristas tend to make without realizing?
One common oversight is neglecting to calibrate grinders for different beans and roast levels. Since roast profiles and bean origins influence grind size requirements, failing to adjust can lead to inconsistent extraction and flavor profiles. A study published in the Journal of Sensory Studies notes that precise grind calibration tailored to specific beans enhances aroma and taste significantly. Moreover, many users assume that once their machine is set up, it remains optimal forever, but hardware components wear over time, affecting pressure stability and temperature consistency. Regularly checking every element, from group head seals to steam boiler pressure, ensures reliability and top-quality shots. Have you ever fallen into this trap? Let me know in the comments.Maintaining your home espresso setup requires the right tools and a routine that prioritizes longevity and consistent performance. Personally, I swear by a high-quality digital timer like the Acaia Pearl for dialing in espresso shots, as it provides precise, real-time feedback on extraction time, helping me fine-tune my grind and tamping with confidence. For cleaning, I rely on Pallo’s PureMist steam cleaner, which efficiently removes residual oils from steam wands and group heads without disassembling your machine—saving both time and hassle. Looking ahead, I believe the trend will increasingly favor smart maintenance systems that monitor wear and notify you when parts need replacing, with IoT integration making home barista tech smarter than ever.
Lessons the Coffee World Didn’t Want Me to Discover
One of the most eye-opening experiences in my journey was realizing that the tiny vibration or rattle I once dismissed as negligible directly impacted my espresso quality. I learned that seemingly minor issues like loose supports or underdamped tanks could cause micro-movements that distort extraction and alter flavor. Embracing patience and meticulous inspection became my secret weapon—saving me from recurring headaches and subpar brews.
I also discovered that maintaining a skeptical eye toward common advice—like blindly replacing parts—can lead to unnecessary expense. Instead, methodically troubleshooting, testing damping materials, and adjusting support structures often yielded surprising results, sometimes better than a costly upgrade. This trial-and-error approach, paired with a willingness to learn, transformed my routine and heightened my appreciation for the craftsmanship behind each cup.
Tools, Reads, and Resources That Deepened My Craft
- Espresso Resource Hub: The comprehensive guides on Mastering the Art of Home Espresso have been invaluable. They connected me with the science and artistry that transform routine brewing into a daily craft.
- Precision Scales: I swear by the Acaia Pearl, whose accuracy and real-time feedback made dialing in shots seamless and educational.
- Cleaning Tools: Regular maintenance is crucial. Products like this deep-cleaning guide showed me that well-maintained gear performs better—and tastes better too.
- Community Insights: Engaging with passionate forums and blogs, like the contact page, opened my eyes to innovative fixes and shared experiences that I wouldn’t have discovered alone.
Your Next Best Sip Awaits
Embracing the art and science of home espresso is an ongoing adventure. Every tweak, every test, brings you closer to that perfect cup—whether it’s eliminating annoying vibrations or perfecting your tamping technique. Remember, confidence grows with experience, so don’t shy away from experimenting and learning from each shot. Your passion for great coffee can truly elevate your mornings—so get hands-on, stay curious, and savor the journey.
Have you ever noticed a small vibration or noise that changed the way your espresso turned out? Share your experience below—I’d love to hear your story!
,