The Best Way to Store Your Milk Frother to Keep It Sanitary
Ever had that moment when you finish a perfect milk froth, only to realize you left your frother sitting out on the counter overnight? The next morning, you wonder if all that creamy foam and warm milk could harbor bacteria, turning your delightful coffee experience into a health concern. I’ve been there, fumbling with makeshift storage methods that seemed convenient but left me questioning how safe—and sanitary—my equipment truly was. That lightbulb moment made me realize that storing my milk frother properly isn’t just about keeping it tidy; it’s about safeguarding my health and ensuring every cup is as pristine as the first.
The Key to Sanitary Frothing: Proper Storage Tips
When it comes to maintaining a hygienic coffee routine, most of us focus on cleaning after each use. But what about how we store our frothers in between uses? An improper storage method can lead to mold, bacteria, and unpleasant odors that compromise the quality of your milk and the safety of your brew. Thankfully, with a few simple tweaks, you can keep your frother clean, dry, and ready to produce fluffy microfoam every time.
First, always make sure your milk frother is thoroughly rinsed and dried after use. Even tiny residues of milk or moisture can become breeding grounds for germs. Then, store the frother in a well-ventilated area—preferably in a clean, dry cabinet or a dedicated container. If your frother has detachable parts, disassemble and give each part a quick clean. For added assurance, consider using a small brush to scrub hard-to-reach areas.
Additionally, some baristas swear by placing a small paper towel or a breathable cloth inside the storage area. It absorbs any residual moisture, preventing mold growth while allowing air circulation. Just be cautious—avoid sealing the frother in airtight containers without ventilation, as trapped moisture can do more harm than good.
For the most part, adhering to these practices can extend the lifespan of your equipment and keep your milk tasting fresh, not sour. If you’re interested in elevating your home espresso setup, check out our guide on choosing the best barista gear to complement your storage habits.
Finally, integrating regular cleaning routines, such as sanitizing parts weekly with a mild vinegar solution, can further ensure your frother stays in top condition. Remember, maintaining cleanliness isn’t a one-time task but a habit that guarantees safe, delicious coffee. Have you ever faced issues with mold or bad odors in your frother? Share your experiences or questions; I’d love to hear your story and help troubleshoot.
So, are you ready to discover the most effective ways to store your milk frother? Keep reading—because the next steps will transform your routine and keep your coffee both tasty and safe.
Dry and Disassemble Immediately After Use
Once you’ve finished frothing, rinse your milk frother thoroughly with warm water to remove residual milk and prevent bacterial growth. Use a small brush to clean hard-to-reach areas, especially if your frother has detachable parts. Dry each component completely with a clean towel or allow them to air dry. I remember a time I neglected this step, leaving my frother wet overnight, which resulted in sour odors the next morning. Disassembling and drying properly prevented this issue, keeping my equipment fresh and ready.
Choose an Optimal Storage Location
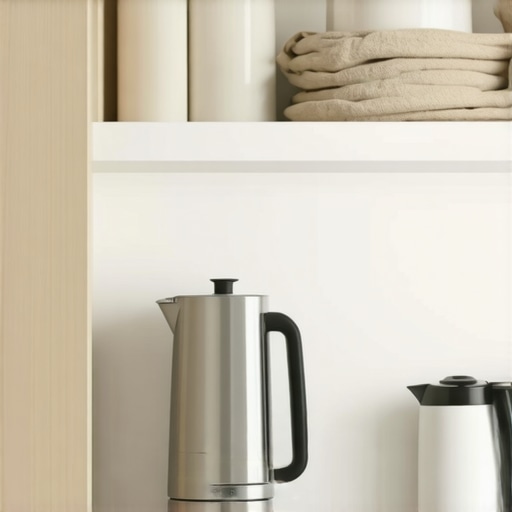
Place your dry, clean frother in a well-ventilated area—preferably in a cabinet or on a shelf with good airflow. Avoid storing it in airtight containers or sealed drawers; trapped moisture encourages mold and bacteria proliferation. Instead, consider placing a small, breathable cloth or paper towel inside the storage space to absorb any residual moisture and promote air circulation. During a recent kitchen overhaul, I stored my frother in a ventilated container with a paper towel, which kept odor at bay and ensured quick access for my morning coffee ritual.
Use Ventilated Containers for Detachable Parts
If your frother has removable parts like whisks or lids, store them separately in a clean, ventilated container. Connecting these to the main body increases the risk of moisture buildup. To streamline this, I repurposed a small mesh colander to hold my frother parts, allowing air to flow freely around them. This simple step eliminated musty smells and prolonged the lifespan of my equipment. Remember, the goal is to minimize moisture exposure to prevent bacterial growth.
Integrate Routine Cleaning and Sanitization
Schedule weekly sanitizing sessions using a mild vinegar solution—dilute white vinegar with water at a 1:3 ratio and give all parts a soak. Rinse thoroughly afterward to remove any vinegar taste. This practice prevents mold formation and ensures your foam remains fresh-tasting. I once neglected this routine, leading to a slimy buildup that took extra effort to clean; now, regular sanitization keeps my frother functioning flawlessly and smelling clean.
Keep Humidity at Bay During Storage
If your kitchen is humid, consider using silica gel packets or moisture-absorbing sachets in the storage area. These non-toxic options help maintain a low humidity environment, especially in cabinets or drawers prone to dampness. I once stored my frother in a humid basement corner, which resulted in mold; adding silica gel packets afterward made a noticeable difference. Maintaining dry conditions is crucial for long-term equipment hygiene.
Document Your Storage Routine
Create a simple checklist to remind yourself of essential steps: rinse, disassemble, dry, ventilate, sanitize, and store properly. Consistent habits prevent overlooked details that could compromise hygiene. I started using a dedicated cleaning log after a close call with sour milk odors, and this mental reminder kept my equipment always fresh. The small effort pays off with better-tasting coffee and peace of mind about your health.
Many home baristas assume that choosing the latest espresso machine or grinding the finest beans guarantees a perfect shot. However, true espresso mastery involves understanding subtle nuances that often get overlooked. Let’s unravel these deeper insights to elevate your coffee game.
First, a common myth is that higher-priced equipment automatically produces better results. In reality, the skill of calibration and maintenance plays a more critical role than sheer cost. For instance, even premium espresso machines can produce inconsistent shots if not properly descaled and calibrated regularly. Regular maintenance routines, like checking for scale buildup or replacing worn gaskets, ensure longevity and consistent performance. You can explore detailed tips on mastering home espresso to deepen your understanding.
Another overlooked aspect is grinder retention and its impact on shot consistency. Many believe that a well-adjusted grinder is enough, but residual coffee in the chute can subtly alter grind size and dose. This is especially true for grinders with complex chute designs, where clogging and retention can lead to inconsistencies. Regularly cleaning your grinder chutes is crucial, and learning how to spot retention issues can save you countless shots of bitter or sour espresso. For insights on this, check out grinder retention tips.
Advanced baristas recognize that temperature stability isn’t just about the boiler temperature but also about pre-infusion pressure variations and group head thermosiphoning effects. Even slight fluctuations can influence extraction quality, especially with delicate light roasts. Investing in a PID controller for your espresso machine can provide precise temperature control, but understanding the science behind heat stability is essential. Studies show that subtle temperature inconsistencies significantly impact flavor profiles, as detailed in research published in the Journal of Food Science.
Moreover, many enthusiasts neglect the importance of proper tamping technique variations. Applying uniform pressure is a good start, but adjusting tamp pressure based on grind size and puck density can optimize extraction. Over-tamping can cause a sluggish flow and channeling, while under-tamping might result in watery shots. Practicing pressure profiling and observing shot timing can lead to a more nuanced extraction.
Have you ever fallen into this trap? Let me know in the comments. Mastering these advanced nuances means you’ll not only brew better coffee but also develop a more intuitive understanding of your gear, leading to consistent, delicious results every time.Maintaining your home espresso setup requires more than just occasional cleaning; it involves investing in reliable tools and adopting consistent routines that keep your gear performing at its best. Personally, I swear by a digital calibrated scale to measure precisely every dose, as it helps me fine-tune my grind and tamp pressure, resulting in consistently excellent shots. Using a scale like the [ANDO Smart Scale](https://espressotechguide.com/how-to-fix-sour-espresso-shots-without-changing-your-grind-size-2), I can track subtle variations and improve my technique over time. Moreover, a high-quality burr grinder with easily replaceable burrs reduces downtime and ensures your coffee grounds stay uniform, preventing bitter or under-extracted espresso. I recommend avoiding commercial-grade grinders for home use, as their complexity and noise levels can be overwhelming; instead, consider options like the Baratza Virtuoso+ or the Eureka Mignon series, which strike the perfect balance between grind consistency and usability. To keep maintenance manageable, I use a dedicated cleaning brush for the chute and a silicone gasket lubricant to prevent seals from drying out, prolonging the lifespan of my machine’s vital components. Regular descaling is vital—every three months—using a product like Dezcal, which dissolves mineral buildup without harming delicate parts. Also, having a set of precision screwdrivers allows me to perform minor repairs or adjustments, like tightening loose group head screws or replacing worn seals, without calling in a technician. Looking ahead, the trend points towards smarter, app-connected machines that can diagnose issues proactively and suggest maintenance routines—making it easier for enthusiasts to keep their gear in top shape. How do I maintain my espresso machine and grinder over time? My key approach involves scheduled cleanings, regular calibration, and using the right tools for inspections to ensure longevity. For instance, regularly checking the grinder burrs for dullness or misalignment can be crucial; dull burrs are a common culprit for inconsistent grind size, which affects extraction. You might notice a decline in shot quality before your grinder’s motor struggles—so inspecting and replacing burrs at the right time can save you from costly repairs. Discover more about optimizing grinder performance at how to clean your burrs without full disassembly. Maintenance also includes sanitizing milk frothing gear and steam wands weekly to prevent bacteria buildup, especially if you enjoy latte art daily. To make this easier, I keep a small spray bottle of cleaning solution nearby—a habit that can be adopted easily. Remember, the longevity of your equipment depends heavily on adopting a proactive maintenance routine, rather than waiting for issues to arise. Why risk a sudden breakdown when proactive checks can prevent downtime and keep your coffee tasting perfect? Try integrating a monthly grinder calibration or descaling session into your routine—your future self will thank you.
As a passionate home barista, I learned the hard way that even the most advanced espresso machine or grinder can’t compensate for neglected equipment hygiene. One of my biggest lightbulb moments came when I discovered that proper storage of your milk frother is crucial not just for cleanliness but for ensuring every coffee experience is safe and flavorful. By adopting simple, effective storage routines—like thoroughly drying parts and choosing well-ventilated spaces—you can prevent mold, odors, and bacteria from creeping into your routine, saving you time, money, and potential health issues.
Secrets from the Baristas: How I Keep My Frother Fresh
Over time, I realized that leaving my frother sit out or in cramped containers led to sour smells and even mold growth. Now, I always disassemble, rinse, and dry my frother immediately after use. Storing it in a well-ventilated cabinet with a breathable cloth inside prevents moisture buildup. Regular sanitizing with a vinegar solution once a week keeps everything pristine. This routine has transformed my coffee mornings, giving me confidence that every cup is as clean as it is delicious. For more tips, check out mastering the art of home espresso.
Unexpected Lessons That Elevated My Routine
- Don’t Rush the Drying Process: Rinsing isn’t enough; drying parts completely prevents microbial growth. I once hastily assembled my frother, and the next morning, I faced a sour odor—lesson learned!
- Ventilate, Ventilate, Ventilate: Storing equipment in airy spaces avoids trapped moisture, a key factor in mold prevention. I now use a small, breathable cloth in my storage cabinet, which works wonders.
- Disassemble for Deep Clean: Detachable parts like the frothing wand and lid should be cleaned separately. It’s a simple step that avoids buildup and prolongs your gear’s lifespan.
- Routine Sanitizing: Weekly vinegar soaks keep bacteria at bay. Even if you’re busy, this quick step pays off in flavor and health safety.
- Prevent Humidity with Moisture Absorbers: Using silica gel packets in storage areas can prevent dampness in humid climates, safeguarding your equipment from mold and rust. Don’t forget these small tricks—they make a big difference in gear longevity.
Expand Your Knowledge Seamlessly
If you’re serious about elevating your home espresso game, exploring related gear is essential. For instance, upgrading to top-rated espresso machines or choosing the right barista gear can make a significant difference. Pairing your machine with a quality milk frother transforms your daily routine and unlocks new creative possibilities. Remember, the key is not just in the equipment but in your consistent, mindful maintenance.
Take Action Now: Your Coffee Deserves It
Proper storage isn’t glamorous, but it’s a crucial step in safeguarding your health and enhancing your coffee flavor. Every morning, when you turn on your frother, remember it’s part of your ritual—not just a tool. With just a few minutes of diligent care, you ensure each cup is as safe and delightful as the first. Your future self will thank you for building these habits today.
What’s the biggest storage challenge you’ve faced with your milk frother or other coffee gear? Share your experiences below—I’d love to hear how you keep your setup fresh and functional!
,