How to Dial In Your Grinder for a New Bag of Beans in Just Three Shots
I vividly remember the first time I cracked open a fresh bag of specialty coffee beans, eager to brew that perfect shot. Excitement quickly turned to frustration when my espresso didn’t taste quite right—bitterness, under-extraction, or sometimes just a dull, flat flavor. It was a lightbulb moment for me: even the best beans won’t shine if your grinder isn’t dialed in properly. Have you ever faced that sinking feeling when your latest bag of beans doesn’t deliver the expected flavor, despite following all the brewing rules? Well, you’re not alone. Many home baristas stumble at this stage because dialing in isn’t always straightforward, especially with a new bag. But here’s the good news: with a few practical tweaks, you can turn that frustrating experience into an enjoyable routine.
Why Dialing in Your Grinder Matters More Than You Think
Getting your grinder just right for a new bag of beans is the secret sauce behind a stellar espresso shot. Fresh beans can be unpredictable; they contain more volatile oils and are often more nuanced in flavor. If your grind is too coarse, you’ll notice a weak, sour shot that’s difficult to extract fully. Too fine, and you’ll end up with over-extraction, bitterness, or a slow-flowing shot. The balance is delicate—like tuning a musical instrument—and mastering it elevates your entire coffee experience. In fact, inconsistent grinding is a leading cause of disappointing espresso, even among seasoned enthusiasts. Early on, I made the mistake of trusting the grind setting I used last week, only to find my shot tasting off. That misstep taught me that every new bag demands fresh attention to preparation, and I want to share that insight with you.
For more tips on selecting the right grinder, check out our guide on [how to select the perfect coffee grinder for your brew](https://espressotechguide.com/how-to-select-the-perfect-coffee-grinder-for-your-brew). Recognizing the importance of grind adjustment can make a tangible difference in your daily routine.
Is Your Grinder Actually Worth the Hype? Common Concerns Debunked
Many skeptics worry that dialing in isn’t as critical as it sounds, or feel overwhelmed by the seemingly endless adjustments. I used to think that once I settled on a setting, I was set for good—that couldn’t be further from the truth. My early mistake was sticking with a setting based on a vague ‘best’ number, without paying attention to taste or flow. Once I realized that adjusting grind size by just a small fraction could transform my shot, I started experimenting more intentionally. If you’ve ever hesitated because you’re unsure where to start, know that small, incremental tweaks are your friends. Remember, your grinder and beans are unique, and there’s no one-size-fits-all setting. Persistent fine-tuning based on sensory feedback—taste, flow rate, and visual cues—will guide you to perfect your brew.
As I learned to listen to the shot’s rhythm and flavor, I discovered that patience and small adjustments yield the best results. If you want to deepen your understanding, exploring [how to master the art of home espresso](https://espressotechguide.com/mastering-the-art-of-home-espresso-tips-for-beginners) can offer valuable insights. Now, let’s dive into the practical steps that will help you dial in your grinder with confidence, even when trying a new bag of beans.
Start with Small Adjustments
My first messy attempt at dialing in involved turning the grinder knob a quarter turn, then pulling a shot. The result was a bitter, over-extracted espresso. The key is to make tiny adjustments—about the size of a grain of rice or a small click on your grinder. For example, if your shot is sour and thin, gradually grind finer in small steps, tasting after each change. This method prevents overshooting the ideal grind and helps you understand how each tweak affects flavor and flow.
Observe and Remember Key Indicators
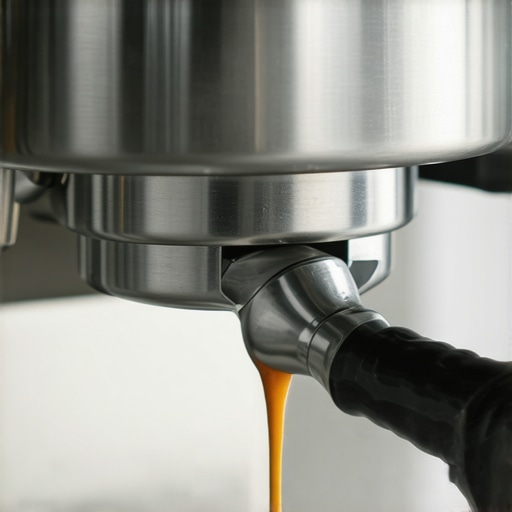
Focus on flow rate, extraction time, and shot color. Aim for a flow that takes about 25-30 seconds for a double shot—if it’s faster, the grind may be too coarse; if slower, too fine. Visual cues like a rich, caramel-colored crema indicate proper extraction. When you first start, keep notes of your settings and results or take photos. I once used a whiteboard to record grind settings and shot times, which sped up my learning curve.
Use Tasting as Your Guide
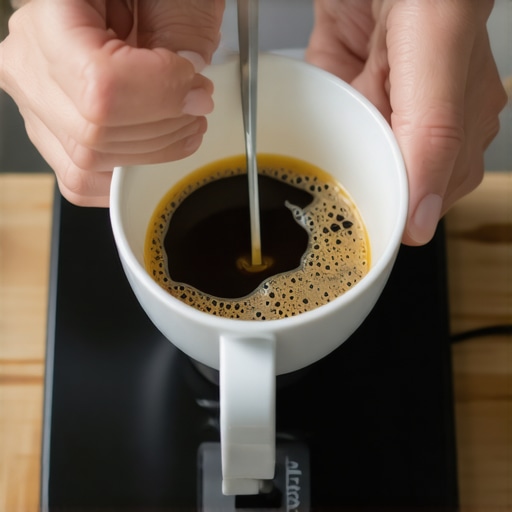
After pulling a shot, sip and assess. Bright, bright, sour notes suggest under-extraction—so consider grinding finer. Bitter, flat, or overly strong flavors point to over-extraction, requiring a coarser grind. Develop your palate by tasting regularly—this sharpens your ability to identify issues and adjust accordingly. Remember, your beans, equipment, and environment influence these outcomes, so patience and consistency are essential.
Fine-Tune Based on Consistency
Once you’ve identified a good starting point, aim for reproducibility. Consistent tamping pressure, dose, and dosing technique matter. Use a distribution tool or WDT (whirlpool tamping) to evenly distribute coffee in the basket, reducing channeling. When I switched to a more precise tamping routine, I noticed my shots became more predictable, allowing me to fine-tune the grind without chasing variables.
Adjust When Using a New Bag of Beans
Fresh beans change the game—oils and grind size fluctuate. Before starting, weigh your dose and reset your grinder to a neutral setting. Pull a test shot—if it under-extracts, coarse up slightly; if it over-extracts, go finer. During my last purchase of a new roast, I started with a slightly coarser grind, then refined it over successive shots. This approach minimized waste and side-by-side comparison clarified the perfect setting.
Patience is Your Best Tool
Remember, dialing in is an iterative process. I once spent an entire afternoon making small adjustments, tasting dozens of shots, and learning how each variable impacted flavor. Keep calm, take notes, and never rush the process. Every minor tweak brings you closer to espresso perfection, turning your kitchen into a true barista’s lab.
When it comes to home barista gear, there’s a common misconception that buying the most expensive machine or the fanciest grinder guarantees perfect espresso. But in my experience, what many overlook is the importance of understanding the true nuances behind each component. For instance, many believe that a high-end espresso machine alone will solve all brewing issues, but without proper calibration and technique, even the priciest equipment can underperform.
Why do so many gear investments fall flat despite buying top-tier products?
The answer lies in the subtle interactions between variables like temperature stability, grind size, and tamping pressure. Experts like James Hoffmann emphasize that equipment quality is essential, yet mastery of these nuances ultimately determines success. An often-missed trap is assuming that new gear will compensate for technique flaws or inconsistent routines. For example, a common myth is that a milk frother can hide poor steaming skills, but in reality, mastering both your milk and espresso extraction yields the best results.
What advanced mistake do even seasoned home baristas make that hampers the coffee experience?
Many overlook the importance of equipment maintenance—cleanliness, calibration, and component condition. A dirty portafilter gasket, misaligned burrs, or scale buildup can subtly degrade flavor and consistency without obvious signs. Regularly inspecting and maintaining your gear not only prolongs its life but also ensures optimal performance. In fact, studies show that scale buildup in espresso machines can significantly alter brewing temperature and pressure, impacting extraction and flavor. Don’t fall into the trap of neglecting maintenance; instead, embrace a routine that reinforces your mastery over your setup. Curious about fine-tuning your gear? Check out our guide on how to select the perfect coffee grinder and learn how small adjustments can make a big difference. Remember, investing in your knowledge and routine can transform your coffee from good to exceptional. Have you ever fallen into this trap? Let me know in the comments.Maintaining your barista tools is essential for consistent, high-quality espresso and saving money over time. I personally rely on a few key pieces of equipment and routines that keep my setup running smoothly. First, a dedicated cleaning schedule for the grinder and espresso machine ensures oils and residues don’t accumulate, which can negatively impact flavor. For grinders, I use a specialized brush and a cleaning pellet kit, like the brush and pellet method, to keep the chute and burrs spotless without dismantling everything each week. Regular descaling of the espresso machine with a manufacturer-approved cleaner prevents mineral buildup that can cause temperature fluctuations and pressure drops, which are subtle but crucial for perfect extraction. I also keep spare parts like group head gaskets, filters, and rubber seals on hand, so I can replace worn components immediately, minimizing downtime and maintaining optimal seals and pressure. When it comes to long-term results, investing in a high-qualityrefractometer allows me to monitor extraction levels and fine-tune my grind and dose precisely, ensuring consistency as beans age. As for scaling, automation tools like smart timers help automate routine cleaning and maintenance tasks, freeing me to focus on brewing. Looking ahead, I see integration of IoT sensors in espresso machines becoming a standard, offering real-time diagnostics and predictive maintenance alerts, similar to developments seen in commercial equipment. If you’re serious about maintaining your gear, I strongly encourage you to start a regular cleaning and calibration routine using trusted products and incorporating a refractometer into your process. Small, consistent efforts like these not only extend your equipment’s lifespan but also elevate your coffee quality—try implementing a weekly cleaning check today!
Over the years, I’ve learned that the secret to exceptional home espresso lies not just in the equipment you choose but in the meticulous process of dialing it in. One valuable lesson that transformed my approach was realizing that equipment maintenance and routine calibrations are just as critical as selecting the right grinder or machine. Regularly cleaning your grinder chute and checking that your espresso machine’s water temperature stay consistent can make a surprising difference in flavor and reliability. I discovered that investing in tools like a refractometer allows me to monitor extraction levels accurately, giving me that extra edge. Additionally, understanding that even minor adjustments in tamping pressure or dose can have a major impact shifted my mindset from guesswork to precision. Combining these insights with a dedicated routine has elevated my coffee from good to truly spectacular.