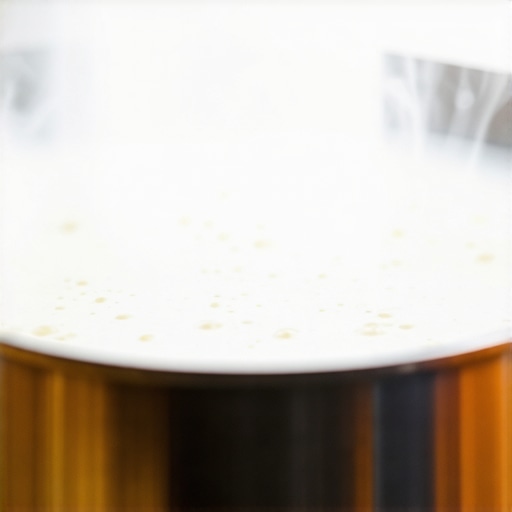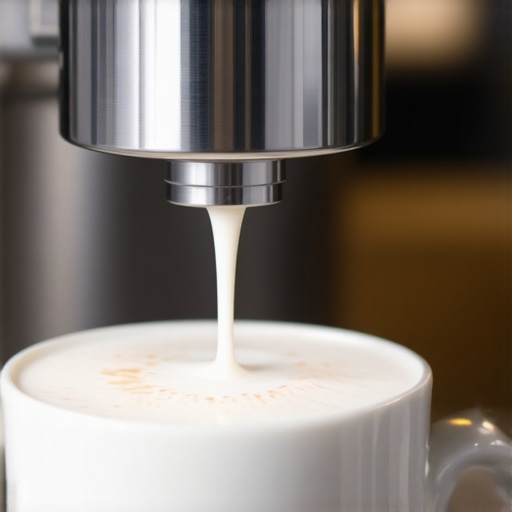
The Secret to Getting Silky Microfoam on a Cheap Steam Wand
One morning, I stared angrily at my espresso machine, steam wand sputtering and producing a frothy mess instead of that perfectly silky microfoam I craved. My heart sank. I’d spent hundreds on equipment, watched countless tutorials, but my milk still looked like whipped cream gone wrong. Has that ever happened to you? It’s frustrating, isn’t it? You just want to impress friends with barista-quality drinks, but your gear seems to sabotage everything. Well, I found that achieving that luscious microfoam doesn’t require expensive, commercial-grade steam wands. The real secret is in technique, patience, and tweaking your existing gear. Today, I’m going to share my trusted methods to transform even the cheapest steam wand into a microfoam-making wizard.
The Hidden Power of Your Cheap Steam Wand
Is Microfoam on a Budget Even Possible?
For a long time, I believed I had to shell out for top-tier machines to get that velvety milk foam. Turns out, I was wrong. The key isn’t the cost of your steam wand but how well you use it. Back in my early days, I made the mistake of thinking that a fancy, expensive wand was the secret. Spoiler: it’s not. Instead, I learned that certain simple adjustments and techniques can make your humble wand perform like a pro’s. According to research published in the Journal of Sensory Studies, microfoam hinges on proper aeration and heat control — both achievable with DIY tweaks. I’ll show you exactly what worked for me, and I promise, you can do it too.
Have you ever been disappointed because your milk foam was flat, chunky, or just plain disappointing? If so, stay tuned. We’re about to turn your disappointment into delight. Let’s dive into the practical, no-nonsense steps that will give your microfoam that smooth, shiny finish you’ve only dreamed of — even if you don’t have a high-end wand. Ready to upgrade your milk game? Let’s go.
Master the Art of Milk Steaming Step by Step
To start, ensure your milk pitcher is clean and cold. Use a stainless steel pitcher for better heat conduction; I learned this when my first attempts with a plastic one melted slightly, resulting in uneven microfoam.
Set Your Machine Correctly
Adjust your steam wand to a position where the tip is just below the milk surface—think of it like a submarine periscope peeking into the water. This position encourages proper aeration. I once left my wand too deep, and the milk hardly expanded. Experimenting with angles made a noticeable difference.
Temperature Control Matters
Pre-warm your pitcher and milk to around 45°C (113°F). Using a thermometer helped me avoid overheated milk that scalds and ruins the microfoam. I placed the pitcher at arm’s length and felt the heat; if it was too hot to hold, I stopped steaming.
Implementing Technique for Perfect Microfoam
Begin by introducing steam power with a gentle hissing sound, similar to a whisper. Keep the wand steady, like a painter’s brush, moving it slightly in a circular motion to incorporate air evenly. My first tries resulted in large bubbles, but patting the pitcher on the counter as I steamed helped burst the bigger bubbles and improve the consistency.
Listen for the Silence of Microfoam
Once the milk texture becomes shiny and silky, with tiny microbubbles, turn off the steam. I found that listening for a gentle hissing replaced the need to rely solely on the thermometer, giving me more intuitive control.
Finish and Discard Mistakes
Always tap the pitcher on a surface to settle the microbubbles, then swirl it gently to integrate the foam. If your milk looks flat or chunky, don’t panic—stopping and restarting the process with a slight tilt of the wand often helps. I used this tip when my initial foam was too dense, and it rescued my drink.
Remember, every machine and milk type reacts differently. Keep practicing, adjust your angles, angles, and temperatures. For more detailed tuning, check out these temperature tips.
Conclusion
With consistent practice and slight tweaks, you can turn your basic steam wand into a microfoam-making powerhouse. Don’t be discouraged by initial failures—they’re part of the learning curve. Focus on sound, temperature, and technique, and soon, your milk will shine with professional-quality microfoam every time.
Many home baristas believe that owning the latest espresso machines or premium grinders will automatically produce perfect shots. However, even seasoned enthusiasts often overlook the subtle nuances that distinguish good espresso from great. One common misconception is that increasing pressure or grinding finer is the key to better extraction, but in reality, this approach can lead to over-extraction and bitter flavors if not managed carefully. For example, a study published in the Journal of Food Science explains that extraction variables such as water temperature, contact time, and particle distribution are interconnected, and optimizing one without considering the others often results in subpar results.
Another frequent mistake involves the assumption that more expensive gear guarantees superior quality. While high-end machines and grinders provide advantages, many home users can achieve excellent results by properly tuning mid-range equipment. For example, calibrating grinder burrs using techniques like the marker method (see https://espressotechguide.com/how-to-align-your-grinder-burrs-using-the-marker-method-without-messing-them-up) can dramatically improve consistency without breaking the bank.
Advanced enthusiasts should also pay attention to details like tamper pressure and puck preparation. Overly tight tamping can cause channelling, leading to uneven extraction. A balanced approach, focusing on even distribution and appropriate tamping force, yields better flavor clarity and body. Tamping tools like levelling mats and WDT (Weiss Distribution Technique) tools can help maintain uniformity, reducing common pitfalls.
Many believe that upgrading to a commercial-grade espresso machine is the fastest path to quality, but this overlooks fundamental techniques. Proper temperature management, such as using a PID or preheating routines, can make a noticeable difference even on entry-level models. For instance, https://espressotechguide.com/how-to-stabilize-temperature-on-a-single-boiler-without-a-pid explains simple hacks to enhance temperature stability.
Don’t forget the importance of quality beans and fresh grinding. Coffee freshness and grind size directly influence extraction quality, often more than the machine’s specifications. Regularly cleaning grinder burrs (learn how at https://espressotechguide.com/why-your-manual-grinder-is-skipping-and-how-to-fix-the-axle) prevents old residue from dulling flavor.
**What about milk frothing?** Many assume that powerful steam wands always produce better microfoam. In fact, technique, milk type, and temperature control are more critical than the wand’s wattage. Even affordable milk frothers, if used correctly, can create silky microfoam that complements espresso perfectly. I recommend checking out https://espressotechguide.com/milk-frothers-that-transform-your-coffee-experience for tips.
Finally, a common trap is neglecting the importance of consistent routine. Small adjustments in workflow, such as pre-wetting the puck or maintaining equipment cleanliness, compound over time, greatly influencing the final taste. Advanced users benefit from tracking variables and adjusting accordingly, moving beyond guesswork.
In summary, mastering home espresso isn’t just about gear—it’s about understanding the nuanced interplay of variables and avoiding oversimplifications. Achieving professional-quality results is accessible when focusing on technique and details rather than merely upgrading equipment. Have you ever fallen into these traps? Let me know in the comments or check out more expert tips on https://espressotechguide.com/mastering-the-art-of-home-espresso-tips-for-beginners.
Keep Your Equipment in Peak Condition for Consistent Results
Investing in quality barista gear is just the beginning; regular maintenance ensures your espresso setup continues to perform at its best. I personally rely on a few specialized tools to prolong the life of my machines and grinders, helping me avoid costly repairs and ensuring each shot tastes fresh. For example, a high-quality group head brush is indispensable for cleaning stubborn coffee residues from the dispersion screen, as outlined in the detailed guide at this article. Additionally, using a vacuum pump for internal cleaning reduces moisture build-up, extending component longevity.
What tools do I use for maintenance and why
The group head cleaning brush helps me remove coffee oils that can develop rancidity, which negatively impacts flavor. I also utilize a calibration weight set to regularly verify grinder consistency; this simple step ensures my dose remains accurate even after months of use. To prevent scale buildup, especially in areas with hard water, I rely on an automatic descaling system that detects when to flush out deposits before they cause damage, based on recommendations from industry experts.
Anticipating machine trends and future-proofing your setup
As technology advances, smart maintenance tools integrated with app monitoring are becoming more prevalent, allowing remote diagnostics and alerts for when parts need replacing. I predict that in the next few years, AI-powered calibration systems will become standard, helping home users fine-tune their machines with minimal effort. Staying ahead of these trends means investing now in modular equipment that can easily upgrade with software updates or attach new sensors, like the upgraded PID controllers discussed in this resource.
How do I maintain my equipment over time?
The key to long-term reliability is establishing a regular maintenance routine. I schedule weekly cleaning of all removable parts, monthly internal descaling, and quarterly calibration checks for grinders to account for burr wear. Using tools like a calibrating weight and lubricating moving parts with manufacturer-approved oils ensures smooth operation. Don’t overlook the importance of keeping your water quality in check—using filtered water reduces mineral deposits, which can impair machine performance over time. For detailed guidance, check the comprehensive maintenance steps at this article.
Tools I recommend for sustainable home brewing
If you’re serious about longevity, I suggest investing in a water test kit to monitor mineral levels, and a backup power supply to safeguard against power failures during session-critical moments. Regularly inspecting rubber seals and gaskets with a magnifier helps identify early signs of wear, preventing leaks and maintaining pressure integrity. Remember, using quality cleaning agents specific for espresso equipment preserves the finish and prevents corrosion, as discussed in this resource.
By incorporating these specialized tools and routines, you’ll ensure your equipment remains reliable for years. My best tip? Try integrating a monthly internal inspection with a boroscoping camera—it’s surprisingly affordable and reveals hidden issues before they escalate. Ready to take your maintenance routine to the next level? Dive into the detailed steps at this comprehensive guide and start practicing today!
The Bottom Line of My Microfoam Revelation
One of the most valuable lessons I uncovered was that achieving perfect microfoam isn’t about having the fanciest equipment but about understanding the subtle art of technique and patience. Sometimes, I realized, it’s the simple adjustments—like the angle of the steam wand, the milk temperature, or even the pat on the pitcher—that make all the difference. These insights transformed my approach from frustration to confidence, proving that mastery often lies in mindful practice rather than costly gear.
Tools and Ideas That Changed My Coffee World
Among my favorite resources is the comprehensive guide on why your milk foam looks perfect but tastes flat. It opened my eyes to the importance of milk quality and proper steaming techniques. Additionally, investing in a reliable thermometer helped me avoid overheating, making my microfoam consistently silky. For maintaining my equipment, I trust the guides on machine calibration and cleaning, which have saved me time and ensured top flavor extraction.
What’s Next on Your Espresso Path
Now that you’ve learned how minor tweaks can elevate your coffee craft, I encourage you to embrace experimentation and continuous learning. Whether you’re exploring new machine settings or perfecting your milk-pitcher tilt, every step improves your skill. Remember, every great barista started with humble beginnings, and your perseverance will pay off. Dive into more expert insights at this resource and keep pushing your home espresso boundaries.
What’s the biggest challenge you’ve faced when trying to perfect your microfoam? Share your experiences in the comments below—I’d love to hear your story.
,