How to Fix an Oily Bean Jam in Your Commercial Grinder
I’ll never forget the day I pulled my first shot after a long week of experimenting with my commercial grinder. Instead of that rich, fragrant espresso I was craving, I was greeted with a stubborn, sticky residue caked everywhere—oil slicks mixed with a stubborn bean jam. It was a wake-up call. That moment made me realize how critical proper grinder maintenance isn’t just a routine but the foundation of that perfect cup.
Why Oily Bean Jam Is More Than Just a Mess in Your Grinder
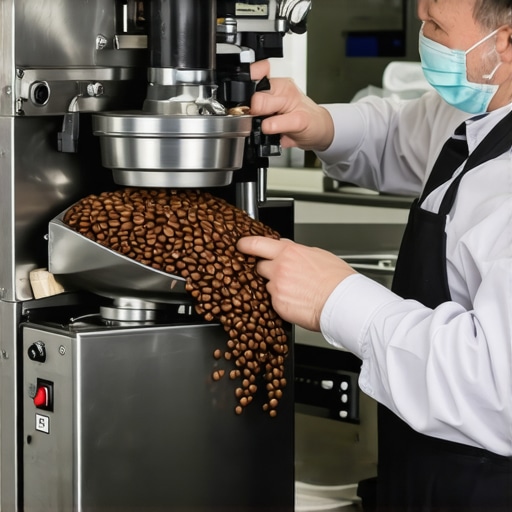
If you’ve ever faced the dreaded oily bean jam, you know how frustrating it can be. Not only does it cause inconsistent grinds, but it also hampers flavor extraction, resulting in bitter or flat brews. The culprit? Oils from coffee beans that accumulate over time, especially if you’re using darker roasts or haven’t cleaned your grinder regularly. These oils, combined with residual coffee grounds, form a sticky, greasy paste that clogs your burrs and chokes your machine’s performance. I’ve been there, and trust me, neglecting this issue can lead to costly repairs and a significant drop in coffee quality.
Addressing this problem isn’t just about aesthetics—it’s about preserving the integrity of your brewing process. When I ignored the buildup early on, I experienced inconsistent shots and a noticeable decline in flavor clarity. It wasn’t until I adopted a routine cleaning schedule, tackling that oily jam head-on, that my grinder started performing reliably again. This experience taught me that preventatively managing oil buildup is vital for any serious coffee enthusiast or professional operator.
Ready to bring your grinder back to life? Stay tuned. We’ll walk through the practical steps to eradicate that greasy bean jam and keep your espresso coming out flawless every time.
Have you ever struggled with oily buildup that seemed impossible to clean? If so, you’re not alone. But don’t worry—there are straightforward solutions that can restore your grinder’s performance and taste. Before diving into the fixes, it’s helpful to understand why this problem happens in the first place. According to coffee science, oils are a natural component of coffee beans, and during grinding, these oils can soften and stick to burr surfaces, especially if the grinder isn’t cleaned regularly (source). Recognizing this helps in designing a proper maintenance routine, saving you time and money in the long run.
Disassemble Your Grinder with Precision and Care
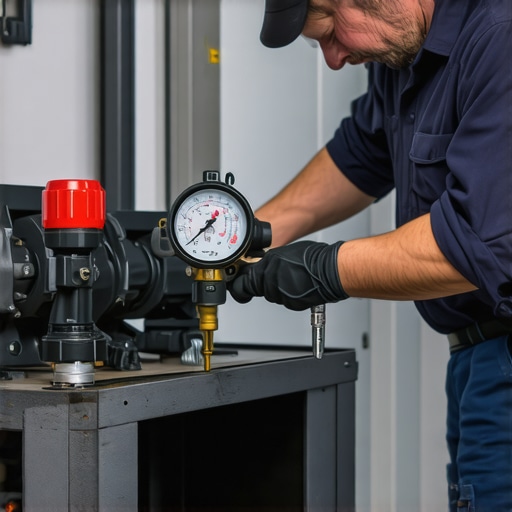
Begin by unplugging your grinder, then remove the hopper and the burrs. Think of this step as taking apart a complex watch—you need to be gentle yet thorough. Use the manufacturer’s manual for guidance or refer to detailed tutorials to avoid damaging delicate parts. During my experience, I once hurried through this step and accidentally knocked loose a small gear, which led to more work later. Always set aside screws and parts systematically, perhaps using a small container, to ensure nothing gets lost. This fundamental disassembly allows you access to the stubborn oils hiding within the burrs and chute, enabling a deep clean that a quick wipe won’t achieve.
Apply the Right Cleaning Agents for Oily Residue
This is where you target the greasy build-up effectively. Use a dedicated coffee grinder cleaner or a mixture of dry rice and a small amount of grinding to absorb oils—think of it as a natural solvent that absorbs grease. Avoid harsh chemicals, which can leave residues affecting your future grinds. When I cleaned my grinder, I used rice to scour the burrs; it dislodged built-up oils and grounds efficiently without risking corrosion. For persistent oily spots, dampen a lint-free cloth with a little isopropyl alcohol and carefully wipe the surfaces, taking care not to saturate any components. Regularly cleaning with these agents prevents oil accumulation from becoming unmanageable.
Deep Clean Burrs and Internal Components
Use a cleaning brush with firm but gentle bristles to scrub the burrs, chute, and surrounding areas—think of it as scrubbing a cast-iron skillet after cooking. Focus on the edges and crevices where oils tend to settle. For stubborn residues, a cotton swab dipped lightly in alcohol can reach tight spaces. I once spent extra time brushing my burrs this way, which dramatically reduced grind inconsistencies. After cleaning, reassemble the burrs carefully as per the manual instructions, ensuring all parts align perfectly to maintain your grinder’s performance. This meticulous step is crucial to removing unseen oil films that cause clogging and flavor contamination.
Reassemble and Calibrate Your Grinder for Peak Performance
Once reassembled, run a few test grinds to flush out residual cleaning agents and oils, similar to flushing a new oil filter in a car. Adjust your burrs to your preferred grind setting, referencing your previous calibration. This process ensures consistent particle size distribution, directly affecting flavor extraction. During my last clean-up, a proper reassembly and calibration improved my shot clarity and reduced static—an added bonus. Always return your grinder to the factory or custom settings, depending on your brewing method, and test with a small amount of coffee to confirm the elimination of oily build-up. Regular maintenance like this prolongs your equipment’s lifespan and keeps flavor profiles pristine.
Thinking All Espresso Machines Are Equal? Think Again
Many home baristas believe that any espresso machine will deliver stellar shots, but the truth is, not all machines are created alike. While entry-level models might seem appealing for their price, they often lack essential features like precise temperature control and stable pressure systems, which are crucial for high-quality extraction. Skimping on these nuances can lead to bitter, under-extracted coffee despite your best efforts. For passionate enthusiasts, investing in gear that offers advanced control—such as dual boilers or PID temperature regulation—can dramatically improve consistency and flavor. Curious about the best machines for serious home brewing? Check out our guide on top-rated espresso machines for 2025 to make an informed choice.
What Advanced Techniques Are Often Overlooked in Home Espresso?
Many seasoned baristas emphasize grind size and tamp pressure, but overlook the importance of pre-infusion. Pre-infusion gradually increases water pressure before full extraction, promoting even saturation of the coffee grounds and enhancing extraction. Neglecting this step can cause uneven shots and stale flavors. Experts like Scott Rao highlight that mastering pre-infusion can turn good espresso into exceptional espresso. Understanding such nuances elevates your brewing from amateur to pro—so don’t underestimate the power of subtle techniques. Want to refine your skills further? Visit mastering the art of home espresso.
Milk Frothers Are Not Just About Frothing
It’s common to see people equate milk frothers solely with creating foam, but advanced frothing techniques involve controlling temperature, texturing milk to suit specific drinks, and even achieving microfoam for latte art. A frequent mistake is rushing the process or using a cheap frother that produces inconsistent results. For instance, the best milk frothers can help you develop a skill set that rivals your favorite café’s. Properly textured milk not only improves mouthfeel but also enhances the visual appeal of your latte art—transforming ordinary coffee into an aesthetic experience.
Are Your Milk Frothing Habits Holding You Back?
One trap many home baristas fall into is over-heating the milk, which kills the proteins needed for smooth microfoam. Using a thermometer and practicing patience can make a significant difference. Cheaper frothers might struggle with consistency—attention to detail here helps craft that velvety milk that elevates your drink. If you’re serious about perfecting your milk technique, consider exploring advanced methods like steaming with a thermometer probe, which is detailed in our guide to polished steam wands.
Common Mistakes with Coffee Grinders That Sabotage Flavor
Many focus solely on choosing a burr size or grind setting, but overlooking maintenance and calibration can sabotage even the best grinder. For example, a grinder that’s not regularly cleaned or calibrated can lead to uneven particles, resulting in uneven extraction and off-flavors. Furthermore, many believe that a higher wattage grinder automatically means better results, but torque stability and burr design are more important factors. For expert advice, visit our comprehensive resource on selecting the perfect coffee grinder.
How Much Does Grinder Maintenance Impact Your Tasting Experience?
Neglecting routine maintenance like cleaning burrs, lubing moving parts, and calibrating grind settings can cause flavor degradation over time. A dirty or misaligned grinder can produce inconsistent grounds, leading to over- or under-extraction. Regular upkeep ensures your grinder’s performance matches your brewing goals. Advanced users even bench-test grinders for burr alignment and consistency—small details that can make a big difference in taste. Spurred to optimize your setup? Reach out via our contact page.
In the end, understanding the finer points of gear and technique is what separates an average brewer from a master. Don’t fall into the trap of believing that equipment alone guarantees quality—it’s about mastering these subtle, often overlooked nuances. Have you ever fallen into this trap? Let me know in the comments!
Keep Your Gear in Top Shape for Consistent Results
Maintaining your espresso setup isn’t just about cleaning; it’s about creating a routine that ensures longevity and optimum performance. I personally swear by a dedicated precision coffee scale for dialling in my grind adjustments when I switch beans. This tiny investment pays off by helping me achieve consistent extraction times, a key to unlocking the full flavor potential of my beans. Another essential is a high-quality espresso machine maintenance kit that includes group head brushes, scrub pads, and descaling solutions. Proper upkeep prevents common issues like pressure inconsistencies or water leaks, saving you costly repairs down the line.
How do I maintain my espresso machine and grinder over time?
Implementing a regular cleaning schedule is your best bet. For grinders, clean the burrs at least once a week with a dedicated grinder cleaner or carefully disassemble for a thorough deep clean—this prevents oil and coffee residue buildup that can clog your machine (source). When it comes to your espresso machine, running a backflush with a cleaning disc followed by descaling every one to two months maintains internal water pathways and prevents mineral deposits. Don’t forget to replace worn gaskets and seals periodically; a failing gasket can be an unsung villain for pressure stability. Setting reminders for these tasks ensures your system performs at its best consistently.
Tools I Recommend for Home Espresso Enthusiasts
For me, a bottomless portafilter transformed my troubleshooting process. The real-time shot visibility helps identify channeling or uneven tamping without guesswork. Pair this with a digital thermometer during milk steaming; this simple addition guarantees perfect milk textures and prevents overheating that affects microfoam quality. Additionally, I rely on a UV sterilizer for my steaming accessories—keeping everything hygienic and odor-free without harsh chemicals.
What advanced maintenance tools are worth the investment?
Silent burr grinders equipped with anti-static features like the specialized anti-static bellows can significantly reduce static mess and improve grind consistency. For calibration, a calibration weight allows precise adjustments, ensuring your scale remains accurate over time. Software-controlled grinders with digital dosing not only streamline workflow but also enhance repeatability. As the trend shifts toward automation, investing in these tools enables you to replicate professional results effortlessly.
Viewing Trends in Equipment Longevity and Performance
In the future, I predict that modular and smart-coffee gear will dominate. Imagine a grinder that self-diagnoses burr wear and alerts you or automatically recalibrates to maintain grind consistency. Similarly, espresso machines with integrated cleaning cycles, guided via smartphone apps, will make maintenance foolproof—no more guesswork or missed preventative care. Embracing these innovations can save time, money, and elevate your home brewing experience to professional standards.
Which maintenance routine will you adopt today?
Start with a simple step: incorporate weekly burr cleaning or check your machine’s internal pressure. After all, even the best gear performs poorly without proper care. If you’re ready to elevate your maintenance game, try investing in a dedicated grinder cleaner or setting quarterly service appointments—these small actions have a big impact. Need customized advice tailored to your setup? Reach out to us through our contact page.
Lessons Hidden in Every Grind: Surprising Truths I Discovered
One of the most eye-opening lessons I learned was that maintenance isn’t just about cleaning; it’s about understanding your grinder’s unique needs. For instance, I once assumed that a quick brush was enough, but real longevity came from deep cleaning and calibrating burrs regularly. Additionally, I realized that many issues stem from neglecting minor adjustments—like fine-tuning grind size after humidity shifts—saving me from bigger headaches down the line. Lastly, involving myself in every cleaning step, instead of rushing through it, turned routine chores into opportunities to discover hidden buildup that could impair my espresso quality.
My Go-To Resources for Coffee Gear Wisdom
Over the years, I’ve leaned on a few trusted tools that consistently elevate my brewing game. The first is a comprehensive guide on choosing the right grinder; it helped me understand the crucial specs and how they impact flavor extraction. I also trust expert articles about espresso techniques that reveal subtle adjustments, pushing my craft further. Lastly, I keep an eye on latest gear reviews to stay updated with innovations that can make maintenance and brewing more efficient and consistent.
Embrace the Challenge and Elevate Your Coffee Rituals
Remember, every step you take to better understand and care for your gear isn’t just maintenance—it’s a pathway to more satisfying, flavorful espresso. Whether it’s deep cleaning your grinder or calibrating your machine, these actions empower you to craft barista-quality coffee at home. So, I encourage you to try one new maintenance habit today—your taste buds and your machine will thank you. What small change are you ready to implement that could transform your coffee experience? Share your thoughts below, and let’s grow together in this brewing journey.