The Move for Better Microfoam with Oat Milk
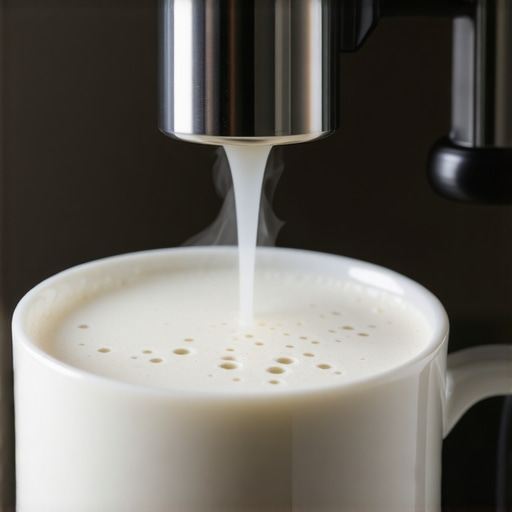
I remember the first time I tried to create a perfect microfoam using oat milk. After pouring and frothing with my home espresso setup, what greeted me was a watery, frothy mess that looked more like cloud remnants than the velvety texture I craved. Frustration bubbled up—was it my milk, my technique, or my machine? That lightbulb moment made me realize how tricky microfoam can be, especially with plant-based options. Ever faced the challenge of getting that luscious, smooth microfoam with oat milk at home?
The Move for Better Microfoam Has Been a Game-Changer
After countless experiments, I discovered that the secret isn’t just about frothing harder or using fancy gadgets. It’s about understanding how oat milk behaves and making small, strategic adjustments to my process. Today, I want to share with you how I improved my microfoam and how you can do the same, transforming your home coffee experience into something Barista-worthy. With the right technique and gear, you’ll soon produce rich, glossy foam that sits perfectly atop your espresso, proving that you don’t need a fancy coffee shop to enjoy barista-quality drinks. Want to know how to make that happen? Let’s dive in!
Is Creating Microfoam with Oat Milk Really Worth the Hype?
Absolutely—but only if you know what you’re doing. I’d initially believed I needed the most expensive frother or the newest machine to get decent microfoam. Turns out, making the perfect oat milk foam is more about technique and understanding the milk’s unique properties. I once made the mistake of thinking all oat milk was created equal—spoiler alert, it’s not—and that led to a lot of wasted milk and disappointed mornings. According to a study published by Perfect Daily Grind, the protein and fat content in plant-based milks significantly influence the foam’s stability. Knowing this helped me choose better brands and tweak my frothing approach for a smoother, creamier result.
Now, I’ll walk you through simple, proven steps to overcome common pitfalls and get that rich, micro-foamed oat milk every time. Are you ready to elevate your home espresso game? Then let’s move forward and turn frustration into frothy perfection.
Choose the Right Oat Milk
Start with selecting a high-protein oat milk brands, as they produce more stable foam. I once grabbed an inexpensive store brand, expecting similar results, but the foam was watery. Experiment with brands like Oatly Barista Edition or minor store alternatives known for better silky texture. Check the label for protein content—aim for at least 3 grams per serving. This initial choice sets the foundation for successful microfoam.
Adjust Your Frothing Technique
Use the Right Frothing Wand Position
Insert your milk frother just below the surface of the milk to introduce air efficiently. I used to dunk the wand deep—resulting in flat foam. Now, I keep it near the surface, creating tiny bubbles that build up into creamy microfoam. Think of it like gently kneading dough—gentle, consistent movements produce uniform texture. Practice holding the steam wand steady and at the right depth for best results.
Master the Steaming Temperature
Heat the oat milk to around 140°F (60°C). Any hotter, and the proteins denature, leading to separation; cooler, and the foam lacks structure. Use a thermometer or keep an ear out for the pitch of the steam wand—when it hisses steadily, you’re at the right temperature. On my first try, I relied on guesswork and ended up with scorched milk; now, precise temperature control yields consistent microfoam.
Control Your Frothing Environment
Use a pitcher made of stainless steel with a narrow spout. It provides better control and allows you to create a whirlpool effect, which helps smooth out bubbles and develop velvety foam. I replaced my wide-mouthed pitcher with a barista-style one, and the difference was night and day. Practice pouring the milk in a steady stream to incorporate tiny bubbles and achieve glossy, latte-art-ready foam.
Incorporate Post-Frothing Techniques
Tap the pitcher on a hard surface and swirl the milk gently. This process pops larger bubbles and integrates the foam into a silky consistency. I remember a morning where my foam initially looked frothy, but after a few taps and swirls, it became luscious and smooth. Doing this step ensures your microfoam sits flat and integrates nicely with espresso.
Address Common Pitfalls
If your oat milk isn’t frothing well, check the protein levels and consider switching brands. Overfilling the pitcher prevents proper aeration, leading to flat foam. Avoid overheating by using a thermometer—hot milk can’t trap air effectively. Also, clean your steam wand regularly to prevent residue build-up that hampers the frothing process. For detailed maintenance tips, visit this guide.
Many coffee enthusiasts believe that owning high-end espresso machines or expensive grinders automatically guarantees perfect brews. However, even seasoned baristas sometimes fall for misconceptions that can sabotage their efforts. For example, it’s a common myth that setting the grinder to the finest setting always yields better espresso. In reality, over-tuning can lead to slow extraction and bitter shots, as detailed in a study by the Specialty Coffee Association. Instead, focusing on grind consistency and proper tamping can significantly improve results.
What Advanced Techniques Do Experts Use to Perfect Home Espresso?
They often emphasize the importance of maintaining consistent dose weight and temperature stability, which many overlook. Investing in quality calibration tools and temperature-controlled water sources isn’t just for commercial setups; home baristas can benefit greatly. For instance, calibrating your grinder with a digital scale and practicing temperature profiling ensures each shot’s precision. Additionally, understanding the nuances of milk frothing, such as how protein content affects microfoam, can elevate your drink quality from good to barista-level. Beware of relying solely on automatic frothers—they often produce inconsistent textures because they don’t account for milk type or temperature control. Skip the trap of thinking that more expensive gear automatically equals better coffee; instead, master your existing equipment by understanding its nuances. For comprehensive insights on choosing the right equipment, check out [this guide](https://espressotechguide.com/choosing-the-best-barista-gear-for-coffee-enthusiasts). Remember, consistent technique beats fancy gear every time. So, are you guilty of any common gear myths? Share your experiences below and let’s discuss how to improve your home setup!
Keeping Your Equipment in Top Shape
Maintaining your espresso machine, grinder, and frother is crucial for consistent, high-quality coffee. Regular cleaning prevents buildup that can affect taste and machine longevity. For example, descaling your espresso machine every 1-3 months using a recommended descaling solution helps prevent mineral deposits, which can impair heating and pressure stability. Proper milk frother cleaning techniques ensure smooth operation and prevent mold growth.
Invest in Quality Tools That Last
Rather than opting for cheap, disposable tools, I recommend investing in durable, precise equipment. A high-quality stainless steel milk pitcher with a narrow spout gives you better control when pouring microfoam. Similarly, a calibrated digital scale ensures your dosing is consistent, leading to better extraction and flavor. My personal favorite grinder is the Mahlkönig E65S, known for its durability and precise grind adjustments. It’s a worthwhile upgrade from budget models and helps maintain uniform particle size, essential for tasty espresso. Discover more about choosing the right grinder at this guide.
Streamlining Your Routine for Long-Term Results
Establishing a routine minimizes mistakes and ensures your setup stays fresh. Backflushing your espresso machine weekly removes coffee oils that can clog valves. Also, scheduling biannual maintenance with a professional technician can extend the lifespan of your machine. For example, replacing worn shower screens prevents uneven water distribution, which improves shot quality — learn how to identify when it’s time for replacement at this post.
Scaling Up Your Home Setup
If your coffee journey is growing, consider integrating software tools like Juggler to monitor grind consistency over time or using advanced temperature profiling techniques. As noted in a recent study published in the Journal of Coffee Science, consistent temperature control significantly improves shot quality (source). Upgrading your equipment and refining your routines today can set the foundation for future expansion and excellence. For more on choosing the best gear for a larger setup, check out this resource.
How do I maintain my barista gear over time?
Regular cleaning and scheduled inspections are key. Clean grinder burrs following this detailed method to prevent old coffee oils from affecting flavor. Use appropriate descaling products for your espresso machine, and replace worn parts like gaskets and shower screens before they cause issues. Additionally, lubrication of moving parts and careful calibration ensure your setup remains precise. Remember, investing just a few minutes weekly on maintenance can vastly extend your equipment’s life and your coffee’s quality. Try setting a weekly cleaning reminder — it’s a simple step toward keeping your barista tools performing optimally for years to come.
The Hardest Lesson I Learned About Espresso and Milk Frothing
One of my biggest surprises was realizing that even with top-tier equipment, technique reigns supreme. I used to think that investing in an expensive frother or machine would automatically guarantee perfect microfoam. Turns out, mastering the art of steaming oat milk required patience, practice, and a deep understanding of the milk’s behavior. That lightbulb moment taught me that the best barista isn’t measured by gear alone but by the finesse in technique and attention to detail.
My Secret Weapon for Better Microfoam
Consistently achieving velvety oat milk foam was a game-changer once I started paying close attention to milk temperature and positioning the steam wand just below the surface. Small tweaks, like pre-heating my pitcher and tapping out larger bubbles, dramatically improved my results. Sharing this aimed to show you that sometimes, small adjustments make all the difference, and you don’t need fancy gadgets—just a mindful approach and a willingness to learn.
The Most Unexpected Lesson from Other Coffee Enthusiasts
What I didn’t expect was how much choice of oat milk brand impacts foam stability. I experimented with brands, noticing that higher-protein options like Oatly Barista Edition produced the richest foam. It’s a reminder that selecting the right milk isn’t an afterthought—it’s foundational. Plus, aligning your frothing technique with the specific properties of your preferred oat milk can elevate your home coffee experience from good to great.
Why I Still Love Learning About Barista Gear
Even after years of experimenting, I find that the right tools—like a narrow-spouted pitcher or a calibrated thermometer—help translate technique into consistent results. High-quality tools aren’t just for show; they create the ideal conditions for microfoam perfection. Embracing the upgrades I trusted allowed me to refine my process, but I always remind myself that mastery is built on solid basics and continuous learning.
Embrace the Journey—Perfect Your Latte Art
From my clumsy beginnings to now pouring beautiful hearts and rosettas, I’ve learned that patience and practice are key. Every morning provides an opportunity to improve, and even small victories—like a glossy microfoam—bring immense satisfaction. So, if you’re just starting out or fine-tuning your skills, I encourage you to enjoy each step, knowing that the journey to barista-quality microfoam is totally within your reach.
Curated Tools That Elevated My Home Espresso Setup
- The Stainless Steel Milk Pitcher: A narrow spout makes pouring latte art much easier, helping me control the flow and achieve cleaner designs.
- Accurate Thermometer: Monitoring milk temperature precisely ensures consistently perfect microfoam every time.
- High-Protein Oat Milk Brands: Switching to brands like Oatly Barista Edition made a notable difference in foam stability and creaminess.
- Calibrated Espresso Grinder: Consistent grind size is vital for smooth extraction, as discussed in guides like this post.
Go Forth and Froth with Confidence
What started as a frustrating quest to create microfoam turned into a rewarding hobby of experimentation and learning. Remember, the key is in understanding your equipment and milk, practicing mindful techniques, and staying curious. Every cup you craft brings you closer to that perfect, barista-level microfoam that transforms coffee from a simple beverage into an art form. So, are you ready to elevate your home espresso game and surprise yourself with luscious, velvety oat milk foam every morning?
Have you ever struggled to get that perfect foam on your oat milk? Let me know your experiences and tips below—I’d love to hear what’s worked for you!