Why Your Commercial Pump is Cavitating Before the Morning Rush
It was a chilly morning, and I was all set for my usual espresso routine. I pressed the button, eagerly waiting for that initial burst of rich aroma, only to hear a strange, sputtering sound from my machine that sounded more like a jet engine struggling than a coffee maker. Frustrated, I realized my commercial pump was cavitating—yes, cavitating—before I even had my first sip. That lightbulb moment made me wonder: why was this happening right before the busiest part of my day, and what could I do to fix it?
Don’t Let Cavitation Ruin Your Coffee Day
In this post, I’ll share my own experiences and the step-by-step methods I discovered to troubleshoot and resolve cavitation issues. Trust me, this isn’t just about machinery; it’s about preserving your mornings and the quality of every single shot you pull. Cavitation can lead to inconsistent pressure, poor shot quality, and even damage your pump if ignored. So, understanding this sneaky problem is crucial—especially when every coffee counts during peak hours.
Is Pump Cavitation Overblown? Does It Really Matter?
Early in my journey, I made the mistake of dismissing the sounds and symptoms as normal machine quirks—big mistake. I learned that cavitation isn’t just a minor annoyance; it’s a sign that something’s off with your pump or water supply. Some folks dismiss it as a myth, but studies show that cavitation can erode pump components and lead to costly repairs if left unaddressed (source: Espresso Tech Guide).
If you’ve noticed a humming or sputtering noise just before your rush, or if your shot pulls are inconsistent, you might be facing cavitation. The good news is, with a little troubleshooting, you can often fix this problem yourself or at least identify the root cause—and I promise, it’s not as complicated as it sounds. Ready to dive into the practical steps? Let’s ensure your mornings are smooth sailing from here on out.
Check Water Supply and Filter Integrity
Start by inspecting your water source. Low water levels or mineral buildup can cause cavitation. Remove the water reservoir, clean it thoroughly, and ensure the water meets your machine’s specifications. Also, verify that the water filter isn’t clogged; a clogged filter reduces flow and increases pump strain, leading to cavitation.
Examine and Prime Your Pump Correctly
If your machine has a manual priming function, use it before brewing. Place a cup under the group head, turn on the machine, and activate the pump to check water flow. In my experience, I once forgot to prime my machine after descale, which caused sputtering. Priming clears air pockets and restores proper pressure, preventing cavitation.
Inspect for Air Leaks and Hose Blockages
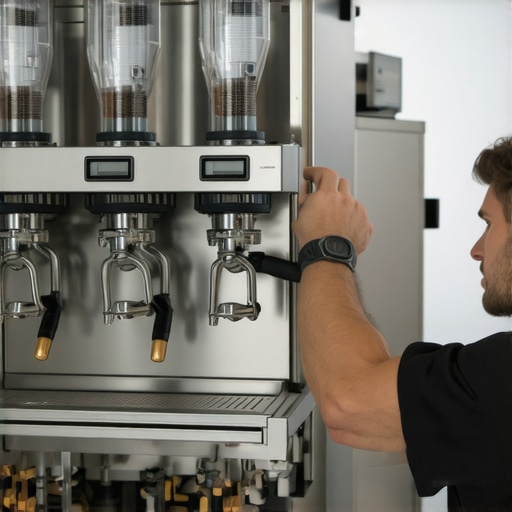
Unplug the machine and open the casing to examine hoses connected to the pump. Look for loose fittings, cracks, or pinched hoses that might introduce air. If you find any, tighten fittings or replace damaged hoses. I once fixed a subtle leak in the water inlet hose that had been causing air bubbles, which dramatically improved pump performance.
Adjust Pump Pressure Settings
If your machine allows, calibrate the pump pressure. Too high a pressure can cause cavitation; too low can result in poor extraction. Consult your machine’s manual or manufacturer guidelines. When I upgraded my old machine to a model with adjustable pressure, I fine-tuned it to optimal levels, eliminating sputtering issues during busy mornings.
Implement Descaling and Regular Maintenance
Mineral deposits can restrict water flow, increasing pump load. Descale your machine regularly following the manufacturer’s instructions or using a descaling solution. I found that descaling every three months kept my pump running smoothly and prevented cavitation. Additionally, clean the shower screen and group head to ensure unobstructed flow.
Upgrade or Service Your Pump Components
If all else fails, consider replacing worn pump parts. Pumps degrade over time, especially if maintenance is neglected. For high-mileage machines, I recommend consulting a professional for assessment. Sometimes, a simple rebuild or replacement of the pump’s impeller can restore optimal pressure and eliminate cavitation sounds.
Addressing cavitation proactively keeps your espresso extraction consistent and prolongs machine lifespan. Regular checks and timely adjustments are key—think of it like tuning your grinder for the perfect macro and micro adjustments. For more detailed insights on optimizing your equipment, check out this comprehensive guide.
While most home baristas focus on choosing a shiny espresso machine or the latest milk frother, there’s a nuanced world of common misconceptions that can trip up even seasoned enthusiasts. One myth I often encounter is the idea that expensive gear automatically guarantees perfect shots. In my experience, many believe that upgrading to top-tier machines, like those listed on top-rated espresso machines for 2025, will solve all brewing issues. But the truth is, mastery lies in understanding the intricacies of each component, not just the price tag.
A widespread mistake is assuming that more powerful grinders always produce better coffee. Actually, static buildup and inconsistent grind distribution are common pitfalls, especially with high-end beans. Proper calibration and maintenance are often overlooked, leading to uneven particle sizes that cause channeling and under-extraction. For detailed insights, check out how to select the perfect coffee grinder, which debunks some myths about grinding technology.
Are All Milk Frothers Created Equal? No, and Here’s Why
Many enthusiasts think that any milk frother can produce microfoam, but in reality, the design and steaming power are critical. For example, specialized frothers with variable steam controls and appropriately sized wands give Baristas more control over the foam texture. Skipping this understanding can lead to disappointing results, especially when aiming for latte art. Remember, even a perfect espresso needs the right milk — and that starts with proper frothing techniques, not just equipment.
” alt=”Barista frothing milk with a professional steam wand” title=”Barista using steam wand to froth milk”/>
What about barista gear? A common misconception is that tools like tampers or shot glasses are just accessories. However, precision tools like a high-quality tamper or a scale designed for espresso dramatically impact consistency. In my experience, investing in equipment guided by expert advice can elevate your brewing game.
Lastly, switching to correct portafilter baskets or maintaining your grinder’s burrs prevents common pitfalls like uneven extraction, which many overlook. The secret is in the details: calibration, routine maintenance, and understanding the science behind each component.
Have you ever fallen into this trap? Let me know in the comments. The more we share these insights, the better our espresso experiences will become.
Keeping your home espresso machine in top shape requires more than just mornings of perfect pulls. It involves a combination of reliable tools, regular maintenance routines, and an understanding of how each component works over time. Investing in the right equipment not only prevents breakdowns but also ensures consistent flavor extraction and longevity of your gear.
Invest in a Precision Calibration Scale
One of my current go-to tools is a high-accuracy scale, such as the professional-grade digital scale. I use it daily to measure dose weight and shot yield, which are critical for dialing in your espresso. Unlike generic kitchen scales, these calibrated tools provide precision within a tenth of a gram, making micro-adjustments to grind dose or tamp pressure straightforward and repeatable. Regular use of such scales prevents under- or over-extraction, maintaining that perfect balance of flavor.
Maintain Your Grinder with Magnetic Chute Fixes
Been battling static buildup or inconsistent dosing? The solution might be simpler than you think. The magnetic chute modification I adapted has dramatically improved my workflow. By attaching small, magnets to the chute, I prevent coffee grounds from sticking or spilling. This small tweak saves cleanup time and guarantees accurate dosing, especially with finesse grinds. Over time, regular cleaning of burrs and chasing accumulated fines ensures uniform grind size, critical for stable extraction and flavor clarity.
Upgrade Your Milk Frothing Experience with Variable Power Steam Wands
When it comes to frothing milk, equipment quality is everything. I recently opted for a frother with a variable steam power feature, which allows me to precisely control steam pressure. This upgrade has transformed my microfoam quality — smoother, creamier, and more consistent. For the serious home barista, investing in a specialized milk frother with diagnostic controls enables better temperature management and less waste.Making regular use of these advanced tools helps prevent common issues like channeling, uneven extraction, or burnt milk. Think of these as the cornerstones for a long-term, high-quality home espresso setup.
How do I keep my equipment working smoothly over time?
Routine maintenance is your best defense against costly repairs and flavor degradation. Descale your machine every three to four months, especially if you use hard water, and clean filters and shower screens weekly. Also, inspect seals or gasket wear—replacing them promptly prevents leaks or pressure drops. Trust me, staying proactive with mini-maintenance tasks saves big money and ensures peak performance. For a comprehensive routine, review these beginner tips for maintaining your espresso gear and adapt them as your setup evolves.
The future of home espresso tools points toward smarter, sensor-driven devices that monitor pressure and temperature in real time. Already, some machines integrate apps that alert you when maintenance is due, or even automatically perform descaling cycles. It’s an exciting time, but until then, trusting established routines and investing in precision tools remain your best bet for consistent excellence. I highly recommend trying the tip of adding a digital scale to your workflow—small change, huge impact on your coffee quality!
What I Wish I Knew About Tuning My Espresso Setup Early On
One of the most valuable lessons I learned was that even the most expensive machine can’t compensate for a poorly calibrated grind or tamp. Consistency starts with understanding your equipment’s nuances—especially when it comes to adjusting pressure and grind size. A small tweak can dramatically improve shot quality, saving you time and frustration in the long run. Trust me, obsessing over these details pays off in richer flavors and a more enjoyable brewing experience.
Curated Tools That Changed My Home Coffee Routine
Investing in a high-precision digital scale was a game-changer—accurate dosing and shot measurement made my espresso consistently better. Furthermore, a quality tamping station helped me achieve uniform pressure, which is crucial for balanced extraction. For maintaining my grinder, I rely on specially formulated cleaning brushes and occasional burr replacements, ensuring my grind remains consistent. Lastly, I swear by adjustable steam wands with variable power—they give me control over microfoam that rivals professional baristas, elevating my milk-texturing game. These tools, backed by trusted sources like expert recommendations, are worth every penny.
Push Your Coffee Skills Forward Today
Embracing the journey of mastering home espresso is both rewarding and empowering. The key is to stay curious, keep experimenting, and celebrate small victories. Remember, every great barista started with a simple push of a button and a willingness to learn. Now, with your improved understanding and the right gear, you’re well on your way to brewing that perfect cup every time. Don’t let cavitation or miscalibrations hold you back—every shot refines your craft. So, what’s the next step you’re excited to try in your espresso routine? Share your thoughts below and let’s grow together.