How to Inspect Your Group Gasket for Cracks and Hardening
I still remember the Tuesday morning my kitchen counter turned into a swamp. I had just ground a perfect dose of fresh beans, locked in the portafilter, and flipped the brew lever. Instead of a beautiful, syrupy stream of rich espresso, a scalding black torrent began spraying out of the side of the group head. It was a complete mess. My sleepy, un-caffeinated brain panicked, and I made the classic rookie mistake of wrenching the portafilter handle as hard as I could to stop the spray. It did not help at all. In fact, learning why your portafilter handle should never be tightened too far was my first real lesson in machine maintenance.
The Silent Coffee Killer Hidden in Your Group Head
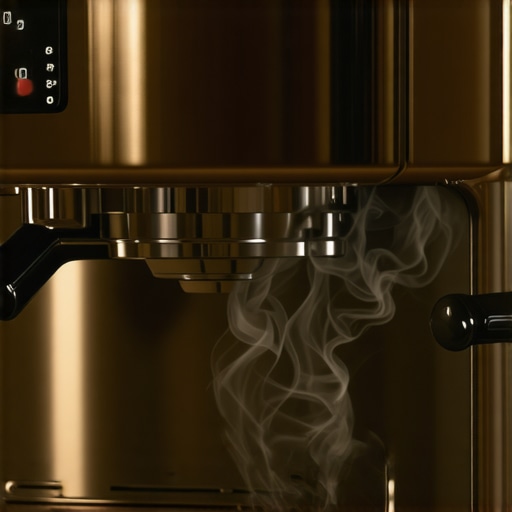
We obsess over water temperature, pressure profiling, and choosing the absolute best barista gear for coffee enthusiasts. Yet, we completely ignore the tiny rubber ring that makes the whole process possible. The group gasket lives in a brutal environment. It constantly endures scorching temperatures near 200 degrees Fahrenheit, high pressure, and acidic coffee oils. Over time, that soft, bouncy rubber slowly bakes into something resembling hard, brittle plastic. When this happens, it can no longer form a tight seal against your portafilter basket. Before you know it, you are dealing with a frustrating mess and wondering why your group head is leaking coffee over the rim during your morning pull.
Is checking my gasket really worth the hassle?
You might think your machine is completely fine because you do not see active puddles yet. However, a degrading gasket slowly ruins your shots long before it starts spraying water everywhere. When a gasket hardens and develops micro-cracks, it allows subtle pressure leaks. This loss of pressure leads to uneven extraction and channeling. According to professional espresso technicians, heat-induced rubber degradation is the number-one cause of home espresso machine leaks and pressure loss. If you do not inspect it regularly, you risk damaging your portafilter ears or even the metal group head itself by over-tightening the handle to compensate for a failing seal.
What We Are Solving Today
Today, we are going to stop those messy counter floods before they start. I am going to show you exactly how to inspect your group gasket for micro-cracks and hardening without having to take your entire machine apart. This simple, five-minute diagnostic routine will save your morning routine and prolong the life of your machine. Have you ever noticed water slowly dripping over the rim of your portafilter, or have you had to pull your handle past the 6 o’clock position just to get a decent seal? Drop a comment below and let me know. If your machine is already exhibiting these symptoms, you will want to understand the reason your portafilter gasket is getting brittle so you can catch it next time before it turns into cement.
Step-by-Step Group Head Gasket Diagnostics
To pinpoint whether your gasket is failing without dismantling your machine, you need to systematically test its physical integrity under pressure. I recall a frantic morning last autumn when I ignored a slightly loose fit on my E61 group head. I tried to force a double shot, and the gasket literally split in two, shooting hot water and fine grounds all over my clean white shirts hanging nearby. Since then, I have relied on this non-invasive diagnostic routine to check the seal’s flexibility and thickness before the morning rush.
The Paper Strip Compression Test
Start with a cool machine to avoid burning your fingers. Take a clean, dry business card or a small strip of thick paper. Lock your empty portafilter into the group head as you normally would. Before you reach your standard locking angle, slide the paper strip between the top rim of the basket and the rubber gasket. Gently tighten the handle. If you can easily pull the paper strip out with zero resistance when the handle is fully locked, your gasket has flattened or shrunk. This lack of compression is a prime reason why your coffee might suffer from pressure drops. To get a feel for how a proper seal affects extraction, mastering the basics of home espresso can give you a solid baseline of what to look for by reading mastering the art of home espresso tips for beginners.
The Flashlight Mirror Inspection
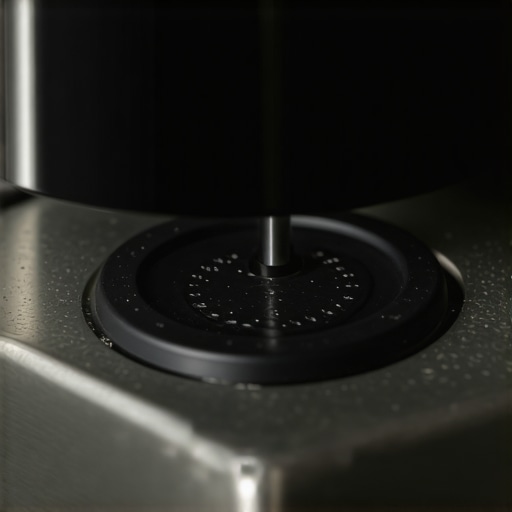
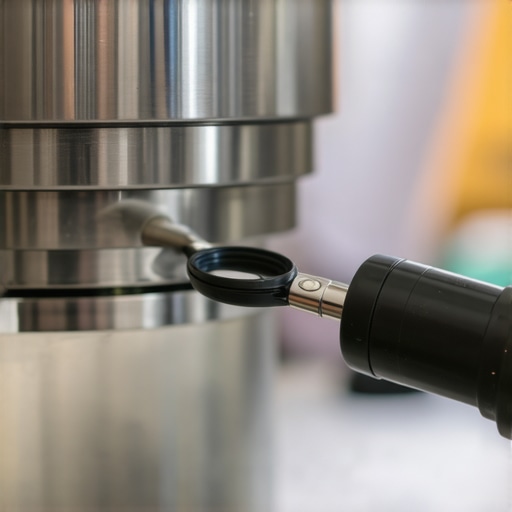
Take a small pocket mirror or use your smartphone’s front-facing camera, slide it underneath the group head, and shine a bright light directly up into the assembly. Inspect the circular channel where the rubber ring sits. Look closely for deep, dark cracks, a shiny glazed surface, or tiny black rubber crumbs sticking to the shower screen. A healthy gasket should look matte and smooth, like a new car tire. If you notice a glossy, hard surface, the rubber has baked solid. This hardening is a common culprit for leaks, similar to how neglecting your other equipment leads to issues like learning how to fix a squeaky grinder adjustment lever before the mechanism locks up entirely.
The Blind Basket Pressure Test
Insert a blind cleaning basket or a rubber backflush disc into your portafilter. Lock the portafilter into the group head and turn on the brew pump. Watch the edges of the group head closely as pressure builds up to its maximum, usually around 9 to 10 bars. If you see water weeping, bubbling, or spraying from the sides of the portafilter ear channels, the gasket is compromised. This test isolates the seal under maximum load without any coffee absorbing the water. If you notice leaks here, it explains why your group head is leaking coffee over the rim during actual brewing. Catching this early prevents you from having to over-torque your portafilter handle, which can warp the metal ears over time.
When we talk about maintaining extraction pressure, most home baristas immediately blame their pump or reach for a screwdriver to fiddle with the overpressure valve. But in my years of diagnosing temperamental setups, I have realized that the community often obsesses over the wrong variables. We buy expensive accessories while ignoring how simple mechanical tolerances actually interact under heat and load. If your extraction pressure is dropping mid-shot, the culprit is rarely a catastrophic mechanical failure. Instead, it is almost always a combination of a hardened group gasket and subtle puck prep mistakes that let pressurized water find the path of least resistance.
Why Your Tamper Size Might Be Sabotaging Your Seal
Everyone in the home espresso community tells you to focus on your tamping pressure. They claim that if you do not press down with exactly thirty pounds of force, your shot will channel. In my experience, this is a total myth. Your tamping pressure matters very little because the force of nine bars of water pressure—translating to hundreds of pounds of force—will easily compress any loose coffee bed. What actually matters is the physical coverage of your tamper. If you are using a standard 58mm tamper in a high-precision basket, you are leaving a tiny ring of uncompressed coffee around the perimeter. Water bypasses the center and climbs up the dry, loose edges of the basket, directly eroding your group gasket with abrasive micro-grounds and causing premature wear. This is why paying attention to why your tamper size actually matters for perimeter extractions is so critical for keeping your group head clean and sealed.
The Wet Tamper Trap
Another common mistake that ruins both your extraction pressure and your gasket’s lifespan is the simple act of wiping. Many home enthusiasts rinse their portafilter and tamper between shots but fail to dry them completely. When you press a damp tamper face onto dry coffee grounds, it creates a sticky crust of coffee on the metal tool. This crust pulls up the edges of your coffee puck when you lift the tamper, leaving invisible micro-fissures along the basket wall. When you lock the portafilter in, the high-pressure water channels through these fissures, spraying water and abrasive oils upward into the gasket channel. To avoid this, you must understand the problem with using a wet tamper on dry grounds before your next brew session.
Are silicone group gaskets really superior to traditional rubber?
For decades, commercial and home espresso machines have shipped with standard black nitrile rubber gaskets. While rubber is cheap and seals effectively when new, espresso technicians at major service centers have published reports showing that silicone gaskets last up to ten times longer without baking into hard plastic. Silicone is chemically inert and withstands temperatures up to 500 degrees Fahrenheit without losing its elasticity. By upgrading to a food-grade silicone gasket, you completely eliminate the chemical hardening cycle that causes leaks. Have you ever fallen into this trap of constantly replacing cheap rubber gaskets only to have them bake solid again? Let me know in the comments below. If you are ready to make the switch yourself, you should learn how to replace a group gasket without scratching the chrome to keep your machine looking and performing like new.
When we look at the big picture of home espresso maintenance, keeping your workflow consistent goes far beyond just swapping a rubber ring every few years. It requires a dedicated, proactive routine that addresses the silent wear and tear on your internal components. Over the years, my counter has hosted countless experiments, and I have found that neglecting the small details eventually leads to catastrophic failures. For instance, many home baristas overlook the internal scaling of their heating elements, which forces the thermostat to work twice as hard and eventually burn out.
The Tools That Kept My Setup Running for a Decade
You do not need a toolbox the size of a professional technician’s, but investing in a few specialized instruments will save you hours of frustration. I personally keep a short brass cleaning brush, a high-quality stubby flathead screwdriver, and food-grade silicone grease (like Haynes Lubri-Film) on my espresso bar at all times. The grease is crucial for lubricating the gaskets and the cam assembly of manual groups, preventing metal-on-metal grinding. If you are operating a classic heat-exchanger setup, you should also establish a regular flushing cadence by studying how to flush your heat exchanger for the ideal brew temp to avoid scaly buildup inside the thin copper tubes.
How do I maintain my espresso gear over time?
To truly guarantee the longevity of your setup, you must implement a strict weekly and monthly maintenance routine. Every week, backflush your machine with a dedicated espresso machine detergent to strip away stale, rancid coffee oils that accumulate in the three-way solenoid valve. Every month, inspect your grinder’s grinding chamber. If you notice your grinder’s performance degrading, you might need to clean or replace the burrs. Knowing how to swap your grinder burrs without losing your settings is an invaluable skill that prevents you from wasting half a bag of expensive beans during re-calibration. Additionally, always keep an eye on your water quality. Hard water is the absolute number-one killer of home espresso machines, causing limescale that clogs tiny orifices and ruins heating elements.
Where the Future of Home Espresso Tech is Heading
Looking ahead, the espresso gear industry is moving rapidly toward smart diagnostics and materials science. I predict we will soon see consumer-level espresso machines with built-in sensors that monitor gasket pressure, water hardness in real-time, and heating element efficiency, sending alerts directly to your smartphone before a leak even occurs. Manufacturers are also experimenting with self-lubricating polymers to replace traditional rubber and silicone altogether. Until those futuristic machines arrive on our counters, we must rely on manual, hands-on diagnostics and premium barista gear to keep our extractions perfect.
According to the technical service manuals from La Marzocco Home, maintaining stable pressure and temperature profiles is directly tied to the cleanliness of the diffusion screen and flow restrictor. When these micro-channels get clogged with fine coffee dust, your pump is subjected to backpressure that can degrade the internal bypass valves. To prevent this, make it a habit to drop your shower screen once a month. My personal challenge to you today is to perform the Paper Strip Compression Test right now. Do not wait for a catastrophic kitchen flood to tell you your seal is shot. Take five minutes, test the elasticity of your gasket, and ensure your morning espresso remains the highlight of your day.
When you start paying attention to these physical indicators, you realize how much control you truly have over your daily brew quality. It is incredibly satisfying when you finally match your routine to the physical demands of your machine, turning a messy chore into a seamless ritual.
The Hardest Lessons I Learned Managing My Own Espresso Setup
Over a decade of pulling shots, I have made every mistake in the book. Here are the core insights that completely shifted my perspective on keeping a home setup in top condition:
- Preventive swaps beat emergency fixes: Waiting for water to stream down your portafilter before replacing a gasket is a recipe for frustration. Changing these components on a schedule keeps your pressure profiles perfectly consistent.
- Water quality is not negotiable: You can buy the most expensive tools on the market, but if you feed your boiler hard, mineral-rich tap water, your internal parts will degrade from the inside out. Always use scaled or properly filtered water.
- The little details dictate extraction quality: The difference between a channeled, sour mess and a rich, sweet shot of espresso often comes down to tiny habits—like ensuring your basket is totally dry before dosing.
My Essential Toolkit for Perfect Machine Maintenance
You do not need a massive garage full of tools to keep your setup running beautifully. These are the specific, high-value items I keep on my coffee bar to manage wear and tear:
- Food-Grade Silicone Grease: A thin application of Haynes Lubri-Film on your portafilter ears and new gaskets keeps everything sliding smoothly and prevents premature tearing.
- A High-Quality Stubby Screwdriver: Ideal for dropping the shower screen monthly without having to awkwardly tilt your entire machine.
- Premium Silicone Gaskets: Upgrading to a silicone seal instead of standard rubber stops the baking and cracking cycle altogether, providing a reliable seal for years. When it is time to upgrade, make sure you know how to replace a group gasket without scratching the chrome to protect your machine’s finish.
- A Dedicated Portafilter Brush: Essential for sweeping away stray grinds from the group head channels before locking in your next shot.
Take Control of Your Morning Brew Today
Maintaining high-performance barista gear for coffee enthusiasts does not have to feel like a daunting task. By taking just five minutes today to run the paper compression test or inspect your seal with a flashlight, you are actively preventing tomorrow’s kitchen flood. Taking care of your equipment ensures that every single shot you pull is smooth, balanced, and delicious. Have you ever struggled with a stubborn, hardened gasket that refused to budge during a replacement? Let me know your experiences in the comments below!