The Problem with Cheap Plastic Distribution Tools
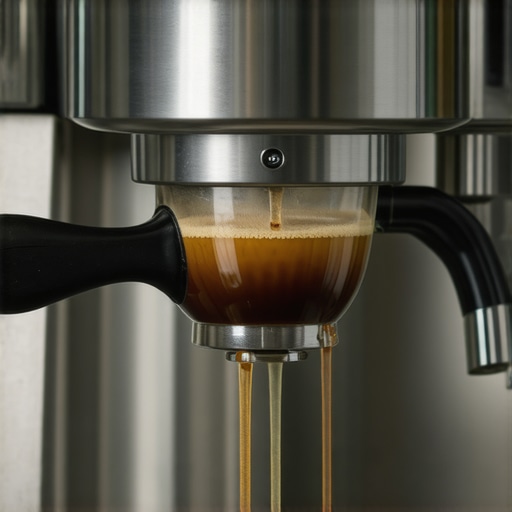
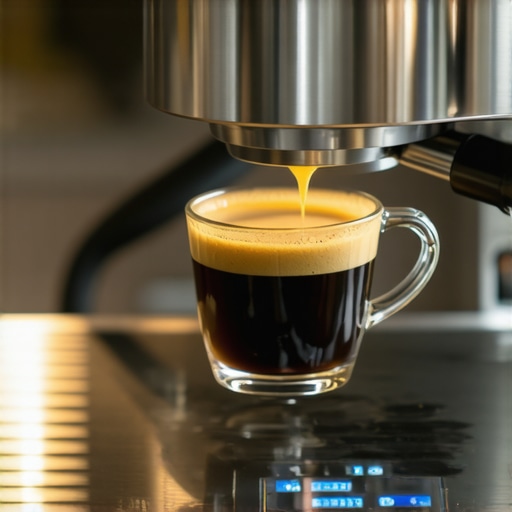
I still remember the morning I nearly threw my portafilter through the kitchen window. I had just bought some beautiful, freshly roasted single-origin beans, dialed in my grinder, and gone through my usual morning ritual. Yet, when I pulled the shot, espresso sprayed wildly out of the bottomless portafilter, painting my counter in sticky, hot brown stripes. It made absolutely no sense. I was using a tiny distribution tool I bought online for five bucks, convinced it was doing its job. That was the exact moment I realized my budget gear was actively sabotaging my mornings. Why your WDT tool is actually causing more channeling often comes down to the quality of the tool itself, and those cheap plastic distributors are the primary culprits behind micro-channeling. Today, we are going to unpack exactly why these inexpensive plastic accessories fail and how upgrading this one tiny step in your workflow will finally give you the sweet, syrupy extractions you deserve.
The Hidden Cost of Saving a Few Bucks on Barista Gear
When you are first setting up your home coffee station, it is incredibly tempting to cut corners. You spend the bulk of your budget on top-rated espresso machines, and then grab the cheapest plastic distribution tools and tampers available to fill the gaps. I made this exact mistake early on, thinking a piece of molded plastic could distribute coffee grounds just as well as a machined stainless steel tool. It cannot. Cheap plastic tools suffer from massive static buildup, especially in dry environments, causing fine coffee particles to cling to the tool rather than settling evenly in your basket. According to coffee extraction physics research published by the Association for Coffee Science and Information, static electricity in ground coffee can cause microscopic clumping that defies even vigorous manual distribution. When you use cheap plastic, you are actually creating density imbalances inside your puck before you even think about tamping.
Do Premium Metal Distribution Tools Actually Make a Difference?
I used to be incredibly skeptical about high-end tools. I wondered if the coffee community was just trying to get me to spend more money on shiny metal objects. But once I switched from my flimsy plastic distributor to a solid, weighted metal tool, the difference was night and day. Premium tools glide through the grounds smoothly without dragging chunks of coffee with them, and they do not hold a static charge that ruins your puck density. If you are struggling with uneven extractions, looking closely at your accessories is just as important as choosing the best barista gear overall. Have you ever noticed your espresso channeling wildly despite your best efforts to distribute the grounds? Drop a comment below and let me know what tools you are currently using in your routine.
Think of your dry coffee bed as a dense pile of sand. If you pour a bucket of water onto it, the water won’t sink in uniformly; it will find the softest, thinnest path of least resistance and tear a canyon right through it. This is exactly what happens inside your portafilter when your distribution is off. High-pressure water from your machine is incredibly lazy. It actively hunts for microscopic air pockets, cracks, or loose spots in the grinds to rush through, leaving the rest of your coffee under-extracted and sour while over-extracting the channel itself.
How to Perfectly Distribute Your Coffee Grounds Every Single Morning
Getting a flat, even density in your basket isn’t about luck; it is a systematic process of breaking up clumps, leveling the bed, and compressing the puck with perfect horizontal alignment. The secret is removing variables. If your coffee is clumpy or unevenly spread before you apply vertical pressure, your shot is doomed before the pump even engages.
Step 1: Break Up the Clumps Before They Ruin Your Shot
The moment coffee leaves your grinder, static electricity and moisture cause the fine particles to stick together. If you tamp these clumps, you create dense little nuggets surrounded by loose, airy channels. I remember a chaotic Tuesday morning last winter when my kitchen was freezing. My grinder was spitting out dense, static-heavy boulders. Instead of using a proper metal tool, I tried to shake the portafilter side-to-side to level it, then shoved it under the group head. The shot literally sprayed sideways, missing the cup entirely and soaking my scale. That mess taught me that you must physically break those bonds. A solid metal distribution tool or a fine-needled tool needs to be stirred through the bed in circular motions from the bottom of the basket up to the top to homogenize the density.
Step 2: Level the Bed Without Dragging the Coffee
Once the clumps are gone, you need a perfectly flat surface. Many beginners make the mistake of using their finger to swipe the excess coffee off, which actually packs down the center while leaving the edges empty. Instead, place your weighted metal leveling tool flat on top of the basket. Let the weight of the tool do the work as you spin it clockwise. This gently coaxes the loose grounds into a flat plain without pre-compressing the coffee unevenly. If your grounds are uneven at this stage, you will notice why your espresso shot is extracting faster on the left side during your extraction, a clear indicator of a tilted bed.
Step 3: Commit to a Straight, Level Tamp
Now that the bed is level, you must compress it. The key here is keeping the tamper perfectly perpendicular to the basket. If you tamp at even a slight angle, you create a slope where the thin side of the puck will channel instantly. When you press down, you don’t need to strain your wrist; press until you feel the coffee resist back. For beginners, the move for more consistent puck compression is to rest your thumb and index finger on the rim of the basket while holding the tamper to physically feel if the tool is level as you apply pressure. Avoid the problem with using a wet tamper on dry grounds, as any moisture on your tool will pull coffee away from the edges, creating instant pathways for channeling.
Step 4: Keep Your Basket and Seals Pristine
The final step in this workflow is ensuring your gear doesn’t interfere with your freshly prepped puck. Before locking your portafilter into the machine, wipe the ears and the rim of the basket completely clean. Stray coffee grounds left on the rim will prevent a tight seal against the group head, causing leaks. Regularly how to inspect your group gasket for cracks and hardening is crucial, because a failing gasket will let water bypass the puck entirely, ruining your extraction pressure and filling your drip tray with wasted water.
The Great Distribution Illusion and the Hopper Myth
When we discuss the nuances of dialing in, everyone tells you to focus on grind size and yield. But in my experience, focusing solely on those variables is a trap. I spent years obsessing over micro-adjustments on my collar, only to realize my espresso tasted entirely different from one morning to the next. The culprit wasn’t my grind setting; it was the weight of the beans in my grinder. Many home baristas believe that keeping a hopper packed to the brim is the best way to maintain consistency. However, a study on grind particle distribution conducted by the Specialty Coffee Association (SCA) confirms that the changing physical pressure of the bean column alters how beans feed into the burrs. This is why your shots taste different on a full hopper compared to when it is almost empty. If you want true consistency, you need to weigh every single dose beforehand instead of relying on a timed grind from a packed hopper.
Why Does Your Premium Tamper Still Leave Wet Rings?
You bought the best metal accessories, but you are still noticing uneven extractions or a strange ring of uncompressed coffee around the outer rim of your filter basket. This is the classic trap of mismatched diameters. Most stock portafilters are listed as 58mm, but they actually measure closer to 58.5mm. Using a standard 58mm tamper leaves a tiny, half-millimeter gap of uncompressed coffee around the edge. High-pressure water will always exploit this weak point, leading to severe edge channeling. This is exactly why your tamper size actually matters for perimeter extractions. Upgrading to a precision 58.5mm tamper will instantly eliminate that ring of bypass water and yield a sweeter, more balanced cup. Have you ever fallen into this trap of assuming your standard gear was a perfect fit? Let me know in the comments below.
The Steam Wand Purge Trap That Destroys Your Boilers
If you love milk-based drinks, you likely spent time finding the right machine and hunting for milk frothers that transform your coffee experience. But advanced maintenance is where most home baristas fail, specifically when it comes to thermal management. When you finish steaming your milk, you probably do a quick purge of your steam wand to clear out any residue. The trap here is purging too late or failing to purge completely, which allows milk to get sucked backward into the steam wand as the metal cools and creates a vacuum. Over time, this milk cooks inside the wand, leading to blockages and bacterial growth. If you notice your steaming power suddenly dropping, you might need to troubleshoot the easy fix for a wand that only blows air. Always purge immediately after removing your pitcher, and wipe the wand down with a damp, clean microfiber cloth to prevent structural build-up.
Preventative Maintenance Keeps Your Espresso Equipment Alive
Buying the best tools is only half the battle. If you do not maintain your setup, even the most expensive kit will degrade rapidly. Over the last three years of brewing daily shots, I have learned that the secret to maintaining that rich, sweet flavor profile lies in your cleaning regimen. Scale buildup is the silent killer of heating elements. To prevent catastrophic failure, understanding how to tell if your water hardness is damaging your boiler is an essential first step. I recommend using a simple calcium hardness test kit once a month to monitor your tap water. According to the technical service manuals from La Marzocco Home, mineral scaling accounts for over seventy percent of all warranty repair issues, proving that proactive water management is non-negotiable for serious home baristas.
How Do I Maintain My Espresso Workflow Over Time?
Consistency is built on small, repetitive habits. My weekly routine always includes a deep backflush with a dedicated espresso machine detergent to strip away stale coffee oils that build up behind the shower screen. I also take a brass brush to the group head threads to remove any stray grinds that could compromise the portafilter seal. If you neglect these small tasks, those rancid oils will leach into your fresh extractions, making even the most expensive single-origin beans taste bitter and flat. For those utilizing specialized setups, sticking to the e61 maintenance schedule you are probably ignoring will ensure your manual lever or rotary pump delivers stable pressure for years to come.
As home espresso technology evolves, we are starting to see a massive shift toward smart sensors and real-time flow profiling. In the next few years, I predict that even entry-level machines will feature integrated scale sensors and automated puck-resistance feedback, reducing the learning curve for beginners. Until then, we must rely on our hands, our senses, and our maintenance routines to keep things running smoothly. I highly encourage you to try one specific advanced tip tomorrow morning: perform a thorough steam wand purge immediately after texturing your milk, and check your group gasket for flexibility. Taking care of your gear ensures that your gear takes care of you, one perfect extraction at a time.
What Experts Won’t Tell You About Your Daily Espresso Routine
After years of pulling shots and chatting with professional baristas, I have realized that the industry often focuses on the wrong things. Here are a few counter-intuitive truths that completely transformed my daily extraction quality:
- The machine is only 20% of the equation: Everyone obsesses over top-rated espresso machines, but your grinder, water chemistry, and distribution routine have a far greater impact on the actual flavor in your cup.
- Visual symmetry is a lie: A puck that looks perfectly flat to the naked eye can still have massive density imbalances. Never assume a level bed means a channeled-free extraction; you must feel the resistance of the coffee when you tamp.
- Freshness has a sweet spot: Using beans roasted yesterday is actually a recipe for gassy, unpredictable extractions. Beans usually need five to ten days to degas before they behave predictably in your basket.
My Essential Toolkit for Better Brews
If you want to stop guessing and start pulling consistent shots, you do not need to spend thousands of dollars. These are the specific, high-value resources and tools I personally rely on every single morning:
- A Precision 58.5mm Tamper: Replacing my stock tamper with a wider, self-leveling tool instantly eliminated channel-prone weak spots along the perimeter of my basket.
- The Barista Hustle Water Recipe: Instead of using standard tap water, mixing mineral concentrates with distilled water protects my heating elements and highlights delicate acidity. This is the single best way to prevent hard water damage.
- A High-Quality Needle Tool (WDT): Rather than using plastic distributors, a simple tool with 0.35mm stainless steel needles has been the absolute key to breaking up micro-clumps before tamping.
Your Turn to Elevate Your Morning Brew
Upgrading your routine does not have to happen all at once. Tomorrow morning, focus on just one small adjustment: slow down your puck preparation, focus on your alignment, and ensure you are choosing the best barista gear that suits your specific workflow. Over time, these small habits will compound into effortless, cafe-quality extractions right in your own kitchen. Consistency is a journey, and every shot you pull brings you one step closer to mastering the art of home espresso.
Have you ever struggled with channeling that you just couldn’t seem to fix with grind adjustments? Let me know your experiences in the comments below!