How to Clean the Hidden Gunk Inside Your Milk Frother
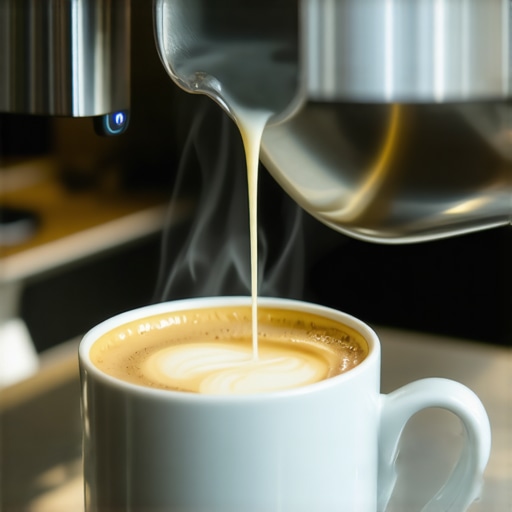
Have you ever taken a sip of your perfectly frothed milk, only to notice a strange, slightly sour taste or a lingering film on the surface? That awkward moment when you realize your trusty milk frother has been secretly harboring gunk, hiding behind its sleek exterior. I vividly remember the first time I experienced this — I was delighted with the silky microfoam, until I brushed against its side and noticed a mysterious film. It was a lightbulb moment that made me question: how clean is my milk frother really?
Why Overlooking the Gunk Could Be Spoiling Your Coffee Experience
Many of us love a good espresso or cappuccino, and milk frothers are essential in creating those cloud-like textures that make coffee special. But here’s the catch: even with regular rinsing, tiny milk residues, oils, and mineral deposits can build up inside the device. Over time, this lurks in unseen corners, turning your frother into a breeding ground for bacteria and stale flavors. And don’t be fooled—what looks clean on the outside isn’t necessarily spotless inside. According to a recent food safety study, bacteria can flourish in damp, neglected appliances like milk frothers, especially if they aren’t cleaned thoroughly and regularly.
What I learned early on was that my quick rinse after each use wasn’t enough. I used to dismiss the need for a deep clean, thinking it was too complicated or time-consuming. I was dead wrong. Neglecting internal gunk not only affects taste but can also impact the longevity of your equipment. Plus, it’s not as intimidating as it sounds once you know the right method. Imagine consistently enjoying frothy milk without that strange aftertaste or unappetizing film. That’s exactly what I aim to share with you today — a simple, effective routine that will transform your milk frother into a clean, happy machine.
Ever Felt Skeptical About Deep Cleaning Your Frother? You’re Not Alone
I remember making the mistake of myself early on—thinking that a quick rinse was all I needed. I didn’t realize that milk residues cling stubbornly inside, especially in those tiny, hard-to-reach crevices. It wasn’t until I noticed a difference in the aroma and texture that I understood the importance. Skipping proper cleaning was costing me in flavor and potentially in microbial health. If you’re thinking, “Is all this fuss really necessary?”—trust me, it is. Proper cleaning isn’t just about aesthetics; it’s about ensuring every sip is pure, fresh, and safe.
Now, after some trial, error, and research, I’ve perfected a routine that makes maintenance simple and effective. Want to keep your frother pristine, avoid unwanted flavors, and prolong its lifespan? Stick around. Next, I’ll walk you through the exact steps that turned my neglected device into a sparkling example of cleanliness. And hey, if you’ve faced this problem already—don’t worry—you’re not alone. Many home baristas have been there, and I’ll show you how I conquered it. Want a quick peek? Check out this guide on milk frothers that elevate your coffee game for more tips.
Disassemble for a Thorough Clean
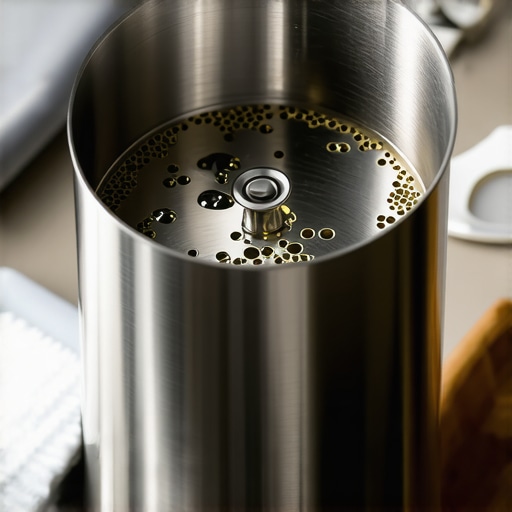
First, unplug your milk frother and carefully remove all detachable parts like the whisk, lid, and any filter or steaming attachment. Think of it like taking apart a small, intricate gadget—this ensures you access all hidden spots where gunk hides. For example, I once neglected to remove the foam disk, which was covered in a thick layer of dried milk that I couldn’t reach otherwise. After disassembly, rinse each part under warm water to loosen milk residues.
Use a Baking Soda and Vinegar Solution
Create a cleaning mixture by combining equal parts of white vinegar and warm water, then add a tablespoon of baking soda. This combo effectively dissolves mineral deposits and milk fats without harsh chemicals. Submerge metal parts in the solution for 10-15 minutes, much like soaking a stubborn pan. During my first try, soaking the frother’s whisk overnight broke down the residues, making cleaning much easier. After soaking, use a soft brush or sponge to scrub away any remaining deposits, focusing on crevices and edges.
Manual Cleaning for Hard-to-Reach Areas
For tiny nooks, use a soft-bristled toothbrush or a dedicated cleaning brush. I remember using an old toothbrush to clean inside the small holes of my frother’s nozzle—this targeted approach prevented buildup that could clog or impair performance. Avoid abrasive pads that could scratch the surface. For particularly stubborn spots, dip the brush in the vinegar solution and give a gentle scrub. Rinse all parts thoroughly under warm water afterward.
Clean the Main Body with a Damp Cloth
Wipe down the exterior and internal surfaces of the frother’s main unit with a microfiber cloth dampened with a mixture of water and a mild dish soap. This eliminates any splashes or dried milk around the base. Be cautious around electronic components; avoid excess water and never submerge the main body. During my clean-up, I used a soft cloth to reach inside the crevices where dust and residual milk often settle, reviving the device’s appearance and hygiene.
Reassemble and Perform a Hot Water Flush
Once all parts are dry, reassemble your frother in reverse order. To ensure no soap or vinegar smell remains, run the device with just clean water—some models allow you to do a quick steaming cycle or hot water rinse. This flush clears any remaining residues, leaving your frother fresh and ready. I find this step crucial for preventing any lingering flavors in your next froth.
Maintain Regular Deep Cleaning Schedule
Make cleaning your frother part of your routine—ideally once a week if you use it daily. Consistency prevents buildup, keeps flavors clean, and prolongs the lifespan of your appliance. Remember, neglecting this step, especially in devices prone to milk residue accumulation, can lead to bacterial growth and flavor spoilage. For a more comprehensive guide on maintaining your coffee equipment, review our tips on mastering home espresso. Proper upkeep not only ensures the best taste but also keeps your equipment functioning smoothly for years to come.
Many home baristas believe that mastering espresso & related gear is simply about choosing the right machine or grinder. However, a less obvious but crucial aspect is understanding the interplay of equipment nuances that dramatically influence shot quality and ease of use. For example, while most focus on grinder burrs or machine pressure, few realize that the tiniest adjustments in tamping pressure or temperature stability can make or break your espresso. According to coffee scientist Dr. Scott Rao, minor variances in dosing and extraction parameters can cause a wide spectrum of flavors, yet many enthusiasts overlook these subtleties, sticking to generic routines. Don’t fall into the trap of over-relying on high-end gear without mastering its nuances. Investing in top-tier equipment like the latest espresso machines for 2025 is fantastic, but without perfecting the small adjustments, you’re not unlocking its full potential.
Why does your shot sometimes taste sour or bitter even with a good machine?
This often stems from overlooked nuances, such as uneven tamping or inconsistent grind distribution, which can cause variability in extraction. Studies published in the *Journal of Food Science* highlight that consistency in grind size & tamping pressure improves flavor stability significantly. So, the secret may be in refining your technique rather than just chasing the latest gear. Remember, even a simple routine tweak—like ensuring uniform coffee distribution—can elevate your brew. For tips on perfecting your technique, check out guides for beginners. Have you ever fallen into this trap? Let me know in the comments.
Investing in the Right Gear for Durability
Maintaining your espresso setup over time hinges on selecting tools that promote longevity and consistent performance. Personally, I swear by the LuxiCafe Precision Grinder. Its stepless grind adjustments allow me to fine-tune extraction and avoid the pitfalls of over- or under-grinding, ensuring my machine and beans remain in optimal condition. Additionally, a quality tamper with adjustable height, such as the BaristaPro Adjustable Tamper, helps in achieving consistent tamping pressure, which is crucial for long-term shot quality.
How do I maintain my espresso gear over time?
Regular cleaning is the foundation of effective maintenance. I use a combination of a dedicated portafilter brush and a descaling routine with manufacturer-approved solutions. Descaling prevents mineral buildup that can cause pressure inconsistencies, draws upon expert advice like the one from Scott Rao’s calibration tips, and extends the lifespan of internal components. I also keep a dedicated burr replacement kit on hand; replacing worn burrs at the right time ensures uniform grind and reduces strain on your machine.
Tools I recommend for optimal maintenance
Investing in a high-quality milk frother cleaner prevents unhealthy residue buildup, which can affect foam quality and machine longevity. An ultrasonic cleaner for small parts like portafilter baskets can dramatically reduce cleaning time and improve results. For ongoing calibration, a precise coffee scale with tare functionality and a digital thermometer are indispensable—allowing you to standardize extraction parameters and control temperature variations to within 1°C. According to the detailed methods in expert calibration guides, these tools become part of a disciplined routine that safeguards your investment in quality brewing.
Future trends in home espresso maintenance
Looking ahead, I predict integrated IoT-enabled machines will provide real-time diagnostics, alerting owners to maintenance needs before issues arise. Innovations like self-cleaning steam wands and automated descaling cycles are also on the horizon, reducing manual effort and improving long-term reliability. But until these become mainstream, practicing disciplined manual maintenance with proven tools and methods remains the best strategy. Don’t forget to periodically review your equipment’s condition through thorough checks—consistent upkeep is the key to enjoying perfect espresso year after year.
Why I Nearly Ruined My Coffee Routine by Overlooking Small Details
One of the most valuable lessons I learned was that the tiniest oversight in cleaning or adjustments can drastically affect your espresso quality. I used to think that a quick wipe was enough, but over time, stubborn residues and mineral deposits built up, leading to inconsistent shots and flavor loss. My early mistakes taught me that paying attention to detail isn’t just about cleanliness—it’s about preserving the entire flavor experience and extending your equipment’s life. That realization pushed me to adopt meticulous routines that now guarantee every cup is as perfect as the first.
The Equipment Hacks I Swear By for Lasting Freshness
If you’re serious about top-notch home brewing, certain tools have become game-changers in my routine. First, a high-quality coffee scale with precise tare functions ensures consistent dosing, critical for flavor stability. I also rely on an ultrasonic cleaner for my portafilter parts—saving time while deep-cleaning with ease. Plus, a durable tamper with adjustable height keeps tamping consistent, making a significant difference in shot quality. Integrating these tools into my routine not only improved my coffee but also preserved my gear’s condition, saving me money and frustration in the long run. For expert-recommended gear picks, explore our detailed guide to barista gear.
Transforming My Approach to Home Espresso – You Can Too
Building a delightful home espresso routine isn’t just about having the right machines—it’s about mastering maintenance, tweaks, and patience. I encourage you to view each step, from cleaning to calibration, as a way to connect deeper with your craft. Embrace the process, experiment with small adjustments, and celebrate the improvements along the way. Remember, every master barista started where you are now—practice, curiosity, and dedication will elevate your coffee experience far beyond what you initially imagined. Ready to take your home brewing to the next level? Let me know what step you’re excited to refine in your routine below!