How to Fix an O-Ring Leak in Your Manual Espresso Press
Have you ever been in the middle of savoring your morning espresso, only to be greeted by a frustrating drip or a sudden loss of pressure? I can’t count how many times I’ve had that lightbulb moment—realizing the leak wasn’t just a minor annoyance but a sign that my beloved manual espresso press needed some TLC. There’s a certain heartbreak in watching your carefully brewed shot seep out where it shouldn’t, especially when you’re eager to start the day. I remember my first O-ring mishap like it was yesterday—fumbling with tools and feeling overwhelmed. But I’ve learned that fixing that tiny rubber gasket isn’t as intimidating as it seems.
Why Fixing Your O-Ring Matters More Than You Think
The O-ring in your espresso press acts as a vital seal, maintaining pressure to ensure that every shot is rich, flavorful, and consistent. When it leaks, you’re not just losing a small amount of coffee—you’re compromising the entire brewing process. This can lead to weak extraction, uneven pressure, and an overall disappointing espresso experience. Plus, an unchecked leak can cause damage to other components over time and drive up maintenance costs. That’s why addressing a leaking O-ring promptly is so crucial, whether you’re a home barista or an espresso enthusiast with a growing collection of gear.
Is Resizing or Replacing the Seal Worth the Hassle?
I’ll admit, I was initially skeptical. I had visions of complicated disassembly and expensive replacements. But early on, I also made the mistake of ignoring minor leaks—thinking they’d go away or weren’t worth the effort. Spoiler alert: they rarely do. In fact, a simple replacement of the O-ring can restore your machine’s integrity and save you money. If you’re worried about tackling the repair yourself, don’t be! There are straightforward steps you can follow, and I’ll guide you through them so you won’t have to guess or panic. Curious? I promise, with a few tools and patience, you can fix this leak yourself, and get back to brewing perfect espresso in no time.
Before we dive into the step-by-step process, let’s take a quick look at common pitfalls, so you’re not repeating my early mistake of rushing into disassembly without understanding the importance of a clean, well-lubricated seal. For further tips on maintaining your gear and avoiding other common leaks, check out this guide on fixing leaks. Now, are you ready to fix that stubborn O-ring leak and enjoy your espresso again? Let’s get started.
Disassemble with Purpose
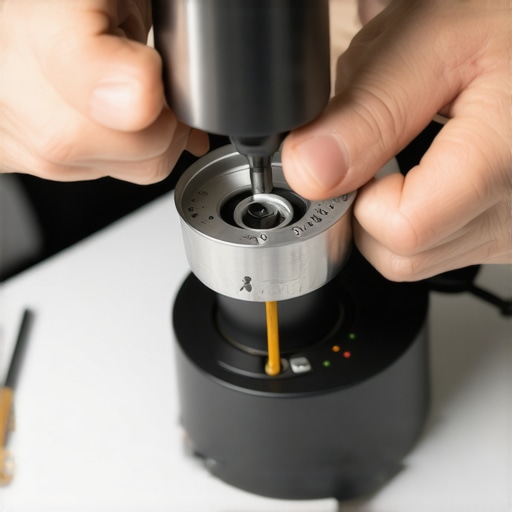
Start by unplugging your machine and removing the water tank to prevent accidental leaks. Use an appropriate screwdriver to detach the components covering the O-ring housing, typically the brew head or piston assembly. During my first repair, I carefully documented each screw position with a smartphone photo—this made reassembly smoother. Keep a container for small parts to avoid losing any.
Identify and Extract the Old O-Ring
Locate the O-ring, which is usually a small rubber gasket snugly fitted into a groove. Use tweezers or a plastic pry tool to gently lift it out—avoid metal tools that could damage surrounding parts. I once used a toothpick, which worked perfectly to lift stubborn rings without scratching. Inspect the O-ring for cracks, deformation, or residues—these signs confirm replacement is necessary.
Clean the Seal Groove Thoroughly
Before installing the new O-ring, clean the groove with a lint-free cloth and a small amount of hot water or a recommended cleaning solution. Residue or debris can compromise the seal, leading to leaks. In one messy repair, I overlooked this step and had to redo the process because the new O-ring didn’t seat properly—don’t skip this crucial cleaning step. Check for any damage or debris that might interfere with proper sealing.
Lubricate the New O-Ring
Apply a thin layer of food-grade lubricant or silicone grease to the new O-ring. This ensures smooth installation and reduces wear during pressurization cycles. I learned this the hard way when forcing a dry ring into place, causing it to nick. Proper lubrication makes the fit snug and prevents tearing or misalignment.
Install the New Seal Carefully
Gently press the O-ring into its groove, ensuring even seating. Use your fingers or a soft plastic tool to work it around the groove without twisting. In my first attempt, I twisted the ring, which caused a minor leak—careful, even pressure is key. Confirm it sits flush and round, no distortions remain, which is vital for a proper seal.
Reassemble the Machine in Reverse
Replace the components, ensuring each screw goes back in its original position. Tighten screws uniformly to prevent uneven pressure on the seal—over-tightening can deform the new O-ring, causing leaks. During reassembly, cross-reference your photos to ensure accuracy. Once reassembled, run a test with hot water to verify the leak fix—you now have control over your espresso quality once again.
Additional Tips to Avoid Future Leaks
Regularly inspect your O-rings for signs of aging, cracks, or deformation. Cleaning your brew group weekly and applying food-grade lubricant annually can extend their life. If leaks persist despite replacement, consider checking related seals or consulting additional resources like this guide for comprehensive maintenance tips or exploring the root causes of pressure drops.
Many enthusiasts believe that purchasing the latest high-end espresso machine guarantees perfect shots, but in my experience, misusing or misunderstanding the nuances of such equipment often causes more problems than it solves. One prevalent myth is that more expensive equipment automatically produces better coffee; however, even premium machines require proper calibration and maintenance to perform optimally. Overlooking these details can lead to persistent issues like inconsistent pressure or temperature fluctuations, which compromise flavor. Another misconception is that grinding finer always results in a better extraction. Yet, overly fine grinds can cause channeling and clogging, especially if the grinder isn’t precisely dialed in, leading to bitter or underextracted shots. Advanced users know that optimizing dose consistency and distribution—like ensuring even tamping or avoiding tap-tapping errors—is crucial for quality, yet many beginners underestimate this nuance, thinking grind size alone is the solution.
Keeping it Working: Tools I Recommend for Home Espresso Enthusiasts
Maintaining your espresso setup over time demands precision, consistency, and the right equipment. My go-to tools are carefully selected to ensure longevity and peak performance of my machines and accessories. For routine maintenance, I rely heavily on a high-quality digital scale like the 250g to 2kg range with ±0.1g accuracy. Not only does this help dial in precise dosing, but it also enables me to track extraction times and shot weight, essential for consistent results. I prefer models with tare and auto-off functions to simplify workflow and preserve battery life.
Another indispensable tool is a precise cleaning brush set. I use a dedicated brush with stiff and soft bristles for scrubbing grinders, baskets, and brew heads. Regular cleaning prevents buildup that can cause channeling or uneven pressure. For grinder maintenance, I recommend a high-quality brush set with stiff bristles for the burrs and softer ones for the chute. This frequency of cleaning directly correlates with better grind consistency and flavor clarity.
Additionally, I keep a calibrated pressure tester for checking your brew pressure and ensuring it stays within optimal ranges—typically around 9 bar. Devices like these help detect any decline in pump performance before it becomes noticeable in your shots. Regular pressure checks are especially valuable if your machine’s pressure regulator is adjustable. I also employ a water hardness tester to monitor mineral buildup, which can scale boilers and pipes, leading to performance issues. Learning to control and mitigate mineral deposits is crucial, and occasional descaling with a proprietary cleaner extends the lifespan of your equipment. For detailed procedures, check out this comprehensive descale guide.
What about software? For those who have smart espresso machines, I recommend firmware updates and monitoring apps to keep your system optimized. They often include calibration tools and fault diagnostics, which can prevent unexpected breakdowns. Investing in a temp-stabilizing insulated mug is also a game-changer, maintaining consistent temperature during longer extraction sessions, especially if you’re experimenting with pour-over or milk drinks. Such accessories contribute to controlling variables that influence shot quality over time.
How do I maintain my gear to ensure long-term performance?
Consistent cleaning, regular calibration, and using quality tools make all the difference. Implement routines like flushing the brew group after each session, wiping down steam wands, and checking the grinder burrs for dullness. Create a maintenance schedule that aligns with your usage frequency—when I notice static buildup in my grinder, I perform this quick fix to keep the grind path clear. Moving forward, incorporate smart monitoring tools to preempt issues, and always keep spare parts such as O-rings and gaskets handy. Combining these practices ensures your espresso gear remains reliable for years to come, producing consistent, high-quality shots every time.
Over the years, I’ve learned that the smallest components often make the biggest difference in your espresso journey. Specifically, the O-ring—though tiny—can be the gatekeeper between a perfect shot and a disappointing leak. My early experiments taught me patience, attention to detail, and the incredible value of preventative care. Once I grasped the importance of regular inspection and proper replacement techniques, I was able to keep my espresso machine humming and my mornings seamless. Trust me: understanding the ins and outs of your O-ring can elevate your entire home barista experience.
What I Wish I Knew About Keeping My Espresso in Top Shape
- Preventative swaps save headaches: Replacing O-rings before they crack not only saves money but also avoids unexpected downtime. I’ve discovered that proactive maintenance is a game-changer for maintaining consistent pressure and flavor.
- Cleaning is your best friend: Regularly cleaning the groove where the O-ring sits prevents residue buildup that can cause leaks or improper sealing. A quick wipe with a lint-free cloth and some hot water is all it takes, and it prolongs the life of your seal.
- Lubrication matters more than I thought: Applying food-grade silicone grease during installation reduces tearing risk and ensures a snug fit, making the repair smoother and more reliable. This simple step can dramatically improve the longevity of your O-ring.
- The right tools make all the difference: Using tweezers and plastic pry tools rather than metal implements prevents damage. During my first fix, these tools saved me from costly mistakes and made the process more manageable.
- Knowing when to replace is key: Cracks, deformation, or even an uneven surface are signs that your O-ring needs replacement. Ignoring these signs risks leaks that can compromise your espresso’s quality.
My Arsenal for O-Ring Triumphs
- Food-grade silicone grease: Ensures smooth installation and longevity.
- Set of precision tweezers: Perfect for removing and installing tiny seals.
- Cleaning cloths and brushes: Keep the groove free of debris and residue.
- Replacement O-rings: Always have spares on hand for quick swaps.
Embrace the Small to Enhance the Big Moments
Taking control of your O-ring maintenance is more than just a technical task—it’s a step towards consistent, high-quality espresso and a more rewarding home barista experience. Think of each replacement as a small investment that pays off in pristine pressure quality, flavor, and the pleasure of a perfectly pulled shot every time. Remember, even seasoned enthusiasts face leaks or wear; what sets you apart is your attitude towards proactive, informed care. Why settle for fleeting perfection when a little maintenance can make your espresso routine endlessly satisfying? Start paying close attention to your seals, and watch your coffee craft flourish.
What common mistake have you made when maintaining your espresso gear, and how did you fix it? Drop your insights below—I’d love to hear your stories and tips!