How to Fix the Drift in Your Grinder’s Step-less Adjustment
Ever been mid-espresso shot when your grinder suddenly feels like it’s lost its mind? I remember the exact moment I realized my once-smooth, infinitely adjustable grinder was now stubbornly stuck at a certain setting, fighting me every time I tried to dial in that perfect grind size. Frustration mounted as I watched my carefully brewed cups turn inconsistent and unpredictable. That lightbulb moment hit me hard: the drift in my step-less grinder was not just an annoyance; it was sabotaging my whole brewing routine.
Why Fixing Your Grinder’s Drift Is More Important Than You Think
“Keeping your grinder calibrated is key to unlocking the full potential of your home espresso setup.” – from Mastering Home Espresso
It’s easy to overlook the significance of a stable grind setting, especially in a step-less grinder where the adjustment is meant to be seamless. But when the adjustment drifts, it can lead to inconsistent extraction, uneven flavors, and wasted beans. Plus, it adds unnecessary stress—you keep chasing a perfect shot that keeps drifting away.
Have you ever faced a similar problem? Maybe your grind size suddenly feels off, and no matter how much you tweak the dial, it refuses to cooperate? Believe me, I’ve been there—and it’s a common frustration among coffee enthusiasts who want nothing but the best from their equipment.
Now, I won’t keep you in suspense. Today, we’re going to explore how to fix that pesky drift in your step-less grinder. Along the way, I’ll share tips from my personal experience, warn you about common mistakes (like over-tightening adjustment screws), and point you toward practical solutions that actually work.
Let’s dive into why this drift happens and how you can regain control over your grind settings. That way, you can consistently enjoy those rich, flavorful shots without the mechanical headache.
Secure the Adjustment Screw and Verify Its Tightness
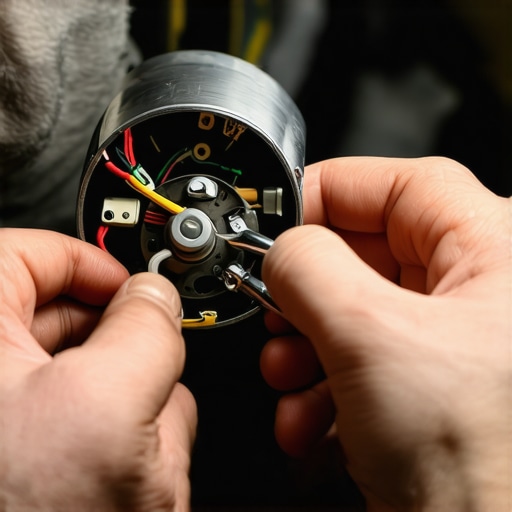
Begin by unplugging your grinder to avoid accidental turns. Using a screwdriver, gently check the tightness of the adjustment screw—think of it like tightening the laces on a shoe that keeps slipping. If it’s loose, turn clockwise in small increments until it’s snug but not over-tightened, which could cause strain. I once spent an hour trying to dial in a shot, only to realize my adjustment screw had loosened over time, causing my grind size to shift unpredictably. After tightening it properly, my shots became remarkably more consistent.
Clean the Grind Cam and Damping Mechanism
Next, remove the hopper and access the grind cam—the part responsible for translating your dial turns into grind size changes. Use a soft brush or compressed air to clear out coffee dust and debris that might cause friction. Remember, coffee oils and dust can act like a sticky residue, hampering smooth adjustments. I once ignored this step and kept chasing micro-adjustments, but after cleaning the cam, I gained better control over my grind settings.
Check for Worn or Damaged Parts
Inspect the internal components such as the grind spindle and adjustment gears for signs of wear or damage. If the gears are stripped or the spindle wobbling, replacement may be necessary. Think of your grinder’s adjustment mechanism as a bicycle gear system—worn teeth make precise shifting impossible. I replaced a worn gear segment, which restored my grinder’s responsiveness and eliminated the drift.
Reassemble and Test the Grind Settings
Carefully reassemble the grinder, ensuring all parts are seated properly. Plug it back in and perform a test run—dial your grind to a medium setting, then turn the dial slightly back and forth to observe if the setting holds. If it drifts, revisit the previous steps. During my last fix, I marked the zero point with a fine marker before reassembling. When I tested, the grind stayed consistent for multiple shots, saving me from guesswork.
Adjust with Purpose and Document Your Settings
Finally, fine-tune your grind for the perfect shot, noting the exact dial position that yields your desired extraction. This step is like setting a favorite radio station—once dialed in, you can easily return to that perfect spot. Keep a small notebook or photo record of your settings, especially if you switch beans or roast levels, to prevent drift recurrence.
Remember, maintaining your grinder is an ongoing process. Regularly cleaning the burrs and adjustment parts prolongs its precision and performance. For deep cleaning routines that preserve your grinder’s longevity, check out this guide. With consistent attention, your step-less grinder will become your most reliable partner in brewing perfect espresso every time.Many coffee enthusiasts believe that investing in high-end equipment guarantees perfect results, but in reality, most people overlook the nuances that truly make a difference. For instance, a widespread myth is that expensive grinders automatically produce better grounds, yet the reality is that choosing the right grinder involves understanding grind consistency, burr design, and maintenance routines. Overlooking these details often results in inconsistent extraction despite premium gear. Additionally, many assume that milk frothers are all created equal; however, not all frothers handle microfoam well, especially when the technique isn’t tailored to the device’s capabilities. This oversight can lead to froth that collapses quickly or lacks the silky texture desired.
**Are all espresso machines equally capable of producing café-quality shots?** Not quite. Factors like boiler size, group head design, and pump type play critical roles—and understanding these allows for better equipment selection and maintenance. A common trap is settling for an entry-level machine with a shared boiler, which might not reach optimal temperatures consistently, thus affecting shot quality. Upgrading without considering these nuances can be counterproductive.
Let’s dig deeper into the advanced mistakes many make. For example, adjusting grinders or tampers based solely on intuition rather than objective measurements can cause more harm than good. Accurate calibration, including using tools like a scale or a calibration card, ensures consistency. According to coffee scientist Scott Rao, even minor variations in tamping pressure or grind setting significantly influence extraction; neglecting these can lead to over- or under-extraction.
**What confuses many about choosing the right coffee grinder?** The dilemma often centers around burr material and size, but an often-overlooked aspect is burr alignment and internal adjustment precision. If the burrs are misaligned or the grinder’s adjustment mechanism isn’t calibrated properly, results will be inconsistent, regardless of burr quality. Regular maintenance and understanding these subtleties can elevate your brewing game.
Further, many home baristas underestimate the importance of grinder speed and heat generation, which can affect bean freshness and grind quality, especially with delicate, light roasts. High-speed grinders tend to heat beans, degrading flavors. Opting for slower, dedicated grinders preserves bean integrity—a nuance covered comprehensively in resources like this guide.
Finally, many fail to realize that even the best gear needs proper cleaning and periodic calibration. Residue build-up or misaligned parts can subtly sabotage your efforts over time. Regularly servicing your equipment, as discussed in this article, is essential to maintain peak performance.
**Have you ever fallen into this trap?** Let me know in the comments how mastering these nuances improved your home brewing experience.Maintaining your coffee equipment isn’t just about keeping things clean; it’s about preserving precision and performance over time. One of my favorite tools is a high-quality burr cleaning brush, which I use weekly to remove coffee oils from the burrs—this simple step prevents clogging and ensures consistent grind size, as highlighted in this detailed guide. For more thorough maintenance, I rely on a calibrated digital espresso scale to fine-tune dose weight—precision that directly impacts extraction quality and flavor consistency. Investing in a proper tamping station, combined with a tamper pressure measurement tool, helps me achieve even tamping every shot, reducing channeling and uneven extraction.
Discover the Hidden Truths Behind Perfect Espresso
My biggest takeaway from troubleshooting grinders and machines is that even the most advanced equipment can falter without proper maintenance and a keen eye for detail. I once believed that investing in high-end gear was enough, but I realized that regular calibration and cleaning are what truly unlock top-tier flavor. The lessons learned through countless adjustments taught me patience and the importance of understanding my equipment’s quirks—not just blindly trusting specifications but actively nurturing my tools.
My Go-To Resources for Coffee Excellence
- EspressoTechGuide.com: A treasure trove of actionable tips, from cleaning routines to grinder calibration techniques. I trust their insights because they combine expert knowledge with real-world experience.
- Mastering Home Espresso: This guide transformed my approach, especially their section on dialing in the perfect grind—I’ve referred back dozens of times as I refined my process.
- Choosing the Best Barista Gear: Knowing what equipment truly adds value saved me from costly mistakes. These reviews and comparisons are honest and rooted in actual user feedback.
Your Next Espresso Milestone Awaits
Remember, mastering home espresso is a journey—each tweak and maintenance routine brings you closer to that ideal shot. Don’t be discouraged by setbacks; instead, see them as opportunities to learn and improve. With a bit of dedication and curiosity, you’ll unlock flavors and textures that rival any coffee shop. So, what step will you take today to elevate your home brewing game? Share your plans below—let’s grow together on this flavorful journey!