How to tell if your espresso machine needs a new group gasket
I remember the moment distinctly—my morning ritual was thrown into chaos because my espresso machine suddenly refused to produce that rich, velvety shot I adored. I had been sipping on bitter, inconsistent espresso for weeks, blaming the beans or my grind setting, when I finally realized the culprit was right under my nose: the group gasket. That little rubber ring, often overlooked, can silently sabotage your coffee experience.
Recognizing When Your Espresso Needs More Than Just a Clean
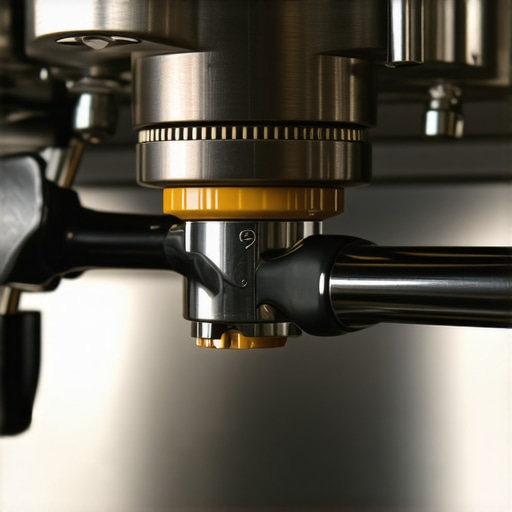
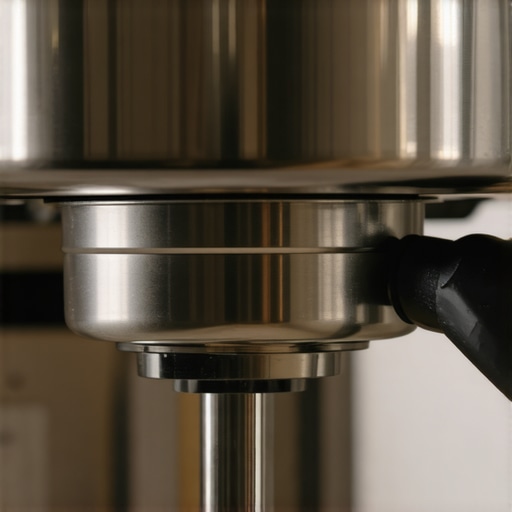
Ever had a shot that feels ‘off’—perhaps too watery, uneven, or engulfs your cup with unintended leaks? These are telltale signs that your machine’s group gasket might be past its prime. This small but vital component seals the connection between your portafilter and the boiler assembly, ensuring consistent pressure for perfect extraction. When it deteriorates, your espresso suffers, and so does your patience.
Is Replacing the Gasket Really Necessary?
Early on, I made a mistake many home baristas do—ignoring the signs of gasket wear because it seemed minor. But neglecting this essential part can lead to bigger issues like leaks, inconsistent shots, and even water damage. According to industry experts, a worn gasket can reduce your machine’s efficiency and compromise your espresso’s flavor profile. Trust me, taking a moment to inspect and replace it will save you from costly repairs and bitter disappointments.
What We’ll Cover Today
In this guide, I’ll walk you through how to spot the signs of a failing gasket, how to replace it yourself, and tips to keep your espresso tasting its best. Before diving into the how-to, I want to address a common worry: “Is replacing the gasket complicated for a non-techie?” Absolutely not. My own first attempt was surprisingly straightforward, and I’ll share expectations and pitfalls along the way.
If you’ve ever faced uneven extraction, leaks, or a sudden drop in water pressure, you’re not alone. Many home baristas stumble here because they don’t realize how essential this small component is. Once you understand its role and how to check it, your espresso quality can elevate dramatically—saving money and frustration. Ready to transform your home espresso game? Let’s get into it.
,
Prepare Your Workspace and Gather Tools
Begin by clearing a clean, well-lit space on your countertop to work comfortably. Collect a replacement gasket specific to your machine model, available from your manufacturer or specialty coffee stores. You’ll also need a screwdriver (usually Phillips or flat-head), a small brush, a clean cloth, and food-grade lubricant if recommended. I once attempted this without proper tools and ended up with a scratch on my machine, highlighting the importance of prepping correctly.
Turn Off and Cool Down the Machine
Switch off your espresso machine and unplug it. Allow it to cool completely to prevent burns or damage. For safety, never work on a hot machine—wait at least 30 minutes after use. This step is crucial; I once rushed the process and accidentally burnt my finger on the metal portafilter, which could’ve been avoided.
Remove the Portafilter and Detach the Group Head
Remove the portafilter and any remaining coffee grounds. Use the screwdriver to unscrew the screws securing the group head cover. Gently lift off the cover, revealing the gasket and internal components. Be careful; some parts may be greasy or delicate. Remember, taking a photo before disassembly can help during reassembly, a trick I learned after struggling to remember how everything fits back together.
Extract the Old Gasket and Inspect the Area
Carefully pull out the worn gasket using tweezers or your fingers. Clean the seating area with a damp cloth and small brush to remove any coffee residue, oils, or debris. Check for cracks or deformities; if the metal surface underneath is damaged, it may require further maintenance. I once neglected this cleaning step, leading to a poor seal even after gasket replacement.
Install the New Gasket Properly
Align the new gasket with the seating groove, ensuring it sits evenly without twists or folds. Press it into place firmly but gently. Some gaskets come with a flanged edge to help with seating—use it as a guide. Applying a small amount of food-grade lubricant can help ease installation and ensure a good seal, just as I did when the gasket was stubborn to fit; it made the process smoother.
Reassemble and Test the Machine
Replace the group head cover and tighten screws securely, but avoid over-tightening which can deform the gasket. Reattach the portafilter, fill the water reservoir, and run a test shot. Watch for leaks or irregular pressure build-up. My first test resulted in a slight water leak, prompting me to double-check the gasket seating and tightening. Fine-tuning at this stage ensures optimal performance.
Perform Regular Maintenance to Extend Gasket Life
Regularly clean your gasket and replace it every 1-2 years, depending on usage. Check for signs of wear or leaks periodically. Maintaining this small but vital part can save you from more significant repairs or flavor issues, much like I learned from my early coffee disasters. For comprehensive care tips, see our guide on [how to maintain your espresso machine](https://espressotechguide.com/mastering-the-art-of-home-espresso-tips-for-beginners). Keep your gasket in pristine condition, and enjoy consistently excellent espresso with every shot.
Many coffee enthusiasts believe that investing in high-end espresso machines or the latest grinder guarantees perfect shots. However, what most overlook are the nuanced factors that truly influence your coffee’s quality. For instance, a common myth is that burr grinders with larger burrs always produce better grounds—while size matters, the burr geometry and alignment are equally critical. According to barista and grinder expert Scott Rao, the precision of burr alignment impacts particle consistency more than size alone.
Is grind size always the main culprit in poor extraction? Let’s dig deeper.
Another trap involves milk frothing equipment. Many think that any milk frother can produce café-quality microfoam. Yet, advanced users understand the importance of the milk steaming technique, the angle of the wand, and the type of milk—details often missed by beginners but vital for barista-level texture.
Many overlook the control panel’s complexity on high-end machines. They assume that more buttons mean more options, but in reality, improper use of these settings can lead to inconsistent extraction and wasted time. Mastering the subtle adjustments, like temperature stability and pre-infusion pressure, can elevate your home brewing.
Furthermore, choosing the right home espresso setup isn’t just about the machine. The grinder’s consistency, dosing accuracy, and tamping technique play pivotal roles. An improperly calibrated grinder or uneven tamp can cause channeling and sour or bitter shots, regardless of your machine’s quality. For insights on achieving particle uniformity, check out https://espressotechguide.com/how-to-align-your-manual-coffee-grinder-for-better-particle-uniformity.
Enjoying perfect espresso at home isn’t just about gear—it demands an understanding of the subtle factors and ongoing maintenance. Regular cleaning, correct calibration, and paying attention to small details make all the difference. Remember, equipment is only as good as how well you understand and use it. For comprehensive tips on maintaining your gear, visit https://espressotechguide.com/mastering-the-art-of-home-espresso-tips-for-beginners.
Have you ever fallen into this trap? Let me know in the comments. Let’s get into the nitty-gritty and elevate your coffee game.
Investing in Quality Tools for Long-Term Coffee Excellence
Keeping your espresso setup in top shape requires more than just occasional cleaning. I personally rely on a few specialized tools that have transformed my routine, saving me time and ensuring every shot tastes phenomenal. For example, I swear by a precision calibration weight to dial in my grinder. Consistency is everything, and knowing exactly how much I dose each time reduces channeling and bitterness. Additionally, a high-quality portafilter brush makes quick work of cleaning residual oils, preventing buildup that can impact flavor.
Furthermore, using a dedicated tamping mat helps maintain an even surface and protects your counter. It might seem simple, but I’ve noticed a significant reduction in puck errors since incorporating one into my process. As I plan for future upgrades, I’m eyeing an advanced diagnostic scale that measures shot weight and extraction time simultaneously, giving granular feedback for refining my technique.
Regular maintenance tools like descaling solutions and gasket replacement kits are also indispensable. The industry is trending toward more integrated cleaning systems; some espresso machines now feature automatic descaling alerts, which greatly simplifies upkeep. To stay ahead, I recommend establishing a maintenance schedule aligned with your usage level—think monthly cleaning and biannual gasket inspections. These practices extend the lifespan of your equipment and keep your coffee tasting just as fresh as day one.
Anticipating future trends, I believe smart brewing appliances with IoT connectivity will become the norm, allowing remote diagnostics and automated cleaning alerts. Exploring these options now can future-proof your setup and minimize unexpected downtime. For trusted product recommendations, check out our gear selection guide.
How do I maintain my espresso gear over time?
The key is consistent, targeted care. Schedule regular cleaning with descaling solutions, inspect and replace worn gaskets proactively, and keep components like tampers and brushes clean to prevent oils from contaminating your brew. Investing in precision tools, like a calibration weight or electronic scale, can elevate your consistency and help identify issues before they impact flavor. Remember, a little effort in maintenance today can save you costly repairs and maintain the deliciousness of your coffee for years to come. Try measuring your shot weight with an advanced scale next time—you’ll be amazed at how much it improves consistency and flavor profile. For a detailed maintenance routine, visit our beginner’s guide.
What I Wish I Knew When I Started Tinkering with Gear
One of the most eye-opening lessons I learned was that even the most expensive espresso machine can underperform if a tiny gasket isn’t in top shape. I used to chase better beans and grind sizes, but the real game-changer was understanding the critical role of maintenance and the subtle signals my machine sent. That realization helped me avoid costly repairs and kept my coffee tasting pristine.
Tools That Became My Coffee Superpowers
Investing in precision tools like a calibration weight and quality brushes revolutionized my approach. These tools provided insights I never had before, helping me achieve more consistent shots and identify issues early. I trust brands like Baratza for grinders and Tacita for cleaning tools because they combine durability with precision, which is crucial for home baristas aiming for professional results.
Embracing the Learning Process with Patience and Curiosity
The journey to perfect home espresso isn’t just about equipment; it’s about being a curious student of your machine. Every tweak, every clean, and every replacement adds up. When I started approaching maintenance as a learning experience rather than a chore, my appreciation for the craft deepened, and so did my coffee quality. It’s a continuous journey — one that rewards persistence and attention.
Your Next Espresso Step Starts Here
Remember, your home espresso isn’t just a routine but a personal art form. Every small effort, from checking your gasket to calibrating your grinder, pushes you closer to the café-quality experience you desire. Stay patient, keep learning, and don’t hesitate to explore new tools and techniques. Your perfect shot is waiting — and I believe in your ability to master it.
What’s been your biggest challenge in maintaining your espresso gear? Share your story below—I’d love to hear and help troubleshoot!
,