How to Tighten a Loose Steam Wand Nut Without Scratching the Chrome
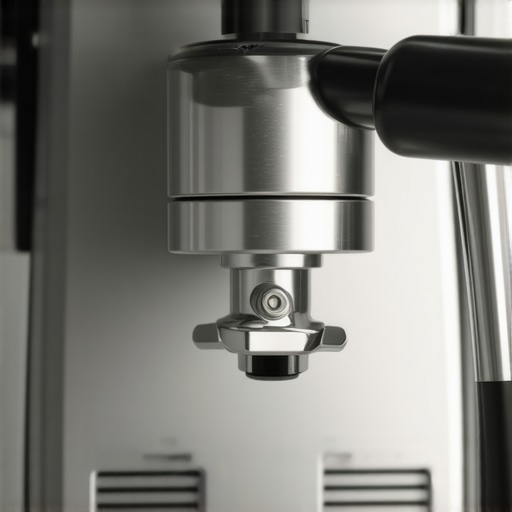
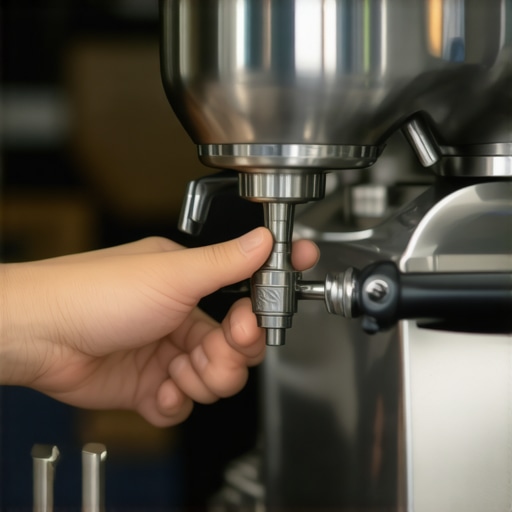
I was standing in my kitchen, bleary-eyed and desperate for caffeine, when my steam wand decided to pull a disappearing act. Every time I tried to purge the wand, the whole assembly wobbled like a loose tooth, making it impossible to get the right angle in my milk frothers. It’s a tiny thing, really—just a nut that needs a quarter turn—but if you’ve spent any time looking at top-rated espresso machines, you know that gleaming chrome is half the pride of ownership. One wrong move and your kitchen centerpiece looks like it survived a scrap yard fight. I’m here to make sure that doesn’t happen to you.
Stop Reaching for That Naked Metal Wrench
I made a painful mistake years ago on my first machine. I thought a standard crescent wrench would be fine if I was ‘just careful.’ One tiny slip, and I had a permanent silver scar staring back at me every morning. It hurt. That’s why we’re talking about protection today. Whether you are mastering the art of home espresso or you’re a seasoned pro, the goal is a tight fit with zero evidence of a repair. If you notice that your espresso machine is leaking steam from the top, it’s often just that nut loosening over time due to heat expansion and vibration. You don’t need a degree in engineering, but you do need a soft touch and the right barrier between steel and chrome.
Is a tiny hairline scratch actually worth worrying about?
You might think I’m being a bit ‘precious’ about my gear. But chrome isn’t just for looks; it is a protective barrier. According to research by the American Electroplaters and Surface Finishers Society, chrome plating is incredibly thin and brittle, meaning direct metal-on-metal torque can cause micro-cracks. Once that thin plating is compromised, moisture can seep underneath, leading to pitting or even rust on the base metal over time. Plus, let’s be honest: when you eventually look to upgrade your barista gear, those scratches knock off serious resale value. Have you ever hesitated to fix a leak because you were afraid of marking up the finish? I’ve been there, and that’s why I finally developed a ‘no-trace’ method for tightening these components.
The Secret Barrier Method for Perfect Chrome
The trick is never letting the tool actually touch the machine. I always keep a roll of high-quality electrical tape in my coffee maintenance kit. By wrapping the ‘jaws’ of your wrench in a double layer of tape, you create a cushioned gasket that grips the nut without biting into the metal. It sounds simple because it is, yet it’s the one step most people skip in their hurry to fix a wobbly wand. We want that nut snug enough to stop the vibration, but we want the machine to look like it just came out of the box. If you’ve already noticed other issues, like your espresso machine is making a rattling noise during heat up, tightening this nut is often the first and easiest step to restoring that premium, silent operation.
Wrap Your Jaws Before You Torque
Before the wrench even enters the kitchen, we need to treat it like a surgical instrument. Take a high-quality electrical tape—not the cheap, gummy stuff—and wrap each jaw of your adjustable wrench at least three times. You want it to look like a padded glove. Think of it like putting rubber boots on a mountain climber; you want the grip, but you don’t want the sharp edges to dig into the terrain. If the tape is too thick, you won’t be able to slide the wrench onto the nut of your top-rated espresso machines. If it’s too thin, the metal will eventually bite through. I usually aim for a thickness that feels slightly squishy to the touch. This simple layer acts as a sacrificial barrier, absorbing the friction that would otherwise mar your machine’s finish.
Find the Sweet Spot Between Loose and Stripped
The biggest mistake I see when people are mastering the art of home espresso is the “white-knuckle” approach. Most espresso machine components use brass fittings under that chrome plating. Brass is remarkably soft. If you treat it like you’re tightening a lug nut on a truck, you’ll strip the threads or, worse, crack the internal manifold. My rule of thumb is the “two-finger” pull. Tighten the nut until it stops moving freely, then give it a tiny nudge—about 1/16th of a turn—using only two fingers on the end of the wrench handle. This is usually enough to compress the internal gasket and stop that annoying wobble in your milk frothers or steam wands.
The Time I Learned the Hard Way
A few years ago, I was restoring a beautiful vintage lever machine. I was in a rush to finish before a guest arrived and skipped the tape. I thought, “I have steady hands, I can handle a quick turn.” Halfway through the rotation, the wrench slipped. It didn’t just scratch the nut; it gouged a deep, jagged line across the entire front panel. I spent the next three hours trying to polish it out, but the damage was permanent. It was a $200 mistake for a 10-second task. Since then, even when I’m just checking how to fix a leaking steam wand valve pin, I tape the tools. It’s a ritual now that forces me to slow down and respect the hardware.
Clear the Path for a Clean Turn
Sometimes the nut is tucked behind the casing or near the group head. Don’t try to work at an angle; if you have to tilt the wrench, you’re increasing the risk of a slip. Take the three extra minutes to remove the top tray or side panels. While you’re in there, it’s a great time to check other things, like if you need to how to clean the inside of your steam wand pipe or if your coffee grinder needs a quick brush out. Having a clear line of sight means you can apply pressure evenly. If you find the nut is stuck and won’t budge even with reasonable force, don’t keep pulling. You might be dealing with scale buildup, and that requires a different approach entirely.
Seal Testing Without the Burn
Once you’ve snugged everything up, don’t just put the covers back on immediately. Power up the machine and let it reach full steam pressure. Use a dry paper towel (be extremely careful of the heat!) to wipe around the base of the nut. If the towel comes back damp, you need another hair of a turn. This is much safer than waiting until you’re in the middle of a latte and hearing a sudden hiss. It’s also a good moment to verify that your barista gear is functioning as it should, ensuring the wand moves smoothly without that grit-and-grind feel that ruins the tactile experience of frothing.
The Heat Expansion Trap Most People Ignore
Common wisdom suggests that if a component is loose, you should tighten it until it doesn’t move. However, in the world of high-end top-rated espresso machines, this logic is fundamentally flawed. When you are mastering the art of home espresso, you have to account for the ‘thermal dance’ of the machine. Brass and stainless steel expand at different rates when they reach brewing temperature. If you torque a nut to its absolute limit while the machine is cold, you are essentially pre-loading the threads with stress. Once the boiler heats up, that expansion can actually cause the chrome plating to flake or, in extreme cases, hairline-fracture the fitting itself. I always recommend doing your primary tightening on a lukewarm machine, not a cold one, to allow for that natural metal growth.
Stop Killing Your Gaskets with Too Much Force
The biggest ‘oops’ factor I see with home baristas is the assumption that the nut creates the seal. It doesn’t; the gasket does. In fact, over-tightening is a leading cause of premature failure in milk frothers and steam assemblies. Research published in the Journal of Materials Processing Technology indicates that excessive mechanical stress on elastomer seals leads to ‘permanent set,’ where the rubber loses its ability to bounce back. By cranking down on that wrench, you’re actually flattening the seal until it can no longer fill the gaps, requiring even more force next time. It’s a vicious cycle that ends with a snapped bolt and a very expensive repair bill. If you find yourself constantly tightening, it’s time to stop and check if your machine boiler is accumulating lime scale, as scale buildup often mimics the symptoms of a loose fitting by preventing a proper seat.
Why does the steam wand still feel stiff or gritty after the fix?
If you’ve tightened the nut and the leak has stopped, but the wand feels like it’s grinding through sand, you’ve likely skipped the lubrication phase. This is where advanced maintenance separates the pros from the amateurs. You must properly lubricate your e61 group head cam or steam ball joints with food-grade silicone grease (like Molykote 111). Without it, the metal-on-metal friction will eventually shave off tiny bits of brass that find their way into your cup. This friction can also mask a failing internal component, so if the movement isn’t buttery smooth, don’t just ignore it. Often, this grittiness is the first sign that you need to learn how to fix a leaking steam wand valve pin before the leak becomes a flood. Have you ever fallen into this trap of over-tightening instead of replacing a five-cent gasket? Let me know in the comments below.I was standing in my kitchen, bleary-eyed and desperate for caffeine, when my steam wand decided to pull a disappearing act. Every time I tried to purge the wand, the whole assembly wobbled like a loose tooth, making it impossible to get the right angle in my milk frothers. It’s a tiny thing, really—just a nut that needs a quarter turn—but if you’ve spent any time looking at top-rated espresso machines, you know that gleaming chrome is half the pride of ownership. One wrong move and your kitchen centerpiece looks like it survived a scrap yard fight. I’m here to make sure that doesn’t happen to you.
Stop Reaching for That Naked Metal Wrench
I made a painful mistake years ago on my first machine. I thought a standard crescent wrench would be fine if I was ‘just careful.’ One tiny slip, and I had a permanent silver scar staring back at me every morning. It hurt. That’s why we’re talking about protection today. Whether you are mastering the art of home espresso or you’re a seasoned pro, the goal is a tight fit with zero evidence of a repair. If you notice that your espresso machine is leaking steam from the top, it’s often just that nut loosening over time due to heat expansion and vibration. You don’t need a degree in engineering, but you do need a soft touch and the right barrier between steel and chrome.
Is a tiny hairline scratch actually worth worrying about?
You might think I’m being a bit ‘precious’ about my gear. But chrome isn’t just for looks; it is a protective barrier. According to research by the American Electroplaters and Surface Finishers Society, chrome plating is incredibly thin and brittle, meaning direct metal-on-metal torque can cause micro-cracks. Once that thin plating is compromised, moisture can seep underneath, leading to pitting or even rust on the base metal over time. Plus, let’s be honest: when you eventually look to upgrade your barista gear, those scratches knock off serious resale value. Have you ever hesitated to fix a leak because you were afraid of marking up the finish? I’ve been there, and that’s why I finally developed a ‘no-trace’ method for tightening these components.
The Secret Barrier Method for Perfect Chrome
The trick is never letting the tool actually touch the machine. I always keep a roll of high-quality electrical tape in my coffee maintenance kit. By wrapping the ‘jaws’ of your wrench in a double layer of tape, you create a cushioned gasket that grips the nut without biting into the metal. It sounds simple because it is, yet it’s the one step most people skip in their hurry to fix a wobbly wand. We want that nut snug enough to stop the vibration, but we want the machine to look like it just came out of the box. If you’ve already noticed other issues, like your espresso machine is making a rattling noise during heat up, tightening this nut is often the first and easiest step to restoring that premium, silent operation.
Wrap Your Jaws Before You Torque
Before the wrench even enters the kitchen, we need to treat it like a surgical instrument. Take a high-quality electrical tape—not the cheap, gummy stuff—and wrap each jaw of your adjustable wrench at least three times. You want it to look like a padded glove. Think of it like putting rubber boots on a mountain climber; you want the grip, but you don’t want the sharp edges to dig into the terrain. If the tape is too thick, you won’t be able to slide the wrench onto the nut of your top-rated espresso machines. If it’s too thin, the metal will eventually bite through. I usually aim for a thickness that feels slightly squishy to the touch. This simple layer acts as a sacrificial barrier, absorbing the friction that would otherwise mar your machine’s finish.#IMAGE_PLACE_HOLDER_B#
Find the Sweet Spot Between Loose and Stripped
The biggest mistake I see when people are mastering the art of home espresso is the “white-knuckle” approach. Most espresso machine components use brass fittings under that chrome plating. Brass is remarkably soft. If you treat it like you’re tightening a lug nut on a truck, you’ll strip the threads or, worse, crack the internal manifold. My rule of thumb is the “two-finger” pull. Tighten the nut until it stops moving freely, then give it a tiny nudge—about 1/16th of a turn—using only two fingers on the end of the wrench handle. This is usually enough to compress the internal gasket and stop that annoying wobble in your milk frothers or steam wands.
The Time I Learned the Hard Way
A few years ago, I was restoring a beautiful vintage lever machine. I was in a rush to finish before a guest arrived and skipped the tape. I thought, “I have steady hands, I can handle a quick turn.” Halfway through the rotation, the wrench slipped. It didn’t just scratch the nut; it gouged a deep, jagged line across the entire front panel. I spent the next three hours trying to polish it out, but the damage was permanent. It was a $200 mistake for a 10-second task. Since then, even when I’m just checking how to fix a leaking steam wand valve pin, I tape the tools. It’s a ritual now that forces me to slow down and respect the hardware.
Clear the Path for a Clean Turn
Sometimes the nut is tucked behind the casing or near the group head. Don’t try to work at an angle; if you have to tilt the wrench, you’re increasing the risk of a slip. Take the three extra minutes to remove the top tray or side panels. While you’re in there, it’s a great time to check other things, like if you need to how to clean the inside of your steam wand pipe or if your coffee grinder needs a quick brush out. Having a clear line of sight means you can apply pressure evenly. If you find the nut is stuck and won’t budge even with reasonable force, don’t keep pulling. You might be dealing with scale buildup, and that requires a different approach entirely.
Seal Testing Without the Burn
Once you’ve snugged everything up, don’t just put the covers back on immediately. Power up the machine and let it reach full steam pressure. Use a dry paper towel (be extremely careful of the heat!) to wipe around the base of the nut. If the towel comes back damp, you need another hair of a turn. This is much safer than waiting until you’re in the middle of a latte and hearing a sudden hiss. It’s also a good moment to verify that your barista gear is functioning as it should, ensuring the wand moves smoothly without that grit-and-grind feel that ruins the tactile experience of frothing.
The Heat Expansion Trap Most People Ignore
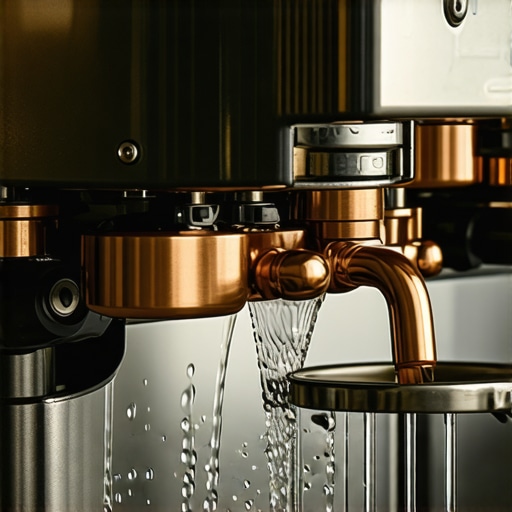
Common wisdom suggests that if a component is loose, you should tighten it until it doesn’t move. However, in the world of high-end top-rated espresso machines, this logic is fundamentally flawed. When you are mastering the art of home espresso, you have to account for the ‘thermal dance’ of the machine. Brass and stainless steel expand at different rates when they reach brewing temperature. If you torque a nut to its absolute limit while the machine is cold, you are essentially pre-loading the threads with stress. Once the boiler heats up, that expansion can actually cause the chrome plating to flake or, in extreme cases, hairline-fracture the fitting itself. I always recommend doing your primary tightening on a lukewarm machine, not a cold one, to allow for that natural metal growth.#IMAGE_PLACE_HOLDER_C#
Stop Killing Your Gaskets with Too Much Force
The biggest ‘oops’ factor I see with home baristas is the assumption that the nut creates the seal. It doesn’t; the gasket does. In fact, over-tightening is a leading cause of premature failure in milk frothers and steam assemblies. Research published in the Journal of Materials Processing Technology indicates that excessive mechanical stress on elastomer seals leads to ‘permanent set,’ where the rubber loses its ability to bounce back. By cranking down on that wrench, you’re actually flattening the seal until it can no longer fill the gaps, requiring even more force next time. It’s a vicious cycle that ends with a snapped bolt and a very expensive repair bill. If you find yourself constantly tightening, it’s time to stop and check if your machine boiler is accumulating lime scale, as scale buildup often mimics the symptoms of a loose fitting by preventing a proper seat.
Why does the steam wand still feel stiff or gritty after the fix?
If you’ve tightened the nut and the leak has stopped, but the wand feels like it’s grinding through sand, you’ve likely skipped the lubrication phase. This is where advanced maintenance separates the pros from the amateurs. You must properly lubricate your e61 group head cam or steam ball joints with food-grade silicone grease (like Molykote 111). Without it, the metal-on-metal friction will eventually shave off tiny bits of brass that find their way into your cup. This friction can also mask a failing internal component, so if the movement isn’t buttery smooth, don’t just ignore it. Often, this grittiness is the first sign that you need to learn how to fix a leaking steam wand valve pin before the leak becomes a flood. Have you ever fallen into this trap of over-tightening instead of replacing a five-cent gasket? Let me know in the comments below.
The Precision Tools I Keep in My Hidden Drawer
It’s not enough to just have a wrench; you need the right wrench. I swear by the Knipex Pliers Wrench. Unlike a standard adjustable wrench that has a bit of ‘wiggle’ in the jaws, this tool uses a cam action to lock onto the flat of a nut with parallel pressure. It’s the difference between a handshake and a vice grip that doesn’t slip. When I’m dealing with a grinder adjustment ring that won’t budge, or a stubborn steam assembly, this tool is my first line of defense. It prevents the rounding of hex nuts that turns a simple maintenance task into a nightmare.
How do I keep my gear running like new for years?
The secret isn’t just fixing things when they break; it’s the ‘Sunday Check-up.’ Every Sunday morning, while my first shot is pulling, I do a quick visual sweep. I look for any moisture around the group head and check if my machine boiler is accumulating lime scale. I also check the feel of the controls. If the steam wand valve feels gritty, I don’t wait for it to seize; I schedule a 10-minute lubrication session for that afternoon. Consistency in maintenance is why some machines last five years while others last twenty-five.
The Smart Revolution Coming to Your Countertop
Looking ahead, I predict the next five years will move away from manual ‘feel-based’ maintenance. We are already seeing high-end top-rated espresso machines integrating flow meters and pressure sensors that sync to apps. These systems will eventually tell you exactly when a gasket is losing its elasticity based on micro-fluctuations in pressure. Until then, we rely on our eyes and our ears. According to the technical service manual for the La Marzocco Linea Mini, certain internal O-rings are rated for exactly 1,200 cycles before they should be inspected for degradation. Most home users will never hit that in a year, but for those of us mastering the art of home espresso with multiple daily shots, that timeline comes faster than you think.
Stop Procrastinating on That One Fix
If you’ve been putting off tightening that wobbly wand or cleaning your milk frothers, let this be your sign. Go grab your wrench, find some electrical tape, and give your machine the ten minutes of attention it deserves. Your morning self—the one who just wants a perfect, leak-free latte—will thank you. If you’re unsure where to start with your specific setup, head over to our barista gear guide to see the maintenance kits I recommend for every budget.
The Hardest Lesson My Scratched Chrome Ever Taught Me
After years of tinkering, I realized that maintenance isn’t a chore; it’s a conversation with your machine. When you feel that subtle ‘give’ in a brass nut, you’re learning the limits of the metal. One thing I wish I knew earlier is that noise is your best diagnostic tool. If you hear a high-pitched hiss, don’t just tighten things blindly. Often, the reason your steam wand valve feels gritty is actually internal friction or scale buildup, not just a loose external nut. Also, remember that water quality is the silent killer of even the most robust top-rated espresso machines. If you’re constantly fighting leaks, it’s time to check if your machine boiler is accumulating lime scale, as mineral buildup creates backpressure that forces fittings to loosen prematurely. #IMAGE_PLACEHOLDER_E#
The Maintenance Kit I Keep in My Hidden Drawer
You don’t need a massive hardware store in your kitchen to keep your station running like a professional cafe. I rely on three specific items: a high-quality pliers-wrench, a tube of food-grade silicone grease, and several clean microfiber cloths. These are essential for mastering the art of home espresso without losing your mind to gear damage. I also recommend checking out our guide on choosing the best barista gear for high-quality maintenance accessories that actually last. If you ever find your grinder adjustment ring that won’t budge, remember the ‘gentle torque’ rule we applied to the chrome nuts today—force is rarely the answer.
Take Pride in Your Precision Coffee Gear
There is a specific kind of zen that comes from using a machine that doesn’t rattle, hiss, or leak. By taking these small, protective steps for your top-rated espresso machines, you’re ensuring that the only thing you have to focus on is the flavor in the cup and the texture of your milk in your milk frothers. Don’t be afraid to get your hands a little dirty (and your wrenches a little taped). The reward is a machine that looks as good as it performs for decades to come. Have you ever accidentally scratched your machine while trying to fix a minor leak? Tell me your ‘horror story’ in the comments below!