The Best Way to Backflush a Spring Lever Espresso Machine
It happened during one of those early morning rituals I cherish—while trying to coax a perfect shot of espresso, I noticed my machine wasn’t performing as smoothly as it once did. The pressure felt off, and there was an odd, persistent echo of gurgling sounds. In that moment, I realized I had neglected something crucial: cleaning the internal parts, specifically through backflushing. That lightbulb moment revealed how overlooked maintenance like backflushing can make or break the quality of our coffee and the longevity of our beloved machines.
Why Backflushing Is the Heartbeat of a Healthy Spring Lever Espresso Machine
Backflushing often feels like a tedious chore, something easy to procrastinate or overlook. Trust me, I’ve been there! But it’s actually the secret weapon for maintaining optimal performance, especially for spring lever espresso machines. These beauties require a bit more TLC because of their intricate valve systems and precise pressure controls. When I first started, I made a classic mistake—using the wrong cleaning agent or skipping the process altogether, which led to clogged ports and inconsistent shots. The result? Frustration, wasted beans, and premature wear.
The good news is, once I learned the proper backflushing technique, everything changed. Espresso shots became brighter, the machine responded more swiftly, and I avoided costly repairs. Proper backflushing clears out coffee oils, mineral build-up, and old coffee residues that sabotage flavor and performance. It’s not just about cleanliness; it’s about preserving the soul of your machine.
In this guide, I’ll walk you through the most effective way to backflush a spring lever espresso machine, based on my personal experience and expert advice. Whether you’re a seasoned home barista or just getting started, understanding this process will boost your confidence and your coffee quality.
Is Backflushing Really Necessary, or Just a Fad?
You might be skeptical—after all, it’s extra work. I get it. I used to think a quick rinse was enough. But neglecting backflushing can cause build-up, stiffen valves, and lead to uneven pressure during extraction. Early on, I ignored this, thinking my machine was fine. But the truth is, even small amounts of coffee oil that remain after brewing can become rancid and clog the pathways, affecting taste and machine health. For more insights on maintaining your gear effectively, check out [The Best Way to Store Your Milk Frother](https://espressotechguide.com/how-to-store-your-milk-frother-to-keep-it-sanitary), which emphasizes routine maintenance.
Do you experience inconsistent shots or strange noises when pulling your espresso? If so, chances are you’re overdue for a proper backflush. Stay tuned—next, I’ll share the simple steps I follow to keep my machine in tip-top shape and ensure every cup tastes as good as the first.
Prepare Your Workspace and Gather Supplies
Start by turning off your espresso machine and unplugging it for safety. Gather your cleaning tools: backflush detergent designed for espresso machines, a blind filter (a solid filter basket), and a soft cloth. Having everything within reach ensures a smooth process and prevents interruptions during cleaning.
Perform a Basic Pre-Rinse
Before backflushing, remove the portafilter and run hot water through the group head for about 10 seconds. This clears loose coffee residues and warms the components, making the cleaning process more effective. Think of it as rinsing your hands before cleaning—prep work that sets the stage for thorough cleaning.
Insert the Blind Filter and Add Detergent
Place the blind filter into your portafilter, then add a small amount of espresso machine-specific cleaning detergent—about half a teaspoon—into the blind filter. Secure the portafilter tightly. This setup allows the detergent to circulate through the system when pressure is applied, effectively breaking down coffee oils and mineral deposit buildup.
Engage the Group Head for Backflushing
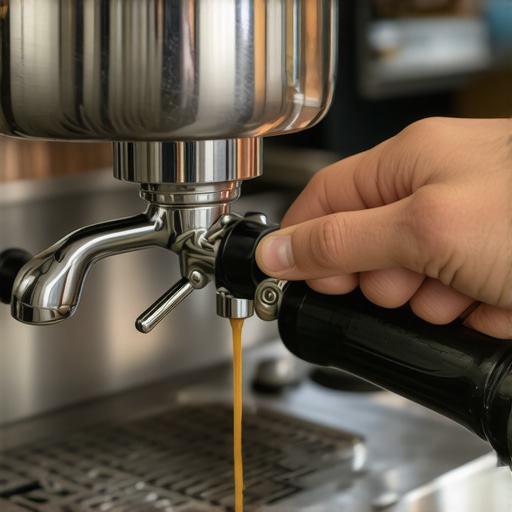
Attach the portafilter with the blind filter to the machine’s group head. Close the steam wand valve or any other outlets to isolate pressure. Turn on the machine and pull a short shot—about 5 seconds—then stop. Repeat this process 4-5 times to push the cleaning solution through the internal channels.
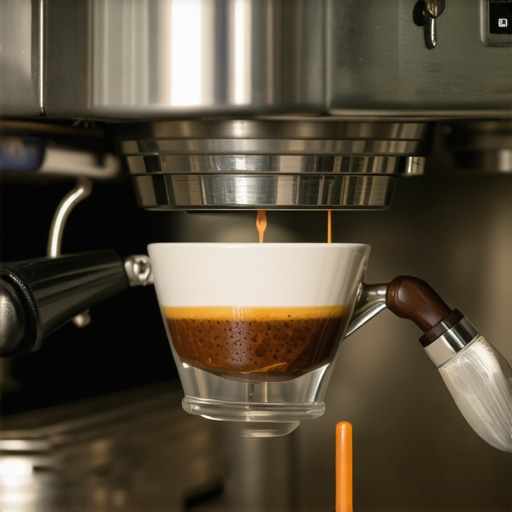
Imagine the pressure building as the detergent circulates, breaking down stubborn coffee oils much like a deep scrub clears grime from a stubborn stain. This is the heart of backflushing—detergent working inside valves and tiny channels where coffee residues hide.
Flush the System with Clean Water
Remove the blind filter and replace it with an empty one. Run the machine with just water—pull several short shots until the water runs clear. This rinses out any remaining detergent, preventing flavor contamination and ensuring your machine is pristine and ready for use. Think of it as rinsing a paintbrush—vital to prevent unwanted streaks.
Inspect and Maintain the Internal Components
Unplug the machine and carefully clean the portafilter, blind filter, and shower screen with a brush or cloth. Check the group head gasket and valves for signs of wear. Regular maintenance here prevents clogs and prolongs machine life, similar to oiling hinges to keep them working smoothly.
Tip for Consistent Results
Establish a routine—perform this backflushing process weekly if you use your machine daily. Consistency keeps internal passages clear, ensuring your espresso always tastes as vibrant as when you first got your machine. For equipment that needs more TLC, consider consulting [how to choose a coffee grinder](https://espressotechguide.com/how-to-select-the-perfect-coffee-grinder-for-your-brew) to optimize your setup further.
Many home baristas fall into subtle traps when selecting or using espresso gear, often believing they’ve got the fundamentals down. However, even seasoned enthusiasts can overlook nuanced factors that impact the quality of their coffee and the longevity of their equipment.
Why Everyone Gets It Wrong About Entry-Level Espresso Machines and Grinders
Contrary to popular belief, choosing the most affordable or highly-rated machine isn’t always the best path to stellar espresso. Many assume that a budget machine can produce cafe-quality shots if it has flashy features or high wattage. In reality, nuances like boiler stability, pressure profiling, and build quality matter more than specs on a box. Likewise, many overlook the importance of proper grinder tuning, which directly affects extraction consistency. For advice on selecting equipment that truly suits your skill level and goals, visit [how to choose a coffee grinder](https://espressotechguide.com/how-to-select-the-perfect-coffee-grinder-for-your-brew).
Common Myths About Milk Frothers and Foam Quality
There’s a widespread assumption that fancy milk frothers automatically produce better microfoam. But, as I’ve discovered through trial and error, the key lies in technique and equipment coordination. Manual or steam wand methods, when executed correctly, yield superior results compared to cheap electric devices. Don’t be seduced by marketing claims; instead, focus on the quality of your pitcher and tip control. Check out [milk frothers that transform your coffee experience](https://espressotechguide.com/milk-frothers-that-transform-your-coffee-experience) to see what truly makes a difference.
Advanced Mistakes and How to Avoid Them
One of the trickiest pitfalls is neglecting routine maintenance—cleaning, calibrating, and replacing parts like gaskets. Skipping these steps might seem harmless, but they cause subtle degradation in shot quality and machine health over time. Furthermore, many overlook the importance of precise tamping and puck preparation; uneven tamping leads to channeling and under-extraction. For expert tips on optimizing tamping technique, explore [why your coffee puck is slipping](https://espressotechguide.com/why-your-coffee-puck-is-sticking-to-the-group-head-and-the-simple-flush-fix).
Is Your Setup Truly Optimized or Just Imitating Gear?Maintaining your espresso equipment isn’t just about cleanliness—it’s about implementing the right tools and routines to ensure long-term performance and consistency. One of my favorite investments has been a high-quality, digital calibration scale. I personally rely on the [35-gram precision scale](https://espressotechguide.com/why-your-espresso-scale-lags-and-how-to-fix-flow-rate-timing) because it provides immediate feedback during extraction, helping me dial in each shot with pinpoint accuracy. This small but powerful tool has dramatically improved my ability to fine-tune grind size and tamping pressure, leading to richer, more balanced espresso every time.
Another tool I swear by is a set of high-quality, stainless-steel cleaning brushes. Regularly cleaning the shower screen and group head with these brushes preserves the efficiency of your machine. I recommend dedicating a few minutes each week to this task, especially if you’re using your machine daily. This practice prevents clogging from coffee oils and mineral deposits, which can cause uneven pressure and extracted flavors.
For grinding consistency, investing in a grinder with stepless adjustment capabilities has been a game changer. I prefer models that allow for micro-tuning, so I can precisely adjust grind fineness without the frustration of clicking through fixed settings. Consistent grind size is crucial for reliable extraction, which impacts both flavor and machine longevity. Proper tuning of your grinder paired with a quality scale can help you achieve shot after shot of barista-quality espresso.
In terms of long-term results, consistently using filtered or distilled water minimizes mineral buildup inside your boiler and water pathways. Over time, mineral deposits can impair heat transfer and pressure stability. Regularly descaling your machine, following the manufacturer’s guidelines, extends its lifespan and ensures peak performance. I recommend setting a reminder every 3-6 months based on your water hardness, which you can easily test with a water hardness kit.
As for scaling your setup, consider upgrading your milk frother to a commercial-style steam wand if you’re serious about microfoam. The control and temperature stability offered by a professional wand enable you to craft latte art and textured milk that rivals cafes. Additionally, incorporating a backup reservoir or a water softening system can prevent downtime due to mineral clogging or water quality issues. As industry expert [James Hoffmann](https://espressotechguide.com/why-your-coffee-beans-are-sticking-to-the-inside-of-your-grinder-chute) points out, routine calibration and maintenance are essential for consistent results.
### How do I maintain my espresso setup over time?
A focus on diligent cleaning, proper calibration, and appropriate water treatment forms the foundation of a reliable espresso routine. Use tools like a precision scale to fine-tune each shot, invest in quality brushes for internal cleaning, and stay disciplined with descaling schedules. Over time, these small investments and habits will provide long-lasting benefits, including flavor improvements and equipment longevity.
To elevate your maintenance game, try incorporating a routine of weekly backflushing with a proper cleaning agent—this prevents the buildup of oils and mineral deposits that can silently degrade your machine’s performance. Remember, equipment that runs smoothly and consistently yields the best coffee, saving you money and frustration in the long run. For more techniques on optimizing your gear, check out [mastering the art of home espresso](https://espressotechguide.com/mastering-the-art-of-home-espresso-tips-for-beginners).
Lessons That Changed My Espresso Routine — No One Tells You This
One of the most profound realizations I had was that maintaining my espresso machine isn’t just about cleaning—it’s about understanding the delicate balance of internal hydraulics and how neglecting them silently sabotages flavor. I used to overlook the importance of regular backflushing, thinking a rinse was enough, until I faced inconsistent shots and unexplained noises. That lightbulb moment made me appreciate how every shot is a reflection of what’s happening inside, and routine maintenance is the key to unlocking its full potential.
Another lesson was discovering the subtle signs of buildup—like reduced pressure or strange gurgling—that signal when backflushing is overdue. Listening to these cues saves me from costly repairs and keeps my machine running smoothly. This personalization of maintenance routines has deeply transformed my approach, turning what once felt like a chore into a ritual of care that elevates my coffee experience.
Finally, I learned that patience during the backflushing process earns richer, more consistent shots. Rushing through the steps only masked problems, whereas thoughtful, deliberate cleaning revealed issues early and improved overall performance. These insights, gained through trial and reflection, have given me confidence and a sense of mastery I never thought possible with my home setup.
Tools and Techniques That Elevate Your Routine
Building upon my journey, I highly recommend investing in quality tools like a dedicated precision grinder and a set of high-quality brushes for internal cleaning. A digital calibration scale has been invaluable in dialing in shot timing, ensuring each brew is optimized. For detailed guides, those resources can provide step-by-step instructions, making routine maintenance less daunting.
Combining these with a good backflushing detergent and a reliable blind filter creates a regime that not only prolongs your machine’s life but also enhances flavor. Remember, the tools are only part of the equation—your consistency and attention to detail are what make the real difference. Regular descaling, water quality management, and user vigilance are your best allies in this pursuit of perfect espresso.
Let Your Passion Drive Your Progress
Every time I perform a thorough backflush, I remind myself that I’m not just cleaning a machine—I’m nurturing a beloved companion that crafts everyday miracles. The joy of pulling a shot that’s vibrant, rich, and full of life fuels my curiosity to learn more. Embrace the learning curve, celebrate small victories, and know that mastery comes with patience and persistence. Your journey into honing your barista skills begins with simple, consistent steps—so take action today and experience the difference.
Have you ever noticed subtle signs that your machine needed backflushing but ignored them? Share your experiences below, and let’s build a community of coffee enthusiasts committed to excellence!