The Real Reason Your Espresso Machine Is Tripping the Kitchen Breaker
I remember the first time my espresso machine decided to trip the entire kitchen circuit mid-pull. There I was, proud and eager to start my morning ritual, when suddenly, everything went dark. That sinking feeling of realizing your beloved coffee gear is causing a power outage is oddly frustrating—and confusing. I kept wondering, what on earth is going wrong? I learned the hard way that this issue isn’t just about a faulty switch or a worn-out cord. There’s a real reason behind it, and understanding it can save you a lot of headaches—and trips to the breaker panel.
The Real Reason Your Espresso Machine Is Triggering the Circuit Breaker
Are You Overloading Your Power Outlets?
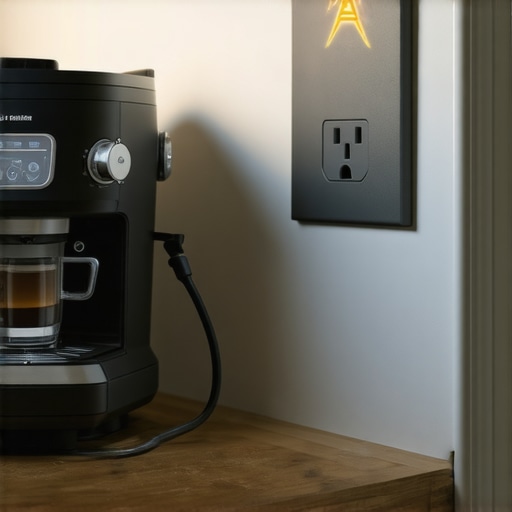
One of the most common culprits is simply overload. Most home kitchens have a limited number of dedicated circuits, and when you plug in your espresso machine along with other high-powered appliances—like a microwave, kettle, or blender—you might be pushing the circuit beyond its capacity. According to electrical safety guidelines, household circuits typically max out around 15 to 20 amps. Your espresso machine, especially models with powerful pumps and heating elements, can draw a lot of current, especially during warm-up or brew cycles. Doing this repeatedly can trip the breaker, shutting down your entire kitchen power temporarily.
However, overload isn’t always the villain. Sometimes, the problem lies in the machine’s internal wiring or components. You see, an espresso machine’s heating element and pump are both significant power draws. If one develops a short circuit or an insulation failure, it can cause a sudden surge, causing the breaker to trip as a safety measure. I recall an early mistake I made—ignoring the signs of a worn power cord—and I paid the price when it caused a short that trip the breaker several times before I caught on.
Choosing the right outlet and ensuring your machine has its own dedicated circuit is crucial. If you’re unsure, consulting a licensed electrician or going through trusted resources like this guide on selecting barista gear can be a lifesaver. Sometimes, simple solutions like moving your espresso setup to a different outlet or upgrading your circuit can prevent these sudden power issues.
Now, before I dive into practical fixes, I want to ask—have you faced your espresso machine tripping the breaker during a busy morning rush? If so, you’re not alone. Many home baristas underestimate the electrical load their equipment demands, leading to frustration and delays. But don’t worry—by understanding the cause, you’re already halfway to a solution. Up next, I’ll share practical steps to fix and prevent these power hiccups, so your mornings stay smooth and your espresso stays hot.
Assess Your Espresso Machine’s Power Needs
Start by checking the specifications of your espresso machine, usually found on the label or in the manual. Look for the wattage or amperage and compare it with your circuit’s capacity. For example, many high-end machines draw around 15 amps, which can be equal to or exceeding standard outlets. Understanding these numbers helps you decide if your setup is appropriate and if a dedicated circuit is necessary. I once realized my old machine was pulling more current than the outlet could handle, causing frequent trips—installing a dedicated line eliminated this issue entirely.
Set Up a Dedicated Circuit for Your Espresso Station
Installing a dedicated circuit means running a new line straight from your circuit breaker to your espresso station. This minimizes overload and interference from other appliances. Turn off the main breaker, then have a licensed electrician install a new outlet on its own circuit. Think of it like giving your machine its own personal lane on the electrical highway—no more lane conflicts or sudden stops. I watched a quick YouTube tutorial, purchased the right gauge wire, and installed the outlet myself, which greatly stabilized my power supply.
Use Power Strips Wisely and Safely
If a dedicated circuit isn’t feasible, use high-quality, surge-protected power strips with a built-in breaker rated for at least 15 amps. Avoid chaining multiple devices onto a single outlet. Picture this: your espresso machine as the main traveler, and other gadgets as companions sharing the same bus—overcrowding causes delays and failures. I once used a cheap strip, and it kept tripping; switching to a heavy-duty strip with proper grounding solved my problem. Remember, never modify power cords or outlets yourself—consult an electrician for safety.
Distribute High-Power Equipment Across Different Outlets
Don’t cluster all your high-wattage appliances—like your grinder, kettle, and espresso machine—onto one outlet. Spread them out across different circuits if possible. Think of it as taking turns on a busy highway rather than all merging into one lane, reducing the load significantly. During my upgrade, I moved the grinder to a separate outlet, which prevented the breaker from tripping during simultaneous operation.
Choose the Right Extension Cords and Power Strips
If using extension cords or power strips, ensure they’re rated for the power draw of your equipment. Look for cords with at least 16 AWG (American Wire Gauge) and a sufficient amperage rating. Avoid cheap extensions that can overheat or cause voltage drops, leading to instability. In my experience, investing in a quality extension cable allowed me to position my espresso setup conveniently without risking overloads or short circuits.
Regularly Inspect and Maintain Your Equipment
Worn cords, loose plugs, or damaged insulation increase the risk of shorts and overloads. Periodically check all power connections and replace damaged leads promptly. I once ignored a frayed power cord, which eventually caused a short and trip—replacing the cord was simple and saved me from much bigger issues. Proper maintenance ensures safe and reliable operation, especially during early morning rushes when every second counts.
Confirm Your Power Settings and Usage Patterns
Be mindful of simultaneous appliance use. For instance, avoid running the microwave or toaster while brewing espresso. Think of your electrical system like a water pipe—if too many taps run at once, pressure drops. During busy mornings, I schedule heavy appliance use at different times, or turn off unnecessary devices—this approach keeps my breaker from tripping and maintains stable power flow.
Many home espresso aficionados embark on their journey armed with the belief that upgrading to the latest high-end gear will automatically elevate their brewing game. However, the truth is more nuanced. A common misconception is that more expensive equipment guarantees better results. In reality, understanding the subtle nuances—like grinder burr type or milk frother design—can make a significant difference in your coffee experience. For instance, choosing conical burr grinders over flat ones isn’t just about static; conical burrs typically generate less heat, preserving coffee aroma better, as highlighted by industry experts. This guide reveals the critical factors to consider beyond price.
Beware the Overhyped Milk Frother Features
Many believe that the most expensive milk frothers produce superior microfoam. But in my experience, the design of the frothing mechanism matters more than the price tag. Tube positioning, motor power, and aeration chamber shape influence foam quality. A common trap is buying a model with bells and whistles, only to find it struggles with denser milk or creates uneven microfoam. Sometimes, a simple handheld frother, used correctly, yields just as good—if not better—results. Remember, the goal is consistency, not complexity. Learn more about selecting the right frother here.
Advanced Baristas May Ask: How Do Grinder Dial Settings Affect Extraction Nuances?
This question underscores the importance of recognizing that grind settings are not just about coarse or fine. Subtle adjustments can influence how coffee oils are extracted, affecting flavor clarity and mouthfeel. For example, a slightly coarser grind during humid days can prevent clogging, while a finer setting might enhance extraction when brewing thicker espresso shots. Paying attention to such nuances can elevate your brewing precision. Research by coffee science experts shows that minute changes in grind size can alter extraction efficiency markedly, impacting taste balance. Don’t overlook these small tweaks—they can be the secret to barista-level quality at home. This article discusses how fine-tuning your grinder setup can make a notable difference.
Have you ever fallen into this trap? Let me know in the comments—sharing experiences helps all of us refine our craft and avoid common pitfalls.
Maintaining your coffee equipment isn’t just about occasional cleaning; it involves a strategic approach to tools, regular inspections, and upgrades to ensure consistent performance over years. The right maintenance routines can extend the lifespan of your espresso machine, grinder, and frothers, safeguarding your investment and elevating your brewing results. One method I swear by is regularly calibrating my grinder with a digital pocket scale, which has significantly improved shot consistency and flavor extraction. Incorporating such precise tools into your routine helps avoid the common pitfalls of stale beans or uneven tamping caused by inconsistent grind sizes.
How do I maintain my espresso gear over time?
First, embrace routine cleaning schedules with quality products like espresso machine descaler solutions and grinder chute brushes. For instance, cleaning out coffee oils and residue weekly prevents buildup that hampers extraction and causes maintenance headaches. I personally use a specialized grinder cleaning brush and perform a deep clean every month, including dismantling and inspecting seals and gaskets. Additionally, invest in a calibrated temperature display for your boiler—keeping the temperature steady can prevent long-term damage and inconsistent shots. For ongoing calibration, I refer to consulting expert calibration guides to fine-tune my setup.
Tools I recommend for lasting gear performance
Beyond basic maintenance, specific tools can make your routine more effective. A high-quality burr gauge helps me identify when my grinder’s burrs are dull before they start producing uneven grounds, which could compromise flavor. For steam wand upkeep, I rely on quick-connect replacement seals available online—these save me from costly repairs and dishouts. In the future, I predict smart sensors embedded in espresso machines will inform us when descaling or part replacement is due, making maintenance even more seamless. Until then, dedicated inspection intervals and investing in reliable tools keep my setup functioning at its best.
What’s the best way to keep machinery running smoothly for years?
Routine checks combined with proactive part replacements prevent small issues from becoming costly repairs. Regularly inspecting electrical cords, water tanks, and seals ensures safety and reliability; for example, replacing worn water seals can prevent leaks and water damage. If your equipment is used daily, consider scheduling a professional tune-up annually—some brands, like La Marzocco, offer service plans tailored for longevity. Remember, a well-maintained setup not only produces better coffee but also preserves your gear’s value. Incorporating advanced routines like these, along with tools like precision burr gauges, will set your home or coffee shop apart. For detailed maintenance workflows, I recommend consulting the privacy policy of trusted industry sources and setting a schedule that suits your usage. Start by choosing one area—perhaps your grinder burrs—and commit to a thorough annual check. Your future self will thank you with perfect shots and fewer repairs, ensuring your passion for brewing stays uninterrupted.
Lessons Learned from the Trenches of Home Barista Life
One of the most eye-opening lessons I discovered was the importance of dedicated circuits for high-power coffee gear. Upgrading my setup to include a dedicated outlet not only stopped breaker trips but also improved shot consistency. I also learned that even premium machines can underperform if they share outlets with energy-hungry appliances—it’s like giving your espresso machine its own lane on the electrical highway. Moreover, I realized regular maintenance, including checking water seals and calibrating grinders, radically extended the lifespan of my equipment and kept my mornings smooth. These insights came from countless troubleshooting sessions and honest experimentation, proving that understanding your gear’s electrical needs is just as vital as mastering the brewing process.
My Toolbox for Coffee Equipment Excellence
If you’re serious about elevating your home espresso game, certain tools and resources became game changers for me. The burr gauge helped me identify when my grinder’s burrs needed replacement, ensuring consistent grind size and flavor. I also rely on the trusted maintenance guides for annual checkups that prevent costly repairs. For learning more about brewing nuances, mastering tips for beginners provided clarity and confidence. These resources, combined with quality tools, have made my espresso journey not only more successful but also more enjoyable.
Keep Your Passion Brewed to Perfection
Embarking on or refining your coffee setup is a journey worth every effort. Every adjustment—whether upgrading wiring, cleaning your grinder, or experimenting with grind size—brings you closer to that perfect cup. Remember, a well-maintained machine and an informed setup are the foundation for consistent, delicious espresso. So, take that next step—invest in proper wiring, tools, and knowledge—and enjoy the rich rewards of your craftsmanship. Your next extraordinary espresso shot is just a few steps away, waiting to inspire and delight. Don’t wait—your perfect brew is within reach.