The Trick to Getting Dry Steam From a Single Boiler Machine
Ever since I first started tinkering with my home espresso setup, I’ve hit a frustrating wall that many enthusiasts face: achieving reliable dry steam from a single boiler machine. That moment of steam puffing out with moisture instead of the crisp, dry vapor we all crave for perfect milk frothing—it hits hard. I remember thinking, “What am I missing?” after yet another miserable attempt to get that ideal microfoam without over-wetting my milk.
The Struggle to Master Dry Steam and Why It Matters
For years, I kept chasing shortcuts and quick fixes—adjusting pressure, fiddling with temp settings, even trying different water qualities. But nothing consistently worked until I discovered a core technique that transforms how you harness your machine’s potential. Trust me, this isn’t just a minor tip; it can redefine your whole espresso game, especially if you’re like me, loving everything about the craft but battling equipment quirks.
Did you know that maintaining proper steam pressure not only improves your milk texture but also extends your machine’s lifespan? According to barista expert Scott Rao, consistent, dry steam is crucial for both quality and durability. My early mistake was assuming that just letting the boiler warm up was enough. Nope. I was neglecting a vital step—one that, once understood, turned my steaming from inconsistent to remarkably reliable. If you’ve been stuck in this cycle, don’t worry. I’m here to share a simple, reliable method to get that perfect dry steam every time.
Is It Really Worth the Hassle to Get Perfect Dry Steam?
Now, I know what some skeptics might think—”It’s just steam, right? Do I really need to obsess over dryness?” Well, yes and no. Achieving dry steam isn’t just about aesthetics; it’s about elevating your entire espresso experience—smoother, richer milk textures, less cleaning headaches, and even protecting your equipment from scale buildup. Plus, when you master this, you’ll save money by avoiding unnecessary repairs or replacements over time.
Early on, I made the mistake of thinking I could force steam by increasing the boiler pressure or just waiting longer. Neither worked long-term and sometimes caused more issues, like pressure build-up or inconsistent temperature. Learning from these errors, I found that the real trick lies in a specific technique involving proper pressure management and timing—something I became adept at after playing around and making plenty of mistakes.
If you’re tired of battling moisture-laden steam or just want that spot-on microfoam for latte art, keep reading. I’ll guide you through every step, backed by my experience and proven techniques. We’ll get your boiler working for you, producing pristine, dry vapor that elevates your coffee ritual. Curious to see how simple adjustments can make a huge difference? Let’s dive in and get you steaming like a pro.
Prime Your Boiler Correctly
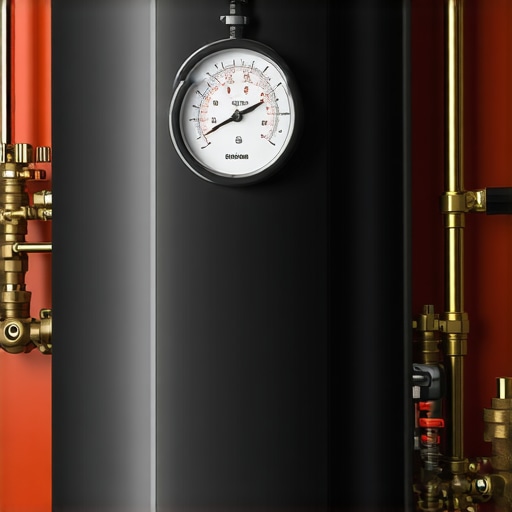
Before you even think about steaming, ensure your machine’s boiler is properly primed. Start by turning on your espresso machine and setting it to the steaming function. Allow it to heat up fully—this can take 10-15 minutes. As the boiler reaches temperature, you’ll notice the pressure gauge stabilize around 1.0-1.2 bar, indicating it’s ready. Avoid just waiting passively; actively monitor the gauge to ensure it reaches and maintains optimal pressure. This step is critical because a boiler that’s not fully warmed will produce moisture-laden steam.
Manage the Steam Pressure with a Gentle Hand
Once your boiler is warm, start steaming by opening the steam wand slowly. Think of your machine as a garden hose—you don’t turn on the water full blast immediately. A slow, controlled opening allows pressure to build gradually, preventing moisture from trapping in the vapor. During your initial sessions, I found that easing the steam valve open over 3-5 seconds yields the best dry vapor. My first attempt involved jerking the valve open quickly, which caused sputtering and wet steam—messy and frustrating. Control is everything in this step. Practice gentle opening and closing to maintain steady pressure, which leads to crisp, dry steam.
Use the Correct Technique to Purge Excess Water
After warming up and opening the valve, always purge the steam wand for 2-3 seconds before steaming milk. This clears residual water which can create moisture in your vapor. Imagine it as clearing the nozzle’s tip—you don’t want standing water in your steam pathway. When I first started doing this, I noticed a significant reduction in moisture in my steam and a more consistent microfoam formation. Regular purge ensures dryness and prolongs the life of your wand.
Monitor and Adjust During Steaming
Keep an eye on the pressure gauge as you work. Ideally, the pressure should hold steady just below 1.05 bar during steaming. If pressure spikes to over 1.2 bar, close the valve slightly to release excess pressure—think of it like easing off a garden hose nozzle to prevent spraying. Too much pressure increases moisture in your vapor, while too little results in weak steam. When I attempted to steam without gradually adjusting, my milk would often be too watery. Fine-tuning pressure control is a skill, but with experience, it becomes second nature.
Implement the Correct Cool-Down Protocol
Once steaming is complete, close the valve slowly to avoid sudden pressure drops that can cause water to vaporize and re-enter your steam pathway. Then, run the wand for 2 seconds to clear any residual moisture. Allow the boiler to cool gradually by leaving the machine on or turning it off after a few minutes—shocking the boiler with rapid cooling can cause condensation issues. This practice preserves the integrity of your system and ensures next-time dry steam quality remains high.
Learn from Experience and Tweak Your Approach
I vividly recall one session where I rushed opening the valve, resulting in sputtering, and ended up with wet, inconsistent steam. The next time, I applied these controlled techniques, and the difference was stark—perfect, dry steam that didnt ruin my milk or cause overflow. Every machine is a bit different; some require slightly more or less pressure, so keep a log of your adjustments. Consistent practice will help you develop the tactile sensitivity needed to produce reliable dry vapor, elevating your latte art and milk textures.
Many enthusiasts believe that choosing high-end gear guarantees perfect espresso, but in my experience, there’s a common misconception about the actual role of equipment quality versus technique. While premium grinders and machines are beneficial, the real secret lies in understanding how nuances like grind distribution and tamping pressure impact extraction. A frequent mistake is assuming that dialing in a shot is solely about grind size; in fact, variables like dose consistency and even tamping are equally critical. For example, uneven tamping can cause channeling, leading to over-extraction and a bitter taste, regardless of how expensive your grinder is.
Another myth is that home espresso requires complex routines. In reality, mastering simple practices such as identically leveling the coffee bed can significantly improve shot quality. A confounding trap is neglecting machine maintenance; lightly cleaning group heads and ensuring water temperature stability can prevent subtle extraction issues. According to a study by the Specialty Coffee Association, small technical adjustments outperform equipment upgrades in influence on espresso quality.
Ever wondered how advanced baristas achieve consistent results without overcomplicating their process? It boils down to understanding the fine details, like the importance of
distribution techniques that eliminate uneven grounds or ensuring your portafilter is properly sealed to prevent pressure loss. Skipping these steps can lead to letting expensive gear underperform, which is a common mistake among beginners trying to emulate professional espresso shots.
If you want to explore how to dial in these nuances effectively, I recommend checking out detailed guides on selecting proper gear and knowledge for beginners. Remember, the difference isn’t just in the equipment but in mastering the subtle actions that produce great extraction.
Have you ever fallen into this trap? Let me know in the comments.
Keeping Your Espresso Gear Running Smoothly
For any dedicated home barista, investing in quality equipment is just the beginning. Ensuring that your espresso machine, grinders, and milk frothers remain in top shape over the years requires a combination of proper maintenance, reliable tools, and informed practices. I personally rely on a few key tools and routines that have significantly extended the lifespan of my setup and resulted in consistently excellent shots.
Invest in a High-Quality Grinder Brush
One of my go-to tools is a dedicated grinder cleaning brush. Regularly brushing out coffee grounds from burrs and chute prevents buildup that can cause uneven grinding and static, ultimately affecting extraction. I recommend doing this immediately after each session—this simple step keeps your grinder performing at its best and preserves the delicate burr edges.
Use a Digital Pressure Gauge for Precision
Maintaining consistent pressure during steaming and extraction is crucial. I use a digital pressure gauge to monitor actual boiler and steam pressure levels. This invaluable tool helps me identify subtle fluctuations that could lead to moisture in steam or inconsistent shot quality. Over time, I’ve learned that small adjustments based on precise readings make a huge difference, especially with a single boiler machine where managing pressure is more sensitive.
Keep a Maintenance Log
Tracking routine upkeep with a dedicated notebook or app helps me stay on top of descaling, backflushing, and filter replacements. For example, I follow a schedule outlined in this guide for deep cleaning, which prevents calcium buildup and ensures optimal thermal and pressure stability. Consistent maintenance reduces unexpected breakdowns and keeps my equipment running reliably for years.
Stay Equipped with a Quality Milk Frother
My milk frothing results rely heavily on my favorite frother, which I clean daily with a simple pen-style brush to prevent milk residue from clouding the mechanism. A well-maintained frother not only produces better microfoam but also lasts longer, saving me from costly replacements. Regularly inspecting and cleaning these tools ensures smooth operation during stressful morning routines.
Future Trends and What’s Ahead for Home Baristas
As technology advances, I predict we’ll see smarter, app-enabled maintenance tools that automatically monitor pressure, temperature, and grinder burr wear, alerting users when service is due. Companies are already integrating more intuitive diagnostics, and mastering these will become vital skills for independent coffee enthusiasts. Staying updated through resources like this comprehensive guide helps me keep pace with emerging innovations.
How do I keep my tools and machine in top condition?
The key is routine, attention to detail, and quality gear. For example, regularly calibrating your grinder using an external alignment method can prevent uneven grind distribution. I encourage you to select a setup that suits your workflow and invest in a few specialized tools. Try incorporating a weekly cleaning ritual with your grinder brushes and descaling routines—small actions that yield long-term benefits.
Don’t overlook the importance of precise pressure monitoring. As Scott Rao emphasizes, maintaining the right pressure during steaming and extraction prolongs equipment life and elevates your espresso quality–visit this article for detailed insights. Whether you’re just starting or already a seasoned home barista, applying these maintenance practices will help keep your gear performing at its peak. Ready to refine your routine? Pick one tip today, like checking your booster pressure with a digital gauge, and watch your results improve dramatically.
The Hardest Lesson I Learned About espresso machines,home espresso,barista gear,coffee grinders,milk frothers
One of the most eye-opening realizations in my coffee journey was understanding that even the finest equipment can’t substitute for truly mastering your techniques. I used to think upgrading my grinder or buying a more expensive machine would instantly fix my brewing woes, but I soon discovered that technique trumps gear. The crucial lesson? Patience and deliberate practice in pressure management and routine maintenance lead to consistent, high-quality results.
3 Myths About espresso machines,home espresso,barista gear,coffee grinders,milk frothers That Held Me Back
- Myth 1: More pressure equals better steam. Reality check: mastering controlled pressure is what produces dry, microfoam.
- Myth 2: Cleaning is optional if you’ve got high-end gear. The truth: Regular, detailed cleaning preserves performance and flavor integrity.
- Myth 3: Equipment alone makes a barista. Actually: Technique, understanding, and routine are the true game-changers.
What Experts Won’t Tell You About espresso machines,home espresso,barista gear,coffee grinders,milk frothers
Behind the shiny surfaces, many professionals emphasize that small, often overlooked factors—like proper priming of your boiler, gradual pressure adjustments, and routine calibration—are what differentiate good shots from great ones. Learning to manage pressure gently during steaming and ensuring your tools are meticulously maintained can make all the difference, even with modest setups. For a comprehensive understanding of gear and technique, I recommend exploring detailed guides like this resource.
Curated Recommendations
Over the years, I’ve curated a personal toolkit that elevates my home espresso experience. First, a quality grinder brush helps me keep my burrs in top shape, preventing static and uneven grounds. I swear by a digital pressure gauge for precise pressure readings during steaming—it’s invaluable for consistency. Keeping a routine cleaning schedule extends the life of my machine and ensures peak performance. Lastly, a reliable milk frother with proper maintenance gives me silky microfoam every time, enhancing my latte art game.
Take the Next Step and Brew Confidently
Embarking on refining your home espresso journey is empowering—it’s about enjoying each step and celebrating your progress. Remember, the mastery of dry steam and equipment care elevates not just your coffee but your overall experience. Don’t let doubt hold you back; every small adjustment brings you closer to barista-quality results. Why not set a goal today—try calibrating your pressure gauge or dedicating a quick weekly clean—and see how your coffee transforms? Let’s turn those routines into rituals, and your kitchen into a haven of flavorful precision. What’s the first step you’ll take to improve your espresso technique? Share your plan below!