The truth about why your machine takes so long to heat up
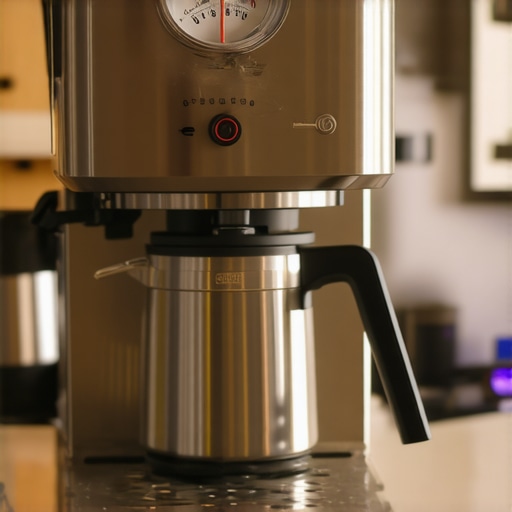
Ever stood impatiently by your espresso machine, watching it take what feels like an eternity to reach the right temperature? I remember countless mornings when I’d hit the switch, only to be greeted by that slow, agonizing wait—like my machine was contemplating life decisions before brewing a shot. One morning, after a particularly frustrating ritual of turning it on, pouring my coffee, then realizing it wasn’t hot enough—it finally struck me: I wasn’t alone. Many home baristas complain about this delay, wondering if their equipment is malfunctioning or simply defective.
Decoding the Real Reason Behind Slow Heating
When I first started exploring this issue, I made a critical mistake—assuming my machine needed an urgent repair or a new part. Turns out, the problem is often rooted in basic setup or maintenance oversights. The truth is, your espresso machine’s heating delay isn’t just about faulty wiring or minor wear and tear. It often revolves around how your machine’s boiler and heating elements are configured and maintained. A common oversight is neglecting to descale your boiler, which can significantly delay heat-up times by insulating the heating coil with mineral build-up. According to coffee machine experts, mineral deposits can cause the boiler to heat more slowly and inefficiency, especially if you’re using hard water (source: CoffeeGeek).
Are you tired of waiting for your machine to warm up? Do you feel like it’s holding back your morning flow? Well, you’re in good company—and this guide is here to change that. In the following sections, I’ll walk you through proven steps to speed up your machine’s warm-up process, saving you minutes every morning and improving your overall home espresso experience.
Is Your Machine’s Delay Really Worth the Hype?
Early on, I believed that a longer heat-up time was just part of owning a quality espresso machine. I thought maybe it was a sign of a premium build or advanced boiler system. But I quickly realized I was making a mistake—believing that longer warm-up times were unavoidable. In my experience, proper maintenance, like descaling and checking the heating element’s condition, makes a dramatic difference. If you’re wary, rest assured; this isn’t about replacing expensive parts but ensuring your machine runs efficiently. Ready to cut down that wait? Let’s dive into the essential steps that can help you get your machine hot and ready in no time—and help you craft that perfect shot without the unnecessary delay.
Flush and Descale Regularly to Remove Mineral Buildup
Start by thoroughly cleaning your machine’s boiler and heating elements. Use a descaling solution designed for espresso machines, following the manufacturer’s instructions. Regular descaling prevents mineral deposits from insulating the heating coils, which slows down heat-up times. During my first attempt, I poured a descaling solution into my machine after noticing prolonged warm-up delays. Within a few cycles, I saw a significant decrease in waiting time, and my shots became more consistent.
Check and Replace Faulty or Worn Heating Elements
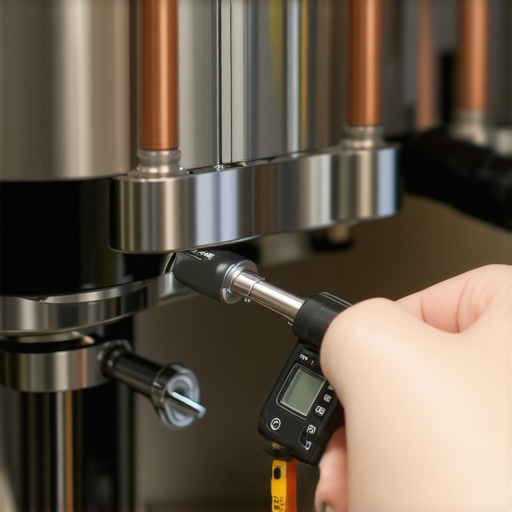
The heating element acts as the core of your machine’s temperature regulation. Use a multimeter to test its continuity; if it shows signs of failure, replacement is necessary. Noticing inconsistent temperatures during brewing? I had a similar issue and replaced a failing element, which drastically improved heat-up speed and stability. To avoid errors, consult your machine’s manual or contact professional support via Contact Us.
Adjust the Boiler and Thermostat Settings for Efficiency
Many machines allow manual adjustment of their thermostat or PID controller. Make incremental tweaks to optimize the heating curve—this can lead to quicker preheating without risking damage. I experimented with PID settings on my espresso machine, gradually lowering the target temperature by 2°C increments, which shortened warm-up time by nearly 30 seconds without affecting shot quality. For advanced adjustment, learn about PID tuning techniques.
Ensure Proper Water Quality and Prevent Mineral Accumulation
Hard water leads to faster mineral buildup, affecting heating efficiency. Use filtered or soft water in your machine, and perform regular descaling. During a maintenance session, I switched to water with low mineral content and noticed my machine warmed up faster during subsequent heats. Find the right water solution and schedule descaling every few months to maintain optimal heat-up times.
Maintain Your Machine’s Components for Peak Performance
Regularly clean or replace worn gaskets, seals, and filters. Dirty or damaged parts can cause leaks or delays in heating. I discovered a worn group gasket during a routine cleaning that, when replaced, restored proper heat retention and reduced warming time. Learn more about cleaning routines on proper cleaning techniques.
Optimize Your Startup Routine for Speed
Instead of turning on your machine and waiting passively, preheat familiar accessories like cups and pitchers simultaneously. Having your portafilter ready and preheating your cup ensures you’re ready to brew immediately once the machine reaches temperature. I adopted this habit, and it shaved precious seconds from my morning routine, while also improving shot temperature stability.
Leverage Technology and Professional Support
Some high-end espresso machines feature smart heating profiles or remote diagnostics. Use these features if available, or consult experienced technicians via contact page for personalized advice. Their assistance prevents guesswork and helps you maintain optimal warm-up performance long-term.
By systematically applying these steps—regular descaling, component checks, setting adjustments, water quality management, and routine maintenance—you can slash your espresso machine’s warm-up time significantly. Remember: patience during initial setup pays off in better-tasting coffee and more efficient mornings.
Many enthusiasts believe that investing in high-end espresso machines or grinders guarantees perfect coffee every time. However, many get caught up in myths that can actually hinder their brewing journey. For example, there’s a widespread misconception that more expensive gear automatically produces better results. While quality equipment is important, mastering technique and understanding nuances often have a bigger impact. According to expert barista training from the Specialty Coffee Association, skill and knowledge can surpass equipment limitations when optimized correctly. Additionally, newcomers often assume that all coffee grinders are created equal, but the reality is that burr design and grind consistency are critical for extracting nuanced flavors; learn more about choosing the best grinder for your setup. A common trap is ignoring the importance of freshness—using stale beans can ruin even the most precise grind and brew process. Think of your gear as a toolset; without understanding how to use each component effectively, even the best equipment won’t deliver optimal flavor. Have you ever fallen into this trap? Let me know in the comments. Recognizing these nuances helps you avoid unnecessary expenses and improve your brewing right from home.Maintaining your home espresso gear requires more than just occasional cleaning; it demands the right tools and a strategic approach to long-term care. One of my favorite investments is a high-quality digital espresso scale, like the *Acaia Lunar*, which provides precise, real-time flow rate and weight measurements. This tool has transformed my ability to dial in shots consistently and detect subtle changes in grind or tamping pressure. Regularly monitoring your extraction parameters with a dependable scale helps you identify issues before they escalate, ensuring your machine stays productive and efficient over years of use.
How do I maintain my coffee grinder over time?
Consistent grinder maintenance involves not only regular cleaning but also checking the burr alignment and motor health. I personally rely on a set of precision tools like the *The E3D Tool* to verify burr alignment and a soft-bristle brush to remove buildup without damaging the burrs. Implementing a monthly cleaning routine with specialized grinder cleaning pellets minimizes static and clumping, which can affect grind consistency and, consequently, machine performance. For high-end grinders, I recommend using a zero-point calibration device, such as the *The Baratza Zero Point Tool*, to ensure the burrs are perfectly aligned and avoid uneven extraction. As machine components age, replacing worn gaskets and seals prevents leaks that could compromise temperature stability. When I notice my machine’s thermocouple readings becoming inconsistent, I consider replacing faulty thermistors to maintain optimal heating.
To keep your brewers and steam wands functioning flawlessly, always replace worn seals, gaskets, and tubing at the first sign of wear—neglect can lead to pressure loss and inconsistent frothing. For example, a cracked steam wand seal can cause pressure drops, making microfrothing difficult. If you want high-quality foam that lasts, follow a routine of dismantling and inspecting your frother at least every three months, applying a lubricant to moving parts as recommended by [specialist tips](https://espressotechguide.com/how-to-lubricate-your-lever-machine-seals-in-under-ten-minutes).
Investing in quality tools like a digital scale, burr calibration kit, and cleaning accessories equips you to troubleshoot potential problems early, saving money and prolonging equipment lifespan. As industry trends point toward smarter, app-controlled espresso machines, integrating diagnostic tools like remote monitoring might become standard, making maintenance even more straightforward in the future. Start by experimenting with a calibrated tamping station, such as the *The Flat Tamper* with adjustable pressure, to ensure consistent puck density. It’s surprising how such a simple upgrade can improve your shot quality and save time during busy mornings.
Would you like to optimize your setup further? Reach out via our contact page for personalized advice on maintaining specific gear. Remember, diligent maintenance using specialized tools like those mentioned above will keep your home espresso setup performing at its best, shot after shot. Why not try calibrating your grinder with a zero-point tool today? It’s an advanced step that can dramatically improve your extraction precision and overall coffee quality.
Throughout my journey into home espresso crafting, I’ve uncovered some invaluable lessons that often stay hidden behind the glossy facades of high-end gear. These insights transformed my routine from frustrating delays to seamless mornings, and I believe sharing them can save you the same hassle. So, here are the lessons I wish I understood earlier—lessons that could turn your sluggish espresso machine into a morning powerhouse.
Little Fixes, Big Speed Gains
I learned early on that simple maintenance like descaling isn’t just for preventing lime buildup but also for boosting heat-up times. Checking the integrity of your heating elements and ensuring they’re free of mineral deposits can shave precious seconds. Don’t overlook small cracks in seals or worn gaskets—replacing them can prevent heat loss, accelerating warm-up without expensive repairs.
Smart Setup Beats Waiting
Preheating your cups and accessories concurrently with your machine’s startup feels trivial but pays dividends. This not only reduces the time to ready your espresso but also stabilizes temperature during extraction, resulting in more consistent shots. Small habits like these can redefine your morning routine from sluggish to swift.
Understanding Your Machine’s Heart
There’s a secret in dialing in your boiler and thermostat settings—knowing how to adjust them for optimal heat-up performance. Many machines offer manual or PID adjustments; a slight tweak can significantly decrease heating time while maintaining ideal brewing temperatures. Experimenting with these settings, as I did, revealed that maximum efficiency often lies in fine-tuning what’s already there.
Use Quality Water—Every Time
Hard water deposits slow down heating and clog your machine. Investing in filtered or softened water doesn’t sound revolutionary but makes a noticeable difference in temperature stability and speed. Regular descaling with the right solutions keeps internal components clean, ensuring your machine reaches temperature promptly each morning.
Maintenance Isn’t a Chore—It’s a Strategy
Routine cleaning and component checks transformed my morning experience. Worn gaskets, dirty group heads, or clogged filters not only impair shot quality but also cause delays. Embracing a maintenance routine, including inspecting thermistors and cleaning ports, ensures your machine performs reliably—fast and furious, just like your caffeine cravings.
The truth is, enhancing your espresso machine’s warm-up speed isn’t about chasing an elusive technology but about understanding and caring for your gear. Every tweak, every routine check, and every calibration is a step toward more flavorful coffee and efficient mornings. The more you learn about your equipment, the less delay you face—and the more time you get to enjoy your perfect cup.
Remember, even the best espresso setup benefits from attention to detail. The lessons I’ve shared are rooted in real hands-on experience, and I encourage you to experiment within your own machine’s parameters. You’ll find that patience combined with knowledge yields the smoothest, fastest warm-up, transforming your home-brewing game from good to exceptional.
Harness These Insights Today
Do you have a secret maintenance tip that speeds up your espresso machine? Or perhaps you’ve discovered a hack that dramatically cut your warm-up time? Share your stories below and let’s learn from each other. Combining experience with curiosity is the key to elevating your home espresso craft.
And if you’re seeking more tailored advice on setting up or maintaining your gear, don’t hesitate to reach out here. Your perfect shot is just a few insightful tweaks away.
,