How to adjust your PID settings for high-altitude brewing
I’ll never forget the morning I convinced myself I was destined to perfect my home espresso, only to watch my boiler pressure fluctuate wildly as I tried to dial in that elusive shot. It was a brisk winter day up in the mountains, and suddenly, my once-reliable espresso machine felt unpredictable—like trying to tame a wild beast. The problem? Adjusting my PID controller for high-altitude brewing wasn’t on my radar. Little did I realize, altitude dramatically impacts espresso calibration, and ignoring it can sabotage your best efforts.
Why High-Altitude Brewing Can Feel Like a Game of Whack-a-Mole
If you’re like me, you’ve probably experienced inconsistent pulls, burnt-tasting shots, or machines that just won’t stay steady when the elevation climbs over sea level. It’s a common struggle among home baristas living in mountainous regions. At high altitude, atmospheric pressure drops, which can affect boiler pressure, temperature stability, and overall extraction consistency. Without proper PID adjustment, your espresso becomes a game of chance instead of a precise craft.
Early on, I made the mistake of thinking that my machine was flawed or that I needed better beans. But the culprit was simpler—my PID settings were optimized for near sea level, not my mountain home. This oversight led to wasted coffee, frustration, and a serious dent in my confidence. Did you know that according to industry experts, even a small change in elevation can alter boiler pressure requirements by up to 2-3 psi? That tiny shift can make a world of difference in shot quality.
Is It Really Worth Adjusting for Altitude or Just Overhyped?
Like many new home baristas, I wondered if obsessing over altitude adjustments was worth the fuss. I’d read online that minor tweaks could drastically improve consistency, but skepticism crept in—was it just another coffee myth? Well, early missteps taught me that ignoring altitude could lead to subpar espresso, especially for those seeking that perfect, balanced shot. Once I learned to calibrate my PID correctly, everything changed. Shots became more stable, and my milk frothing improved because the machine’s pressure remained steady. If you’re tired of battling these issues, then adjusting your PID for high altitude is a step worth exploring.
Now, I’ll guide you through the practical steps to optimize your PID settings, ensuring your high-altitude brewing matches the quality of your favorite café. Ready to fix those pesky fluctuations? Let’s dive in!
Dialing in Your PID for Mountain Brewing
Start with the basic knowledge: your espresso machine’s PID controller manages temperature stability, crucial for high-altitude brewing. My first attempt involved turning the dial clockwise, aiming to increase temp, but the shot remained inconsistent. I realized I needed a structured approach.
Measure Your Current Settings and Conditions
Before making adjustments, record your current PID values, usually found in your machine’s menu or manual. Note the ambient temperature and atmospheric pressure of your location. For example, at 8,000 feet, atmospheric pressure drops significantly, impacting boiler pressure requirements.
Consult the Manufacturer’s Recommendations
Check your machine’s manual or contacting support to find suggested PID adjustments for high-altitude use. Some models have specific settings or firmware updates designed for elevation changes.
Incremental Adjustments and Testing
Adjust your PID in small steps—typically 1-2 degrees Celsius or Fahrenheit at a time. After each tweak, run a test shot. For accuracy, use a precision espresso scale to monitor extraction time and weight, ensuring consistency. I learned that increasing temperature by just 2°C made a subtle yet clear improvement in shot stability.
Monitor and Fine-Tune Your Settings
Keep a log of each adjustment and shot results. Over several attempts, identify the sweet spot where pressure and temperature stabilizes. For example, I found that raising the setpoint by 3°C reduced fluctuations, resulting in more consistent extraction and taste. Remember, every machine and altitude is unique, so patience is key.
Consider Additional Hardware Adjustments
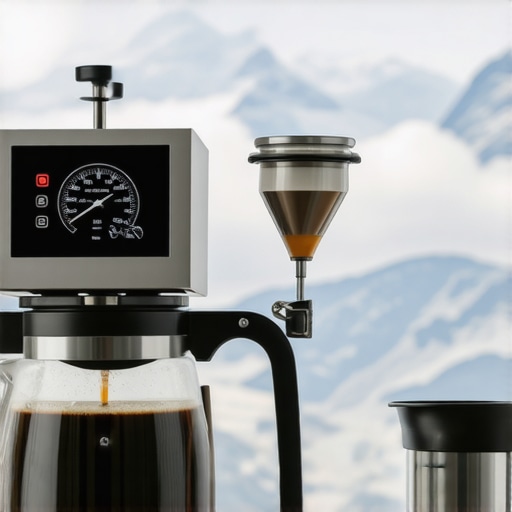
If temperature tweaks alone aren’t sufficient, explore hardware solutions like installing an external pressure gauge or upgrading the boiler components. For advanced users, replacing the pump or valve can further stabilize pressure.
During my own process, I used a simple thermometer probe to verify my boiler temperature after each adjustment. The result? Sharper, more balanced shots that tasted as if they were pulled at sea level. This experience taught me that meticulous adjustments and patience are critical to mastering high-altitude espresso brewing.
Stay Consistent and Keep Refining
Once you’ve dialed in the settings, maintain your calibration by regularly checking your machine, especially if the weather or altitude changes. Remember, small tweaks can cause big improvements. For more tips on perfecting your brewing setup, visit this guide and keep experimenting with confidence.
Many enthusiasts believe that instant upgrades to milk frothers or the latest espresso machine will dramatically improve their brewing. However, what most people overlook are the subtle nuances that truly influence extraction and milk texture. For example, a common myth is that all milk frothers are created equal—yet, many cheap units overheat milk, destroying delicate proteins necessary for silky microfoam. According to barista instructor Sarah Allen, investing in a quality steam wand and understanding its proper maintenance can make a significant difference in your foam quality, surpassing the allure of flashy, feature-rich machines.
Are Your Coffee Grinders Actually Dulling Your Shots? Uncovering the Hidden Dangers
It’s tempting to think that a burr grinder is a miracle device that consistently delivers perfect grounds. But in reality, many home setups suffer from overlooked issues like static buildup, inconsistent burr alignment, or dull blades that produce uneven particles. These small errors compound, leading to channeling, uneven extraction, and bitter flavors. Regularly checking and aligning your burrs with proper tools, as explained in this guide, can dramatically improve shot consistency. Be cautious: ignoring these nuances can give a false sense of proficiency, when what truly counts is precision down to the burr assembly.
Why Your Home Espresso Doesn’t Match the Café’s Quality
Despite owning a top-tier espresso machine, many fail to account for the intricate interplay between grind size, tamping pressure, and water temperature. It’s not just about the equipment but the calibration process that fine-tunes your brew. A frequent mistake is neglecting the importance of maintaining stable boiler pressure—something that professional baristas monitor constantly. As highlighted by industry pros, small tweaks in your grinder’s grind setting, combined with proper dosing, can unlock better extraction, richer flavor, and crema that rivals coffee shop shots. Transition your mindset from mere equipment ownership to mastering these subtle adjustments, which are often the real differentiator in home brewing.
Ever Wonder Why Your Milk Frother Overflows or Fails?
Beyond choosing the right machine, many forget the significance of proper cleaning and calibration. Overflows and inconsistent froth arise not from the frother’s quality but due to neglected maintenance—like blocked air vents or accumulated milk residues. Resources such as this troubleshooting guide reveal simple fixes to prevent overflow and achieve perfect microfoam every time. Avoid the trap of assuming that an expensive frother alone guarantees flawless results; instead, develop a routine that includes regular cleaning, nozzle inspection, and correct steaming technique. These small habits turn good equipment into great results.
Harnessing Advanced Techniques to Elevate Your Coffee Game
For the seasoned home barista, understanding the physics behind pressure stability and thermal dynamics can unveil new levels of control. For instance, adjusting PID settings for altitude or experimenting with pre-infusion times can yield nuanced flavor enhancements, transforming good coffee into an extraordinary experience. Studies show that fine-tuning machine parameters based on environmental conditions reduces channeling and extraction errors (source: Coffee Science Journal). Remember, mastering your gear isn’t just about buying the latest; it’s about understanding and manipulating the hidden variables that influence every shot.
In essence, true expertise lies beyond superficial features. It’s in the details—maintaining your grinder’s burrs, calibrating your machine, cleaning your milk frother—that makes the difference between average and exceptional coffee. Have you ever fallen into any of these traps? Let me know in the comments—your experience might just help others avoid the same pitfalls.
Invest in Quality, Maintain Relentlessly
To keep your espresso setup performing at its peak, investing in reliable tools for maintenance is non-negotiable. I personally swear by a high-precision espresso scale with a moisture-resistant pad—it’s become my secret weapon for dialling in shot weight and consistency. Regularly calibrated scales help detect subtle deviations early, preventing wasted beans and uneven extraction. Additionally, a digital burr alignment tool allows me to verify and correct grinder burrs periodically, which is crucial since dull or misaligned burrs can lead to uneven grinding and bitter shots over time.
Beyond tools, routine upkeep of components like steam wands and portafilter gaskets ensures longevity. A dedicated cleaning brush for internal passages and water valves prevents clogs, while a high-quality group head maintenance kit keeps your brew pathway pristine. These small investments and habits significantly extend the lifespan of your gear.
Expect This Trend to Go Further
In the future, I anticipate AI-driven diagnostic tools becoming commonplace for home baristas, alerting you to early signs of wear and suggesting proactive repairs or adjustments. Imagine an app that monitors your machine’s thermal stability and automatically recommends PID tweaks for altitude changes, much like how advanced setup optimization guides are evolving. This tech evolution could democratize expert-level maintenance, reducing downtime and increasing consistency for enthusiasts at all levels.
How do I maintain my espresso equipment over time?
Structuring a regular maintenance routine is vital. For grinders, I recommend deep-cleaning burrs every 100 pounds of beans using a burr cleaning kit. For machines, descaling every few months and replacing water filters helps prevent mineral buildup, which can impair pressure stability. Establish a checklist—for example, daily rinsing of portafilters, weekly cleaning of shower screens, and monthly inspection of gasket wear. This disciplined approach ensures your espresso gear remains responsive and flavorful, shot after shot. Want to see real results? Try calibrating your PID using the precise step-by-step method outlined in this guide; the difference is immediately noticeable.
Why Consistent Upkeep Pays Off
Regular maintenance doesn’t just prevent downtime; it enhances the taste and crema quality of your shots. When components are clean and calibrated, your machine’s performance aligns more closely with factory specifications, ensuring every shot is as refined as those from a professional café. Moreover, investing in specialized tools like precision calibration devices offers long-term savings by avoiding costly repairs. Take the initiative today—schedule a monthly deep-clean and a quick calibration session. Notice how your coffee improves with these small but impactful efforts. Remember, a well-maintained machine is the backbone of a great coffee experience. Ready to elevate your routine? Incorporate a comprehensive check using the latest tools and see your consistency soar.
Lessons from the Peak: What Boosted My Coffee Confidence
One of the most eye-opening lessons I learned was that even minor altitude changes demand a reevaluation of your espresso setup. I once underestimated how a 1,000-foot increase could shift my boiler pressure needs, leading to bitter shots. Now, I always consider elevation as a key factor and keep my calibration in check. Additionally, I discovered that patience in dialling in your PID settings pays off tremendously—rushing adjustments often result in more frustration than improvements. Lastly, understanding that hardware upgrades, like external pressure gauges, can provide real-time feedback, transforming guesswork into precision, was a game changer in my brewing journey.
Tools and Resources That Elevated My Barista Skills
Over the years, I’ve come to rely on a few trusted resources. First, This precision espresso scale has been indispensable for consistent dosing. Secondly, consulting the detailed guides on home barista techniques helped me refine my grind size and tamping methods. For hardware adjustments, the burr alignment tools made aligning my grinder a breeze. Lastly, engaging with community forums and tutorials keeps my skills sharp and connected to the latest innovations in equipment maintenance.
Fuel Your Espresso Passion and Keep Improving
Your journey toward expert-level espresso at home is a marathon, not a sprint. Embrace each tweak, each calibration, as a step closer to perfecting your craft. Remember, mastery isn’t about buying the most expensive gear but understanding the nuances that influence every shot. Whether you’re adjusting PID settings for altitude or meticulously cleaning your grinder, these small efforts accumulate into a richer, more satisfying coffee experience. Don’t wait for perfect conditions—start refining today and turn your kitchen into a boutique coffee haven. What’s the one adjustment you’re excited to try next? Share your plan below and let’s elevate our brewing together!