Why the dry-erase alignment trick often lies about your burrs
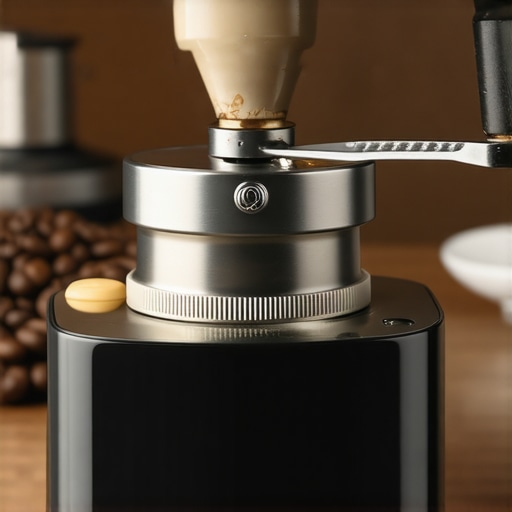
Have you ever stood in front of your grinder, carefully aligning those tiny burrs with a whiteboard marker, only to find your freshly ground coffee tasting off the next morning? I sure have. It was a moment of frustration that led me down a rabbit hole of misinformation and half-truths. That simple dry-erase trick, touted as the ultimate way to line up burrs perfectly, often feels like a clever illusion rather than a reliable method.
The Real Challenge of Burr Alignment
When I first started tinkering with my home espresso setup, I believed that precise burr alignment was the holy grail. If only I could get those burrs to sit just right, I thought, I’d unlock a world of consistent, delicious shots. So I turned to the popular dry-erase trick, marking my burrs and hoping for perfection. But time and again, my shots varied wildly, and my flavor profile was inconsistent. That’s when I realized that this alignment method might be misleading—not all burr sets are created equal, and subtle factors often overshadow these visual cues.
According to coffee experts, even a tiny misalignment or dull burrs can dramatically impact extraction quality. A study published by the Specialty Coffee Association indicates that burr condition and proper calibration are critical for consistent grind size and flavor. The kicker? The dry-erase trick doesn’t account for wear or the internal adjustments that affect burr contact—it’s simply a visual aid, not a calibration standard.
Have you faced this problem?
If you’ve ever tried to tune your grinder solely based on visual cues or a quick mark, you’re not alone. Early on, I fell into the trap of trusting superficial fixes instead of digging deeper. The truth is, real alignment requires a combination of understanding your equipment, regular maintenance, and sometimes, professional calibration. So, in this post, I’ll share my journey and the steps I took to truly optimize my burrs—beyond the illusions—and improve my espresso game for good.
Prepare Your Workspace and Gather Tools
Start by clearing your workspace and assembling necessary tools: a sharpening marker, a small flat-head screwdriver, a clean cloth, and your grinder’s user manual. Familiarize yourself with the grinder’s burr adjustment mechanism by reviewing the manual or online tutorials.
Remove and Access the Burrs
Disconnect your grinder from power to ensure safety. Remove the hopper and any beans, then carefully unscrew or unlatch the burr chamber as per your model’s instructions. Place the burrs on a clean surface for inspection.
Mark the Burrs for Alignment
Using a sharpie, draw a small line across the top of each burr at a consistent orientation—preferably aligning with a specific feature or edge. This visual cue will help in assessing the burrs’ contact point during adjustment. I remember doing this after a particularly inconsistent grind, and it made the process much clearer.
Use the Paper Towel Test to Check Burr Condition
Before proceeding, perform the paper towel test. Place a folded paper towel between the burrs and slowly turn the grinder by hand. If the paper tears or slips, your burrs might be dull or misaligned, requiring further cleaning or replacement.
Align the Burrs Precisely
Reassemble the burrs without closing the chamber completely. Manually turn the grinder handle and observe the markings. Adjust the burrs slightly using the screw or dial, aiming to bring the marks into perfect contact—meaning the lines are aligned, and the burrs touch evenly without gaps or overlaps. Be cautious: over-tightening can cause damage or uneven alignment.
Fine-Tune Your Adjustment
Make small adjustments and recheck the contact. It might take several iterations—think of it like tuning a musical instrument, where tiny changes produce harmony. After achieving good contact, secure all screws tightly as per your manual’s torque specifications, avoiding overtightening that could distort the burrs.
Verify the Alignment and Test Grind
Reinstall the hopper and run a few test grounds. Examine the grounds for consistency, checking their particle size and uniformity. If you notice uneven grounds or residual inconsistencies, revisit the adjustments. Regularly cleaning your burrs (see Cleaning Burrs Properly) ensures optimal performance and longevity.
Monitor and Maintain
Over time, burrs wear down or shift slightly, so schedule periodic checks. Incorporating this precise alignment routine can dramatically improve shot clarity and flavor, setting your home espresso apart from the average.
Many home espresso enthusiasts believe that investing in premium equipment guarantees perfect cups, but the truth is more nuanced. A common misconception is that high-end machines automatically produce superior shots; however, without fine-tuning and understanding their intricacies, even the priciest gear can underperform. For example, understanding the importance of consistent tamping pressure and dose calibration often gets overlooked, leading to uneven extraction and bitter or weak flavors. An often-ignored detail is the state of water quality—the minerals and pH level significantly influence taste and machine longevity. Regular descaling and water testing are essential steps most overlook, resulting in clogged pipes and off-flavors.
Another pitfall involves grinder maintenance. Many assume that once the grind size is set, it remains static. In reality, burrs dull over time, and residual oils clog the grinding chamber, causing inconsistent particle sizes. This subtly degrades espresso quality, masking itself as tamping or extraction issues. Advanced home baristas often neglect to verify their grinder’s zero point or to deep-clean their burrs, which can lead to over-extraction or channeling. Incorporating routine grinder calibrations can elevate your espresso from good to exceptional.
Tuning your machine and grinder is only part of the equation. Even the most skilled baristas can fall prey to myths—many believe that more pressure results in better extraction. In fact, applying excessive tamping force can compact the coffee unevenly, causing water to bypass the grounds or create channeling paths that lead to inconsistent flavor. Understanding the delicate balance of tamp pressure and flow resistance is crucial; studies suggest that uniform pressure around 30 pounds yields optimal results, but many rely on guesswork instead of measurement. Advanced techniques involve using tamping guides or scales to achieve consistent tamping—detail that often separates a casual home brewer from a true artisan.
Do you know the subtle adjustments that make a measurable difference? For instance, adjusting your brew temperature by just a degree or two can drastically alter flavor profiles, a nuance that many overlook. Calibration tools like digital temperature controllers or pressure profiles can help refine these variables, but mastering them requires education and attention to detail.
Have you ever fallen into this trap? Let me know in the comments. Remember, investing in knowledge and routine maintenance often outweighs upgrading gear alone—that’s the hidden secret behind truly spectacular espresso at home.
Keeping your home espresso setup in optimal shape requires more than just good beans and a precise grind. It demands the right tools and consistent maintenance routines that ensure your equipment functions flawlessly over the long term. As a seasoned home barista, I rely on specific gear and methods that have proven their worth time and again.
Investing in the Right Tools for Longevity
First, a high-quality coffee grinder with a digital dose counter is indispensable. I personally prefer a conical burr grinder with stepless adjustments because it allows me to fine-tune grind size effortlessly and maintain consistency. Regularly calibrating my grinder with a precision scale helps me avoid common dosing errors and ensures each shot is perfect. Trust me, a reliable scale is the foundation of dialed-in espresso.
For cleaning, I swear by a dedicated stainless steel brush and an ultrasonic cleaner for removing coffee oils and residues from essential parts like the shower screen and portafilter. Keeping these parts spotless not only maintains flavor clarity but prolongs the lifespan of your machine.
Software and Routine Checks
Modern espresso machines often come with temperature and pressure profiles. Using a digital thermometer and pressure gauge allows me to monitor and replicate ideal extraction parameters consistently. Additionally, I periodically perform the deep cleaning of burrs and lubricate moving parts to prevent wear.
Envisioning Future Trends
Looking ahead, I see the integration of smart sensors with maintenance apps becoming mainstream, providing real-time alerts for wear and accumulated residues. This connectivity will empower home baristas to perform proactive servicing, extending equipment life and ensuring top performance.
How do I maintain my espresso gear over time?
Establishing a routine—such as monthly grinder calibration, quarterly deep-cleaning, and annual professional check-ups—has been my strategy. Quick, targeted routines like replacing worn seals or gaskets, as outlined here, prevent small problems from escalating. But remember, patience and consistency are key; the more attentive you are, the longer your gear will serve you well.
If you’re serious about long-term results, try integrating these advanced tools and routines into your routine. Small investments in quality gear and disciplined maintenance can transform your espresso quality and make your brewing process smoother than ever.
The Hardest Lessons I Learned About Home Espresso, Espresso Machines, Barista Gear, Milk Frothers, Coffee Grinders
My journey into home espresso revealed that even small details—like burr alignment or tamping pressure—can make or break the shot. I used to believe that equipment alone dictated quality, but the truth is persistent tweaks and understanding your gear’s quirks are game-changers. Recognizing that routine maintenance, like deep-cleaning burrs or calibrating scales, often yields bigger results than upgrades, was a lightbulb moment for me.
3 Myths About Home Espresso, Espresso Machines, Barista Gear, Milk Frothers, Coffee Grinders That Held Me Back
One: More expensive gear guarantees better shots. Not necessarily—the real secret is proper calibration. Two: Consistent grind size means uniform flavor. In reality, cleaning and burr sharpness matter just as much. Three: Letting the machine warm up is enough; frequent maintenance prevents performance drops. Busting these myths propelled my espresso skills forward.
What Experts Won’t Tell You About Home Espresso and Equipment
Beyond the popular tips, seasoned baristas know that understanding your machine’s unique airflow, temperature stability, and internal wear can transform your brewing. Small investments—like a precise scale or dedicated cleaning tools—are often overlooked but crucial. Additionally, learning to interpret shot clarity and puck texture offers insights your equipment’s readouts might miss, guiding you toward perfecting your technique.
Curate Your Coffee Arsenal for Lasting Excellence
My go-to tools include a high-quality conical burr grinder, like the one recommended here. Regularly calibrating with a precision scale helps maintain dosing accuracy. For cleaning, I depend on a stainless steel brush and ultrasonic cleaner to keep parts in top shape, ensuring every cup shines with clarity. These investments make a noticeable difference over time.
Your Turn to Elevate Your Coffee Routine
Now that I’ve shared my insights, it’s your move. Small consistent efforts—like monthly burr checks or routine descaling—can elevate your home espresso from good to extraordinary. Remember, mastery isn’t about perfection but progression. Commit to understanding your gear and routine, and you’ll taste the true potential of your beans. What’s one tweak you’re excited to try next? Share below and let’s elevate each other’s brewing game.