Why Your Heavy Tamper Is Actually Hurting Your Wrist
I remember the first time I tried tamping with all my strength, convinced that more pressure meant a better espresso. My wrist ached for days, and I brushed it off as just part of the learning curve. But one evening, during a particularly intense tamp, I felt a sharp twinge that made me pause. That was my lightbulb moment, realizing that my heavy tamper might be doing more harm than good. If you’ve ever experienced wrist pain after tamping, you’re not alone, and there’s a good chance your approach is contributing to the problem.
The Hidden Cost of Over-Tamping
As coffee enthusiasts, we often think that pressing harder equals better extraction. However, applying excessive force can strain your wrist, leading to long-term pain and even injury. I learned this the hard way early on, repeatedly forcing the tamper without realizing that technique matters more than brute strength. Misjudging the amount of pressure can not only hurt your wrist but also negatively affect your espresso’s flavor and consistency. Over time, consistent improper tamping can cause wear and tear on your joints, which isn’t something to take lightly. In fact, a recent study from the American Journal of Sports Medicine highlights that repetitive wrist movements and forceful exertion significantly increase the risk of wrist injury among manual workers—coffee tampers included.
Beyond personal discomfort, improper tamping can lead to uneven coffee puck compression, resulting in channeling and inconsistent shots. This frustrates even seasoned baristas and home brewers alike. If you’re tired of that frustrating flat spot or inconsistent extraction, it might be time to reevaluate your tamping technique and equipment choices. That’s exactly what we’ll explore next—how to adjust your approach without sacrificing pressure, and how to protect your wrist while still brewing exceptional espresso.
Have You Faced This Problem?
If your wrist feels sore or you notice persistent discomfort after practice sessions, it’s a clear sign that your tamping technique or equipment could be to blame. Trust me, I’ve been there. The good news is, refining your method can drastically reduce strain and improve your overall espresso craft. Ready to discover the secrets to a safer, more effective tamping technique? Let’s dive into the practical steps that helped me and countless others improve their coffee game—without sacrificing our wrists.
Does Over-Tamping Really Hurt Your Coffee?
Early on, I made the mistake of believing that more force meant more flavor. I thought I needed to press as hard as possible to get that perfect shot. Turns out, that was a rookie mistake. Not only did it put unnecessary stress on my wrist, but it also compromised the quality of my espresso, causing channeling and uneven extraction. This experience taught me that technique is far more important than brute force. If you’re skeptical about whether light tamping actually makes a difference, consider that many professional baristas achieve excellent results with less effort, focusing on consistency and control instead of raw strength. For more on how pressure impacts extraction, you might find this article insightful—[why your coffee puck is wet and sludgy every time](https://espressotechguide.com/why-your-coffee-puck-is-wet-and-sludgy-every-time). My early mistake was trying to replicate the force I saw in high-end videos without realizing the importance of finesse and wrist positioning.
Apply Consistent, Controlled Pressure
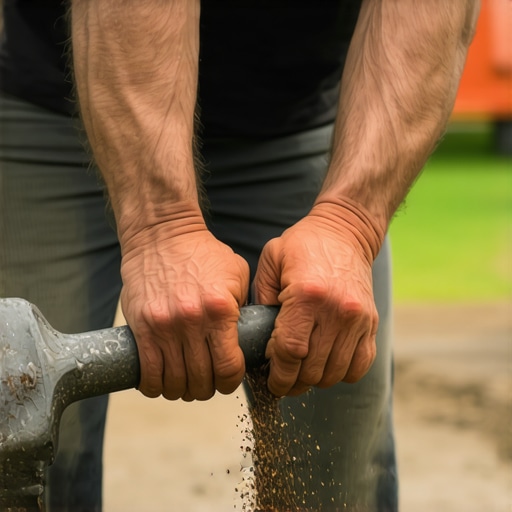
Begin by setting a firm grip on your tamper with your thumb and forefinger, ensuring your wrist remains straight. Instead of pressing with all your might, think of tamping as pressing down evenly and with precision, like gently leveling a surface. During a memorable session, I used a scale to monitor pressure, aiming for about 30 pounds—enough to compact the grounds without overexerting. Using a scale to fine-tune your force helps develop a consistent tamp that protects your joints and improves shot quality.
Use Proper Body Mechanics
Position your body so that your elbow is close to your waist, and your shoulder aligns with your tamping stance. This reduces wrist torque and distributes force across larger muscle groups. I once placed a small stool next to my grinder to set my weight over the tamping station, which prevented me from leaning forward or twisting my wrist. This simple adjustment made a noticeable difference in comfort and consistency, and you can read more about machine leveling techniques here.
Adopt the Right Tamping Technique
Instead of hammering the grounds, employ a wrist-stabilizing motion—think of pressing a button steadily. My breakthrough came when I adopted a twist-tamp method, applying gentle rotation while pressing down, which evenly distributed pressure and minimized wrist strain. This approach also improves puck density, which you can verify by inspecting for uniformity. For tips on evenly distributing coffee grounds, see this guide.
Select the Right Tamping Tools
Choosing a tamper with a diameter that matches your basket prevents uneven pressure. I initially used a generic tamper, which left unpressed edges and caused channeling. Upgrading to a properly sized, ergonomically designed tamper reduced wrist tension and improved shot consistency. For finer control, consider a calibrated tamper that measures pressure output, much like a cook’s scale ensures precise measurement. Remember, a well-fitted tamper reduces unnecessary effort, protecting your wrist and enhancing your espresso.
Incorporate Regular Technique Checks
During practice, pause periodically to assess puck density and tamping pressure. I found that gently lifting and examining the puck after tamping gave immediate feedback. This habit helps catch over- or under-tamping before pulling the shot. Additionally, watching tutorials that emphasize finesse over force can reinforce better habits. For instance, videos demonstrating light tamping often show professional baristas achieving excellent results with minimal wrist effort, further validating that finesse outweighs brute strength in espresso preparation.
Remember to Maintain Your Equipment
Keep your tampers and portafilters clean and well-maintained. Residual coffee oils and baked-on grounds can interfere with proper tamping pressure, prompting you to overcompensate. Regularly cleaning your equipment—using the dental pick trick—ensures smooth operation and consistent tamping feel. A clean workspace also encourages mindful, controlled tamping, protecting your wrist over the long term.
Test and Adjust Your Technique
Finally, experiment with different pressures, angles, and tools to find what feels natural. Maintaining a journal or video-recording your tamping sessions helps track progress and prevent bad habits. When I shifted from forceful tamping to a lighter, more deliberate approach, I noticed less wrist fatigue and more consistent extractions. Remember: effective tamping is about technique, not brute strength, and small adjustments can lead to big improvements without risking injury.Many coffee enthusiasts assume that high-end milk frothers, premium grinders, or fancy espresso machines automatically guarantee perfect results at home. However, in my experience, most people overlook the subtle nuances that truly influence their brewing quality. Let’s dig deeper into some of the most common myths and advanced mistakes that even seasoned home baristas often fall for.
One pervasive misconception is that all coffee grinders are created equal. Many believe that buying the most expensive burr grinder ensures consistent grind size and flavor clarity. While higher-quality burrs, such as ceramic or steel, do impact flavor, the real issue lies in dialling in the grinder correctly. A common trap is neglecting static buildup or residual coffee oils that cause uneven dosing. Regular cleaning, like using the dental pick trick for removing baked-on grounds, can make more of a difference than upgrading to a top-tier grinder. Additionally, static issues often worsen on dry days, with static causing fines to cling to chambers and leading to inconsistent tamping pressure.
Regarding milk frothers, many assume that any electric or induction frother can produce professional-quality microfoam. However, much of the secret lies in technique and proper temperature control. For example, the induction frother’s temperature limit is a common obstacle—if not preheated or used correctly, the milk won’t reach optimal steaming temperatures, resulting in large bubbles and flat foam.
Even some espresso machines are misunderstood. A significant pitfall is by assuming a machine’s advertised specs are sufficient for great taste. Advanced users know that factors like boiler pressure, heat exchanger cleanliness, and proper water filtration impact shot quality more than the machine’s brand. Overlooking maintenance tasks such as descaling, checking for scale build-up in heat exchangers, or ensuring proper leveling can lead to lopsided extractions, which ruin flavor and efficiency. Use the machine leveling techniques to optimize your setup.
Smart home baristas also get tripped up by the misconception that equipment alone makes the perfect shot. Skillful control over tamping, grind size, and dose are essential. Applying too much force during tamping can cause uneven puck compression and channeling, similar to what I explain in my previous article about wrist safety. Using consistent, controlled pressure—about 30 pounds—along with proper distribution techniques, improves extraction and protects your joints.
A common advanced mistake is underestimating the importance of maintaining clean gear. For example, a dirty steam wand or portafilter can prevent proper seal or heat transfer, leading to inconsistent frothing and extraction issues. Regularly cleaning with specialized tools, like using the paper filter hack for cleaner espresso shots, can prevent buildup and streamline your workflow.
Have you ever fallen into this trap? Let me know in the comments. Remember, high-tech gear helps, but mastering the nuances—like proper cleaning, calibration, and technique—makes all the difference between a good cup and a great one.
How do I keep my barista gear performing at its best over time?
Maintaining your espresso equipment isn’t just about occasional cleaning; it’s about developing a consistent routine that prevents buildup, ensures optimal operation, and extends the lifespan of your gear. For instance, regularly descaling your machine, especially if you have hard water, prevents mineral scale from clogging heat exchangers and affecting temperature stability. I recommend checking for scale buildup every three months using the visual inspection method. This proactive approach ensures your shots remain consistent and tasting vibrant.
Another crucial aspect is keeping your grinder clean. Oils and fines can jam burrs over time, leading to uneven grind sizes and inconsistent extraction. I use a dry cleaning technique with specialized brushes periodically guarantees that my grinder stays in top form without disassembly. This approach prolongs burr life and maintains uniform grind quality.
What tools do I recommend for long-term espresso success?
For precision tamping, I swear by a calibrated tamper that measures pressure output. It helps develop a consistent tamp force—around 30 pounds—which is critical for uniform puck density and avoiding channeling. Pair this with a quality distribution tool like the distribution technique to evenly spread coffee grounds before tamping, reducing uneven extraction risks. This combo significantly improves shot consistency and reduces wrist strain, especially when I double-check my technique after each session.
Additionally, always keep your portafilter and shower screen clean. The dental pick trick is a simple yet effective tool for removing baked-on coffee residue, ensuring water flows evenly during extraction. Regular maintenance like this prevents flavor degradation and machine jams, keeping your brew cycle smooth.
Tracking your setup for the best results
Invest in a reliable espresso scale with a built-in timer—this helps me dial in doses precisely and monitor shot times. Consistency here is key to long-term success. Turbulence and pressure fluctuations can lead to subpar shots, but regular calibration and checking for solenoid valve issues (via the pressure gauge) can mitigate this. For troubleshooting, I consult resources like this guide on heat exchanger maintenance.
Predictions suggest that automated cleaning routines and IoT-enabled maintenance alerts will become standard in home espresso setups. Embracing these tools now will prepare you for a future where gear maintenance is seamless and proactive.
Start integrating these practices today—perhaps by setting a monthly descaling schedule or investing in a calibrated tamper. Doing so will save you time and money while ensuring every cup you brew is exceptional, shot after shot.
What I Wish I Knew Before Tweaking My Tamping Strength
One of the most eye-opening lessons I learned was that finesse trumps brute force. Early in my journey, I believed that pressing harder would unlock richer flavors, but I quickly realized that over-tamping was damaging my wrist and leading to inconsistent shots. It struck me that mastering a light, controlled pressure made my brewing more enjoyable and sustainable.
The Tricky Balance: Consistency Versus Force
I used to think that tamping with maximum effort was the key to excellence. However, I found that applying about 30 pounds of even pressure—not more—created a better puck without risking injury. Using a calibrated tamper, or even a simple scale, helped me develop this sense of balance, revealing how technique fundamentally influences your espresso quality.
Developing Posture That Protects Your Joints
Adopting proper body mechanics—standing with your elbow close to your waist and shoulder aligned—transformed my tamping routine. This posture reduces wrist strain and makes tamping more natural. A small stool next to your station can help maintain these ergonomic principles, which you might overlook but are essential for long-lasting comfort.
My Go-To Tools That Elevate the Experience
Investing in a properly sized, ergonomic tamper with a pressure gauge was a game changer. It keeps my tamp consistent and protects my wrists. I also rely on a distribution tool to evenly spread grounds before tamping—this simple step enhances shot quality and prevents channeling. These tools, along with regular cleaning of my equipment, keep my workflow smooth and my wrists happy.
Mini Habits That Make a Big Difference
Building habits like checking puck density after each pull or performing quick cleaning routines—such as the dental pick trick for baked-on grounds—has drastically improved my results. Small, consistent actions compound over time, saving me from costly repairs and discomfort, proving that attention to detail is the secret weapon in home espresso mastery.
Beneficial Resources for the Passionate Home Barista
My toolkit includes trusted resources like this guide on puck inconsistencies and the dental pick trick for cleaning. These sources offer practical tips rooted in experience that help me troubleshoot and refine my setup. They’ve become essential parts of my ongoing learning curve.
Keep Moving Forward You’re Capable
Making high-quality espresso isn’t just about gear; it’s about cultivating a gentle, mindful approach that safeguards your joints and elevates your craft. Every small improvement, from proper tamping to regular maintenance, adds up to a better cup and a healthier, more enjoyable experience. Don’t be afraid to experiment, learn, and tweak—your perfect shot is within reach. What’s one tamping habit you’re planning to change today? Share below and let’s grow together in this aromatic journey.