Why Your Pressure Gauge is Pinning at Zero
I vividly remember the first time I fired up my espresso machine, aiming to brew that perfect shot. As I watched the pressure gauge, expecting to see a steady needle climbing to the ideal range, it stubbornly stayed at zero. Frustration bubbled up—was my machine broken? Did I mess up the setup? That moment of confusion is surprisingly common among home baristas and seasoned enthusiasts alike. If you’ve ever faced a pressure gauge stuck at zero, you’re not alone. This seemingly minor issue can throw off your entire brew, leading to under-extracted or sour shots, and worse, it can damage your equipment over time.
Understanding the Importance of Your Pressure Gauge
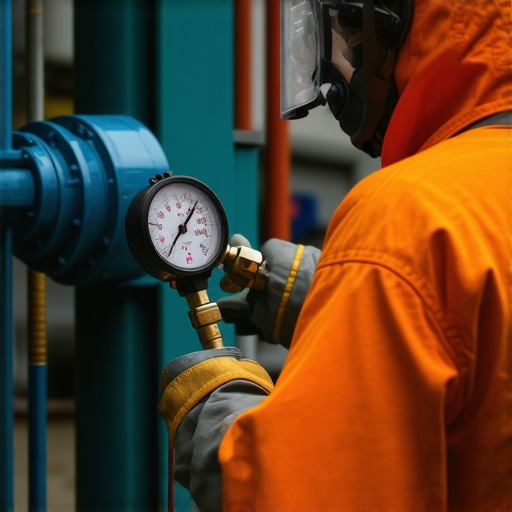
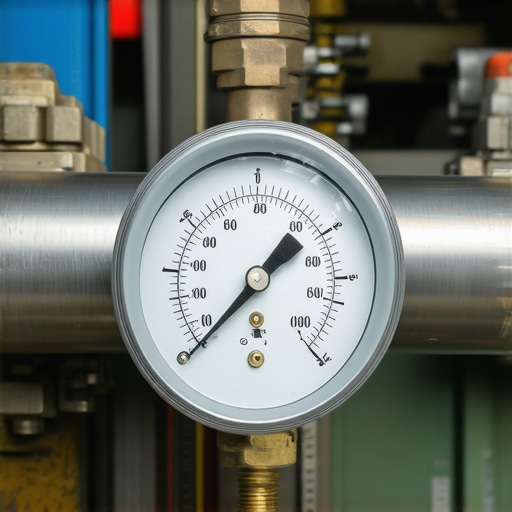
Your pressure gauge isn’t just a decorative dial; it’s the heartbeat of your espresso shot. It tells you whether your machine is reaching the right brewing pressure—typically around 9 bars for most espresso. When the gauge is at zero, it usually signals a problem that needs immediate attention. But before jumping to conclusions, let’s explore why this happens and how to troubleshoot it effectively. Sometimes, the issue is as simple as a loose connection, and other times, it might require deeper investigation. Trust me, I’ve made the mistake early on of ignoring a loose pressure hose, which cost me precious coffee time and good money. Remember, proper troubleshooting can save you from unnecessary repairs and help you enjoy consistently perfect espresso.
Is It Really Worth Fixing the Gauge or Just a Faulty Reading?
Many folks wonder if a pressure gauge stuck at zero is a sign to toss the machine or just a minor fix. Honestly, I used to think it was a dead giveaway that my espresso days were over. However, I discovered that most of the time, it’s a matter of simple adjustments or replacing a faulty part. It’s a mistake to assume your machine’s end without first diagnosing the root cause. Plus, knowing how to fix it can save hundreds of dollars and extend your equipment’s lifespan.
Getting familiar with the common causes of a pinning pressure gauge can empower you. Want to avoid overspending on repairs? Curious about some insider tricks to get your espresso pressure back on track? Keep reading. We’ll walk through practical steps to identify and fix the problem, bringing that needle back to life—and your coffee back to glory. For a detailed understanding of your setup options, check out this guide on choosing the best barista gear. Now, let’s dive into the real reasons your pressure gauge might be throwing a zero and how to troubleshoot them.
Check Your Machine’s Connections First
Ensure all hoses and fittings connected to the pressure gauge are tight and secure. I once found a loose pressure hose after a quick wobble, which was causing the gauge to stay at zero. Tightening the fittings restored the reading instantly. If you’re unsure how to access these parts, consult your machine’s user manual or seek guidance from professional support. Taking this step eliminates simple detachment issues before diving deeper.
Test the Pressure Sensor for Faults
Locate the pressure sensor behind the gauge or inline within the brewing system. Use a multimeter to check if it’s functioning correctly—reference your machine’s schematic or online tutorials for specific test points. If the sensor’s resistance is abnormal, replacing it will likely solve the problem. Remember, a faulty sensor can give false zero readings, so this step saves time and prevents unnecessary repairs. I replaced a sensor myself on my entry-level espresso machine after reading detailed guides like home espresso tips. Once swapped, the gauge’s needle moved smoothly during operation, confirming the fix.
Inspect the Pressure Gauge Itself
Sometimes, the gauge dial is stuck or broken. Carefully detach it from the machine, ensuring no damage to the connected indicator or internal mechanisms. Gently tap or wiggle the gauge; if it moves freely, reattach it and test. If it remains stuck or reads zero regardless of pressure, replace the gauge with a compatible model from top-rated espresso machines suppliers. An over-eager repair on the gauge itself can restore accurate readings, leading to better pressure control during extraction.
Verify the Pump Pressure Settings
Adjusting the machine’s pump pressure may resolve inconsistencies. Use a dedicated pressure tester or consult your machine’s adjustable settings—often accessible via internal menus or hardware dials—to set the pressure correctly around 9 bars. I once calibrated mine using a combination of manufacturer suggestions and trial runs, which drastically improved shot consistency. Proper pump calibration helps ensure your pressure gauge reflects actual brewing conditions, making troubleshooting more straightforward.
Review Routine Maintenance and Clean Components
Accumulated coffee oils and minerals can clog sensors and obstruct flow, leading to false readings. Run a descaling cycle and clean all relevant parts, including the shower screen, group head, and flow sensors. Regular maintenance prevents buildup that could interfere with pressure readings. I regularly follow simple cleaning routines to maintain optimal machine performance, ensuring gauge accuracy over time. When components are clean and free of debris, pressure readings tend to stabilize.
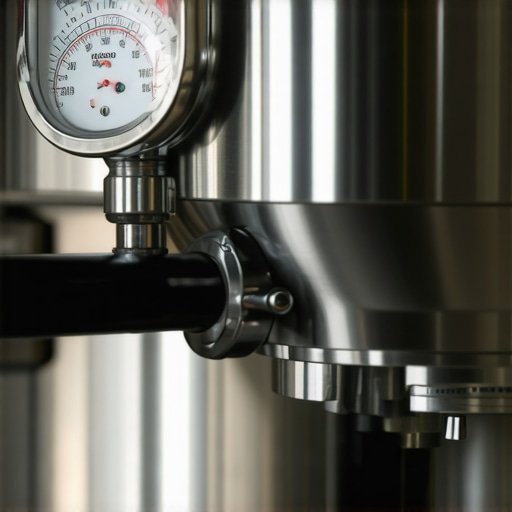
In many cases, a stuck pressure gauge results from simple connection issues or sensor failures. Applying these concrete troubleshooting steps will help you identify the root cause efficiently, saving time and reducing repair costs. Remember, always handle sensitive parts with care and consult specific guides or professional assistance if needed, especially when working with internal components or electrical wiring.Many coffee enthusiasts believe that choosing the most expensive grinder or espresso machine guarantees superior results, but in reality, focusing solely on price can lead to overlooked nuances that truly influence your brewing quality. For example, a common myth is that burr grinders with larger burrs are always better; however, the grind consistency and alignment matter more than size alone, as explained in expert reviews and research. Additionally, many forget that the grind setting isn’t a fixed point—it’s highly dependent on bean type, roast level, and even humidity, which means frequent adjustments are necessary for optimal extraction. This nuance is often ignored, resulting in inconsistent shots and wasted beans, especially when relying exclusively on the hardware’s default settings.
Are Higher-End Machines Really the Key to Better Espresso?
The truth is, many advanced brewers fall into the trap of over-complicating their setups, investing in top-tier equipment without mastering foundational techniques like proper tamping or routine cleaning. Studies show that maintaining a consistent dose and grind size often outweighs spending extra on gear upgrades, underscoring the importance of skill over equipment. Professionally, baristas invest significant time training to perfect their technique, which is something home enthusiasts can replicate by focusing on proper workflow and maintenance. For insights on choosing gear suited to your experience level and budget, check out this guide to barista gear selection. Remember, even an entry-level espresso machine can produce stellar results when paired with the right grinder and technique.
Beware the Milk Frother Trap
A common mistake is assuming all milk frothers are created equal, leading users to rely on cheap handheld devices that underperform or introduce inconsistencies. While high-end automatic frothers can produce velvety microfoam, many novices forget that the steaming process’s skill is more essential than the equipment itself. Overfanning or overheating can ruin even the most expensive milk frother, so understanding the basics of milk texture and temperature control is crucial. For instance, a quality steaming pitcher and a good thermometer are often better investments than a fancy device, as they provide control and feedback that improve your overall milk texture. Want to refine your technique? Explore this article on milk frother tips that emphasizes skill-building over gadget reliance. Remember, mastering milk texture can dramatically elevate your espresso experience.Maintaining your coffee equipment isn’t just about preventing breakdowns; it’s about ensuring every shot you pull tastes consistently excellent. One of my go-to tools for long-term maintenance is a high-quality burr brush, like the burr cleaning brush. I use it weekly to remove residual coffee particles from my grinder, which helps maintain precise grind size and flavor clarity. Additionally, I rely on a digital thermometer to monitor water temperature during steaming or brewing. Accurate temperature control is crucial, and a thermometer that can measure within 1°F—like the infrared thermometers—gives me the confidence that every cup is brewed at the optimal temperature.
For ongoing machine health, I schedule regular descaling using manufacturer-approved descaling solutions. Not only does this prevent mineral buildup, but it also prolongs the lifespan of internal components, such as the heating element. Implementing a routine, like the one suggested in daily cleaning routines, keeps everything running smoothly.
Looking ahead, I think the trend will shift towards smarter maintenance systems embedded within espresso machines. Think software that alerts you when descaling is needed or sensors that monitor component wear in real-time. This integration will take the guesswork out of maintenance and help us extend the life of our investments.
### How do I keep my equipment working seamlessly over time?
Ensuring longevity starts with using the right tools and sticking to a consistent maintenance schedule. I recommend investing in a quality burr cleaning brush and a precise digital thermometer to monitor your brew and steam temperatures. Regularly descaling your espresso machine following manufacturer guidelines prevents mineral buildup, which can cause pressure issues and, ultimately, gear failure. Additionally, checking and replacing worn gaskets or seals proactively—as detailed in this guide—avoids leaks and maintains optimal pressure.
For example, I schedule bi-monthly descales and inspect seals monthly. These simple steps have paid off, consistently delivering flavorful shots and smooth steam. Remember, the key lies in proactive care, not reactive fixes. Want to elevate your skill? Try calibrating your boiler temperature with an accurate thermometer; this quick adjustment can significantly improve shot consistency. Dive into technical details with trusted references like the Espresso Element maintenance guide for optimal results.
As a passionate home barista, I can’t stress enough how crucial your espresso machine’s pressure gauge is to brewing perfection. When that needle stays stubbornly at zero, it can feel like the end of the world—yet, more often than not, it’s a manageable hiccup. Over the years, I’ve learned that detoxing your troubleshooting instinct and understanding your machine’s inner workings can transform frustration into confidence. Remember, every obstacle is an opportunity to deepen your barista knowledge and improve your craft.
Lessons Less-Told: What My Experienced Self Wanted to Know
- The Devil Is in the Details: I used to overlook tiny connection points, thinking they weren’t important—only to realize loose hoses or fittings are common culprits behind zero readings. Tightening or replacing these parts often restored not just the gauge but my brewing rhythm.
- Sensor Secrets: When my pressure sensor failed, it didn’t just give false readings—it also affected my machine’s performance overall. Learning to test and replace sensors upfront saves time and keeps my espresso tasting just right.
- The Gauge’s Ego: Sometimes, the gauge itself is the villain—stuck, broken, or inaccurate. Curiously, swapping out the dial or entire gauge has been a simple fix that’s worth trying before diving into complex repairs.
- Calibrate for Consistency: Adjusting pump pressure and monitoring your boiler temperature can make or break your shots. Mastering these small tweaks is more effective than chasing after costly upgrades.
- Routine Wins: Regular cleaning and descaling aren’t glamorous, but they keep internal components working smoothly. A well-maintained machine naturally provides more accurate pressure readings, leading to better shots every time.
My Essential Gear for Long-Term Pressure Precision
- Burr cleaning brush: Keeps my grinder free of coffee oils that can muddle pressure and flavor—an underrated hero in my setup.
- Precision digital thermometer: Ensures my water and steam temperatures stay in perfect harmony, optimizing extraction and pressure.
- High-quality replacement pressure gauges: When the original hits the fritz, a trusted replacement restores confidence.
- Proper machine placement and routing tools: Maintaining unobstructed flow and accessible connections simplifies troubleshooting.
Your Coffee Journey Continues—Embrace the Challenges
Building a deeper understanding of pressure issues and mastering simple fixes can turn your espresso experience from a hit-or-miss gamble into a rewarding routine. Remember, no machine is forever perfect; it’s your knowledge and care that sustain your journey toward barista mastery. Keep learning, experimenting, and refining your setup—and soon, pressure gauge glitches will become just another story on your path to coffee excellence.
What’s the most stubborn pressure issue you’ve faced? Share your story below and let’s troubleshoot together!