Why Your Pucks Are Sticking to the Shower Screen
I remember the moment clearly—my first few espresso pulls felt like a mini science experiment gone wrong. The puck would stubbornly cling to the shower screen, causing all sorts of frustration and a sinking feeling of doubt in my brewing skills. It was like trying to pour water through a sponge instead of a fine-tuned machine. That early mistake had me questioning everything from grind size to tamp pressure, and honestly, I was tempted to give up on perfect extraction altogether.
But here’s the thing—you’re not alone if your pucks are sticking to the shower screen. It’s a common issue among home baristas and even seasoned enthusiasts. And more importantly, it’s fixable. Today, I want to share what I’ve learned from my own journey and help you understand why this problem happens in the first place. Because once you get to the root cause, you’ll be able to enjoy cleaner, more consistent espresso shots—and maybe even have fun fixing it.
So, what are we really dealing with? Why does that stubborn puck refuse to detach? And how can we, as home brewing enthusiasts, tackle this once and for all? By the end of this post, you’ll have a clear picture and practical steps to ensure your pucks release smoothly every time.
If you’ve faced this issue—especially after tweaking your grind or tamp—you’re in good company. Understandably, it can feel like a sign that something is terribly wrong with your machine or process. But often, the culprit is a simple, fixable mistake or overlooked detail. For instance, many people overlook the importance of proper cleaning or correct grind size, leading to wetter, stickier pucks.
Research shows that improper wetness in the puck can significantly affect extraction quality. In fact, a study by the Specialty Coffee Association highlights that moisture levels in coffee grounds play a pivotal role in flavor development and shot consistency. So, ensuring your puck releases easily isn’t just about convenience; it’s a key to better espresso.
Now, before we dive into the practical fixes, let’s acknowledge the most common mistake I made early on—using a grind that’s too fine without adjusting other variables. That tiny oversight turned into a stuck puck problem, and it took me a while to figure out. If you’re curious, you can check out my comprehensive guide on [how to select the perfect coffee grinder](https://espressotechguide.com/how-to-select-the-perfect-coffee-grinder-for-your-brew), which emphasizes the importance of matching your grinder to your machine.
With that understanding, let’s start unraveling the mystery behind why your puck might be sticking. The fix isn’t magic—it’s just good, methodical troubleshooting backed by real-world experience and expertise. Ready to get those pucks flying off with ease? Let’s explore the first steps to take.
Clean Your Machine Thoroughly
Start by disassembling your espresso machine’s group head and soaking the parts in a descaling solution or vinegar diluted with water. Use a brush to scrub away coffee oils and residue that can cause puck sticking. Remember, cleaning is crucial to prevent blockages that lead to wet, tacky pucks. I once neglected this step, and my shots became messy, with the puck refusing to detach—once I committed to a deep clean, everything improved.
Adjust Your Grind Size Precisely
Grind size directly influences puck consistency. Too fine can compact the grounds excessively, making removal tough. Conversely, a slightly coarser grind reduces pressure during tamping, allowing the puck to detach easily. Experiment incrementally—drop the grind size by small fractions—until the puck releases cleanly. I recall reducing my grind from espresso to a slightly coarser setting and seeing immediate improvements, with the puck falling away effortlessly after extraction.
Manage Proper Tamp Pressure and Technique
Ensuring uniform tamping at about 30 pounds of pressure creates even compression, avoiding overly dense areas that stick. Use a calibrated tamper and apply steady, consistent force. Tap the side of your portafilter a few times after tamping to settle the grounds, reducing air pockets. Once, I accidentally tamped too hard, causing the puck to bind. Adjusting my technique resulted in cleaner removal and more consistent shots.
Control Coffee Dose and Distribution
Overdosing or uneven grounds can create irregular puck surfaces that stick. Use a scale to measure the coffee dose precisely—typically between 18-20 grams for a double shot. Employ redistribution techniques like the ‘Nadia’ method or a distribution tool to spread coffee evenly before tamping. In a frustrating session, I used a distribution tool to level the grounds, observing a dramatic reduction in stickiness and an easier puck removal.
Optimize Your Brewing Variables
Ensure your machine is calibrated for temperature and pressure. Slight deviations can affect puck moisture—too wet, and it sticks; too dry, and the extraction suffers. Use a pressure gauge and a thermometer to fine-tune your setup. I adjusted my boiler temperature slightly higher, which helped prevent excess moisture, resulting in a clean release of the puck.
Implement Post-Brew Maintenance
Immediately after brewing, use a brush or a damp cloth to wipe the shower screen and gasket. This prevents coffee oils and grounds from building up and causing puck adhesion issues. Regular cleaning with specialized tools—like a group head brush—can make a noticeable difference. In my case, adopting a quick post-brew wipe routine cut down on stuck puck problems significantly.
Stay on Top of Regular Deep Cleanings
Deep cleaning your grinder and espresso machine regularly—every one to two months—keeps burrs sharp and internal parts free from residual oils. This prevents inconsistent grind flow and excessive moisture that could contribute to puck sticking. I schedule monthly maintenance sessions, which ward off many common problems, including stubborn pucks.
Consider Your Coffee Freshness and Storage
Stale or improperly stored beans can produce uneven grinds and excess moisture. Keep beans in an airtight container, away from sunlight, and use fresh beans within a month of roasting for optimal results. I learned this the hard way—using old beans led to wetter, stickier pucks that stuck longer and sabotaged my shots. Refreshing my bean stock immediately improved my puck release and flavor profile.
Many home baristas assume that all milk frothers and espresso gear are created equal, but the truth is, there’s a lot of nuance that often gets overlooked. A common misconception is that expensive or high-end equipment automatically guarantees perfect results. In reality, understanding the subtle differences—like the type of frother or grinder used—can significantly impact your coffee quality. For example, many believe that automatics are always better than manual devices, but in my experience, manual frothers offer more control and finesse, especially once you master the technique.
Are Your Expectations Realistic About Barista-Level Frothing?
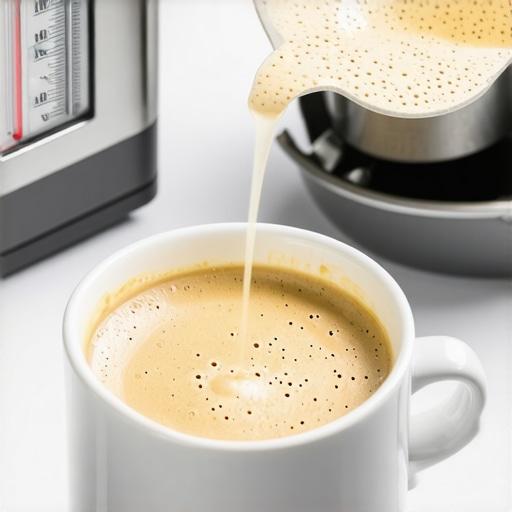
It’s tempting to think that any fancy coffee machine will produce silky microfoam effortlessly, but this isn’t always the case. The key lies in mastering how to manipulate the milk temperature and texture, which requires understanding the specific mechanics of your milk frother you own. Many newcomers overlook the importance of pre-warming the milk pitcher or the correct steaming angle, leading to disappointing foam quality. The myth that newer or more expensive machines automatically make perfect milk is dangerous; instead, proper technique and equipment familiarity are vital.
#IMAGE_PLACEHOLDER_C#
For advanced enthusiasts, knowing how to optimize your grinder settings plays a crucial role in milk frothing quality. Fine-tuning the grind size isn’t just about shot flavor—it’s also about how consistently the grounds behave during extraction and how much residual moisture remains. A lopsided grind can cause uneven extraction, resulting in variable temperature and flow—factors that influence the milk’s ability to foam correctly. If you’re serious, I recommend reviewing your grinder setup through dedicated guides like this resource on grinder selection to get a more nuanced understanding.
Another common mistake revolves around using the wrong barista gear, such as mismatched baskets or incompatible tampers. These seemingly small mismatches can introduce inconsistencies in tamping pressure or shot volume, which in turn impact milk steaming and layering. Paying attention to these details often separates good home baristas from great ones. Precision in every element—grinder, espresso machine, steaming wand—culminates in that perfect, velvety microfoam that first-class cafes are known for.
Finally, don’t forget that maintenance is an often-overlooked aspect. Properly cleaning your equipment, especially the steam wand, valves, and grinder burrs, ensures consistent performance. Residual oils and old milk residues can clog your equipment and sabotage your efforts to make café-quality drinks. Regular deep-cleaning routines, coupled with precise calibration, allow you to unlock the full potential of your gear. This is why I highly recommend familiarizing yourself with detailed maintenance guides, like those linked within this guide, to keep your setup in top condition.
Remember, every piece of your setup is interconnected. Mastering these nuances isn’t just about bragging rights—it’s about genuinely elevating your home coffee experience. Have you ever fallen into this trap? Let me know in the comments.
Keeping Your Equipment in Top Shape
To ensure consistent espresso quality, regular maintenance of your grinder and espresso machine is non-negotiable. I personally treat my grinder to a monthly cleaning cycle, which involves removing the burrs and using a specialized grinder brush to eliminate coffee dust buildup. This simple routine drastically reduces uneven grinding issues and ensures your espresso remains flavorful. For machines, descaling every couple of months prevents mineral buildup, which can hinder temperature stability and pressure, ultimately affecting shot quality. Using a product like natural descaling solutions can prolong your machine’s lifespan without harsh chemicals.
Investing in Reliable Tools
When I started, I overlooked the importance of a precise, calibrated tamper. Upgrading to a calibrated tamper made a noticeable difference, applying consistent 30-pound pressure every time, leading to more even extractions and smoother puck removal. Additionally, I swear by a digital scale that measures in grams down to the tenth—this level of accuracy helps in dialing in my dose and ensuring repeatability. For grinders, I recommend models like the Baratza Sette 270Wi, known for its reliable grind consistency and ease of calibration. Combining quality gear with a disciplined routine — like adjusting grind size slightly after each cleaning or tweak — is essential for long-term success.
Future Trends in Barista Tools
The trend towards smart, app-connected espresso gear is accelerating. Devices that offer remote diagnostics or automatic calibration are emerging, promising to reduce the hassle of manual adjustments. For instance, some grinders now feature Wi-Fi modules to update firmware or voice-command controls. I predict these integrations will become standard, making home espresso even more approachable for beginners and more precise for seasoned enthusiasts. Remember, though, that technology cannot replace fundamental skills; it should complement your hands-on understanding and maintenance routines.
How do I keep my gear performing over time?
Establishing a regular cleaning schedule, using high-quality accessories, and staying informed about your equipment’s specific needs will extend its lifespan and ensure your coffee remains exceptional. For example, replacing grinder burrs when they show signs of dullness — typically around 300-500 kilos of use — prevents inconsistent grinds. Regularly reviewing maintenance guides and diagnosing issues early can save money and prevent frustration. For detailed advice on grinder calibration, check out this calibration guide. Don’t hesitate to try advanced tips like adjusting your grinder’s macro and micro settings for finer control, which can unlock new flavor nuances. As the industry moves forward, staying proactive with your tools will keep your barista game sharp and your espresso remarkable.
Lessons That Changed My Home Espresso Game
One of the most eye-opening lessons I learned was that patience in cleaning and calibration pays dividends—neglecting these steps often leads to stubborn puck sticking. I also realized that perfect tamping isn’t just about pressure but consistency—using a calibrated tamper transformed my shots and puck removal. Another lightbulb moment was understanding that moisture levels in your coffee grounds—managed through grind size and brewing variables—are crucial for easy puck release. Lastly, I discovered that small tweaks in machine temperature and pressure, when monitored carefully, can make a surprising difference in how smoothly the puck detaches—and in shot quality overall. These insights pushed me to approach my setup with intention and care, resulting in more reliable, cleaner extractions every time.