Why Your Shop Water Filtration is Failing Your Boiler
I remember the first time my espresso machine sputtered and suddenly refused to heat properly. It was frustrating—waste of coffee, time, and money. That lightbulb moment hit me hard: my water filtration system, which I trusted to keep my boiler in top shape, was actually the culprit. Turns out, an overlooked aspect of water quality can silently sabotage your boiler, leading to costly repairs and disappointing shots.
The Hidden Enemy in Your Water Line
Many shop owners and home baristas alike underestimate the importance of proper water filtration. They assume that by simply installing a basic filter, they’ve covered all bases. But in reality, subpar filtration allows minerals, sediments, and even dissolved gases to accumulate inside your boiler and its components. Over time, this buildup causes scaling, corrosion, and ultimately, boiler failure. According to a recent study by the National Coffee Association, water quality accounts for up to 80% of boiler-related issues in coffee equipment.
Have You Faced the Frustration of a Failing Boiler?
If you’ve experienced inconsistent performance, frequent repairs, or a sudden total breakdown, there’s a good chance your water filtration might be falling short. Early on, I made the mistake of trusting a cheap, generic filter without considering the water source and mineral content. It seemed harmless—until my boiler started to corrode prematurely, and my maintenance bills skyrocketed. That mistake taught me a vital lesson: quality water filtration isn’t just an afterthought—it’s the backbone of a reliable brewing setup.
Properly filtered water ensures longevity and optimal performance of your espresso machine. It prevents scale buildup, maintains the delicate balance of minerals that aid extraction, and preserves the overall health of your equipment. But how do you know if your current filtration method is enough? And what’s the right approach to safeguard your investment? That’s exactly what we’ll explore next, starting with the critical signs that your water filtering isn’t doing its job properly.
Start with a Comprehensive Water Test
Before selecting a filter, test your water to determine mineral levels and hardness. Use a testing kit or send a sample to a lab. Knowing your water’s composition guides you in choosing the right filtration system and prevents unnecessary expense. For instance, high calcium or magnesium levels increase scaling risks and demand more robust filtration approaches. I once ignored this step, and my boiler scaled up within months, leading to costly repairs.
Choose the Right Filtration System
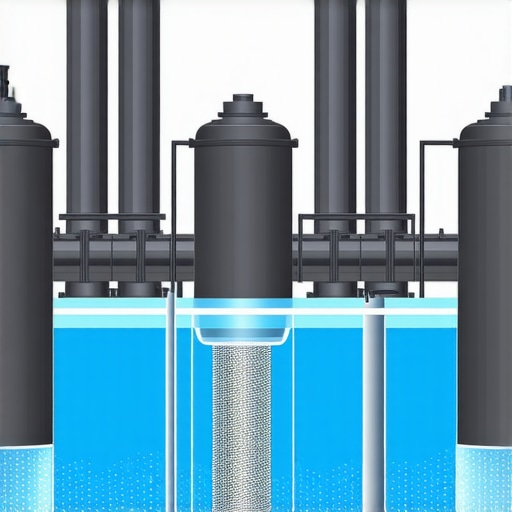
Switch from generic filters to multi-stage systems tailored to your water profile. Reverse osmosis units are excellent for removing minerals entirely, but they can produce demineralized water that affects flavor. Alternatively, consider a calcite filter if you have hard water, as it softens water naturally, reducing scaling. When I upgraded to a dual-stage filter—combining carbon to remove sediments and a calcite stage for hardness—I saw a noticeable decrease in scaling and better-tasting shots.
Install a Water Softener or Conditioner
If your tests show hard water, install a water softener or a conditioning system that prevents mineral deposits from adhering to boiler surfaces. Be cautious—their compatibility with your espresso machine is crucial. Proper installation ensures longevity. I once tried a DIY softening system without proper research, and it caused inconsistent water flow; consulting the [installation guide](https://espressotechguide.com/contact-us) helped me avoid repeated mishaps.
Implement Regular Maintenance Routines
Schedule periodic flushing and descaling based on your water hardness and machine usage. Use products recommended by the manufacturer or professional-grade descalers. For example, I set reminders after every 20 hours of brewing to run a descaling cycle, which kept my boiler pristine and avoided buildup. Neglecting maintenance accelerates scaling, leading to pump stress and uneven extraction.
Monitor and Adjust Filtration Effectiveness
Keep track of your water quality over time by retesting periodically. If mineral levels increase, upgrade or replace filters sooner. Also, observe changes in shot quality; a bitter or chalky taste may indicate filtration issues. I learned this the hard way when my shots suddenly tasted flat, prompting me to recheck the water, which revealed increased hardness due to filter saturation. Regularly inspecting your setup ensures your water remains optimal for brewing.
When it comes to mastering your home espresso setup, many enthusiasts fall prey to misconceptions that can hinder progress and even damage equipment. One of the most widespread myths is that more expensive gear guarantees perfect results every time. While high-end machines and grinders certainly have their advantages, they won’t compensate for technique errors or maintenance neglect. A study by the Specialty Coffee Association emphasizes that proper calibration, routine cleaning, and understanding your equipment’s nuances are far more impactful than price alone.
Another common trap is believing that all milk frothers are created equal. Many assume that any frother can produce barista-quality microfoam, but in reality, specialized steam wands and milk texturing techniques make a significant difference. Skimping on quality or neglecting proper technique often results in flat or steamed-over milk, ruining the final drink. Check out our article on milk frothers that truly transform your coffee for insights.
For advanced users, understanding the importance of grinder burr type is crucial. Ceramic vs. steel burrs isn’t just a debate about durability—research indicates that steel burrs generally provide more consistency and better flavor extraction when properly maintained. This nuance often gets overlooked by novices who focus solely on grind size or dosing. Learn more about burr material and flavor extraction to elevate your setup.
One often-overlooked mistake is neglecting to regularly check and calibrate grinder settings, especially when switching beans or roast levels. Minor deviations in grind size can cause under or over-extraction, leading to bitter or sour shots. Advanced baristas constantly fine-tune their grinders, knowing that even a small tweak can dramatically improve taste. For perfect shots, mastering calibration with our guide on grinder calibration is essential.
Finally, many home baristas believe that the timing of extraction alone determines shot quality. In reality, shot timing is just one piece of the puzzle; factors like tamp pressure, puck distribution, and espresso machine pressure stability play critical roles. Ignoring these can lead to inconsistent results despite precise timing. Advanced techniques involve monitoring pressure profiles and doing equipment maintenance, which can be complex but immensely rewarding. Want to optimize your workflow? Check out our detailed microfoam and machine maintenance tips.
Making the leap from beginner to expert requires not just new gear, but a deeper understanding of these nuances and pitfalls. Don’t fall into the trap of oversimplification—mastering home espresso is an ongoing journey. Have you ever fallen into this trap? Let me know in the comments.
To ensure that your home espresso setup consistently delivers excellent shots, investing in the right tools for maintenance and identifying the best practices are essential. One of my top recommendations is a high-quality precision burr cleaning brush. This tool helps remove stubborn coffee oils and fines from your grinder without damaging the burrs, maintaining grind consistency over months of use. Regularly cleaning your grinder with such a specialized tool prevents clogging and uneven dosing, which are common pitfalls among enthusiasts aiming for barista-level results.
How do I maintain my espresso machine over time?
Periodically descaling is the cornerstone of long-term machine health. I personally prefer using a commercial-grade descaling solution recommended by machine manufacturers, as it effectively dissolves mineral buildup without harming internal components. Setting a descaling schedule—typically every 1-3 months depending on water hardness—ensures scale doesn’t impair heating efficiency or pressure stability. For example, I schedule a descaling cycle every eight weeks using a solution specified in the manufacturer’s instructions, which keeps my boiler functioning optimally.
Scaling your toolkit for broader success
When your equipment is properly maintained, scaling your setup with upgraded gear can be more effective. Recent advancements in espresso machines for 2025 focus on user-friendly maintenance features—like easily removable boilers and smart diagnostics—that reduce downtime. Integrating these tools helps preserve your investment and guarantees consistently high-quality coffee. Additionally, investing in a high-performance coffee grinder calibration kit ensures your grind settings stay precise after routine cleaning, which is vital for extracting the perfect shot.
Stay ahead with routine checks and software updates
Modern espresso gear often comes with firmware updates and diagnostic utilities. I’ve found that connecting my machine to the manufacturer’s app, where available, allows me to track usage and receive alerts for parts that might need attention—like a failing capacitor or worn seals. Regularly updating firmware and running diagnostic tests minimize unexpected breakdowns, reducing repair costs over the long term. For detailed procedures, consult the manufacturer’s technical documentation.
Don’t forget a few expert tips
A little-known but impactful maintenance method is using precision calibration with a digital scale during grinder adjustments. It may seem tedious initially, but the difference in shot consistency and flavor clarity is remarkable. I challenge you to try calibrating your grinder with this method—simple, yet game-changing. Remember, maintaining your barista gear isn’t just about convenience; it’s about ensuring every espresso shot reflects your skill and dedication.
Looking back, I realize that the journey to consistent, delicious espresso isn’t just about picking the right machine or grinder. One often overlooked aspect—water quality—can silently undermine your efforts, leading to costly repairs and compromised flavors. Embracing the deeper lessons about filtration has transformed my home brewing experience, and I want to share these insights with you.
Lessons I Didn’t Expect About Water and Home Espresso
- Overconfidence is Costly: I used a basic filter without considering my water source, which led to premature scaling. It taught me that a customized filtration approach is essential, especially if you live in hard water regions.
- The Power of Regular Testing: Periodic water testing uncovered mineral levels I never suspected. This proactive step prevents surprises—trust me, waiting until your boiler sickens is a costly mistake.
- Filtering Isn’t One-Size-Fits-All: A multi-stage system tailored to your water profile reduces scaling and preserves flavor. When I upgraded, the difference in shot quality was night and day.
My Go-To Resources for Water Filtration Mastery
- Expert guide to selecting the right grinder and filters—because equipment advice makes all the difference.
- Latest espresso machine reviews—helping me choose gear that integrates well with my water system.
- In-depth articles on water softness and espresso quality—a game-changer for understanding water’s role in flavor and longevity.
- Tools for maintaining cleanliness—since clean grinders favor better extraction and flavor.
Your Next Step Toward Espresso Excellence
Don’t let water quality be the weak link in your coffee journey. By embracing a tailored filtration approach, regular testing, and continuous learning, you’re setting the stage for barista-quality shots every time. Remember, consistent espresso greatness isn’t just achieved by high-end gear; it’s supported by the commitment to understanding every detail—including the water that turns your beans into nectar.
What’s your biggest challenge with water quality in your home setup? Drop your thoughts below—I’m here to help you troubleshoot and elevate your brew!