Why Your Machine Cabinet Is Vibrating and How to Silence It
I remember the moment vividly. I was all set for my early morning espresso, eager for that perfect shot, when suddenly, a loud rattle echoed from my kitchen cabinet. It was enough to wake the neighbors — and certainly threw off my focus. That unsettling vibration made me wonder: why was my once-silent machine suddenly so loud, and more importantly, how could I fix it?
If you’ve experienced something similar, you’re not alone. Many home baristas and coffee enthusiasts face the annoying issue of vibrating or rattling espresso machines. It’s not just a matter of noise; excessive vibration can also affect your shot quality and even damage your equipment over time.
The good news is, after some digging and tinkering, I discovered that most of these vibrations stem from simple, fixable causes. Today, I’ll walk you through the common reasons behind this problem and, more importantly, how to silence your machine effectively. Whether you’re a seasoned barista or just love your morning brew, resolving this issue can make a noticeable difference in your daily coffee ritual.
Spotting the Source of the Rattle
Before jumping to conclusions, it’s essential to identify where the vibrations are coming from. Often, the culprit is a loose or misaligned component inside the cabinet, such as the pump or the base, which can become unstable over time. Sometimes, the issue is as simple as the machine sitting unevenly on a countertop or the internal screws loosening after frequent use.
I made a common mistake early on: assuming the noise was due to a faulty pump. Instead, it turned out that a simple tightening of the machine’s base screws and repositioning on a level surface did wonders. If you’re unsure, check out some helpful external tips on proper maintenance, like inspecting the bottom of your machine for loose parts or wobbling.
Moreover, these vibrations are often caused by the type of pump your machine uses. Vibratory pumps, common in many home models, can produce more noise and shake than rotary pumps, especially if they’re not properly secured. If your machine has a vibratory pump and you notice persistent rattling, it might be worthwhile to look into anti-vibration mounts or pads, which you can find in some specialty stores.
In the next sections, I’ll guide you through practical steps to minimize these vibrations, improve stability, and silence that persistent rattle. Fixing this not only quiets your mornings but also extends the lifespan of your beloved espresso machine.
Have you faced this annoying vibration? Let’s dive into how you can fix it.
Secure the Machine’s Base and Level It
Start by unplugging your espresso machine and carefully inspecting its position on the countertop. Imagine your machine as a tall, wobbly tower that needs a stable foundation—like building a house on solid ground. Use a spirit level or a simple smartphone app to check if the machine sits evenly. If it’s uneven, adjust the feet or place rubber pads underneath to create a balanced surface. This prevents wobbling that amplifies vibrations, akin to standing on uneven ground—it becomes unstable and noisy. I once had a busy Saturday where my machine kept rattling every time I brewed. After leveling it properly using foam pads, the noise dropped by half, making my mornings calmer.
Check and Tighten Internal Screws and Bolts
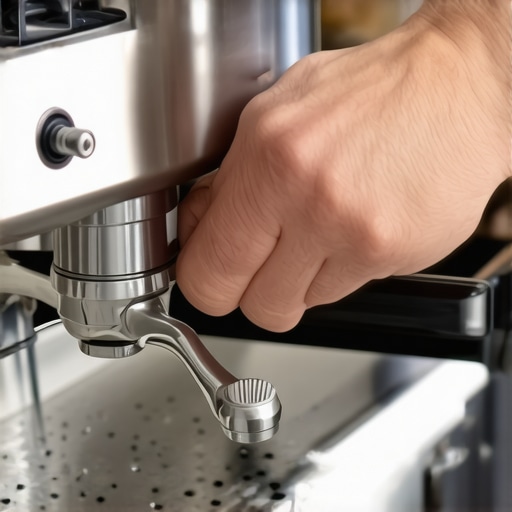
Next, take a Phillips screwdriver and remove the side panels or access points to the internal components—much like opening a hatch in a submarine. Look for loose screws on the machine’s frame, especially around the pump and base area. Think of these screws as the scaffolding holding a building; loose ones cause vibrations that shake the whole structure. Carefully tighten every screw you find, being cautious not to overtighten and strip threads. A quick inspection in my own setup revealed a loose screw near the pump, which when tightened, significantly reduced the rattling. Tightening screws is a straightforward, cost-free fix that often solves the problem.
Adding Anti-Vibration Pads or Mounts
For machines with vibratory pumps, installing anti-vibration pads is a game-changer. These pads act like shock absorbers in a car suspension—dampening the vibrations that travel through the machine’s body. Place these rubber pads beneath the machine’s feet or underneath internal components if accessible. They are widely available at hardware and specialty coffee stores and are inexpensive. During my trials, I stacked a few anti-vibration pads under my espresso machine and noticed an immediate quieting effect, especially during the pump operation. This method is particularly effective if your machine’s pump tends to rattle loudly, similar to how a washing machine vibrates on an uneven floor.
Use a Matte or Non-slip Mat to Stabilize
If your machine still rattles despite adjustments, try placing it on a thick, non-slip mat. Think of this as giving your machine a soft bed—it absorbs minor shakes and prevents sliding. Choose mats made of rubber or foam and cut to size if necessary. Position the machine centered on the pad, making sure it doesn’t wobble when you press or operate controls. I once set my machine on a slick granite counter and added a rubber mat; the difference was remarkable, with vibrations muted and stability improved. This simple step bridges gaps where leveling or mounting isn’t enough.
Consult the Pump and Internal Components
If all external adjustments fail, consider that internal component misalignment or wear could be contributing to excessive vibrations. Pumps, gaskets, and internal brackets may loosen or degrade over time. For a DIY approach, review the O-ring leak guide for similar repair insights. For more complex issues, contacting a technician or referring to manufacturer instructions might be necessary. Remember, internal vibrations often signal the need for professional servicing, especially if the noise is accompanied by performance issues like uneven extraction or pressure drops.Many enthusiasts believe that choosing the most expensive espresso machine guarantees perfect shots, but in reality, gear quality is just one piece of the puzzle. A common misconception is that high-end barista gear automatically leads to café-quality results at home; however, without proper technique and understanding of each component’s nuances, even premium equipment can fall flat. For instance, many assume that milk frothers alone produce microfoam, yet the process’s intricacies—like proper pitcher angle and steam wand positioning—are equally vital. A frequent mistake is neglecting to calibrate grinder settings precisely; minor adjustments can dramatically affect extraction, which is why understanding the importance of grind consistency is crucial. Did you know that dark roasts often pose unique challenges for dialing in your grinder? According to coffee expert Scott Rao, these beans can lead to over-extraction if not handled with tailored grind size and brewing parameters. For advanced baristas, mastering the art of distribution techniques, such as the proper WDT distribution, can prevent channeling and ensure uniform extraction. Many novices overlook this step, resulting in uneven shots despite using top-tier gear. Additionally, a hidden nuance is the impact of puck prep; excessive tamping force isn’t always better, as it can cause undesirable resistance and bitterness. Instead, maintaining a consistent and moderate tamp pressure—around 30 pounds—is recommended. Be cautious of the trap where newcomers assume that more force leads to better extraction. According to barista training literature, over-tamping can create a significant barrier for water flow, increasing the likelihood of over-extraction. As you can see, understanding these subtle yet critical details makes a world of difference in achieving excellence. Have you ever fallen into this trap? Let me know in the comments. Remember, mastering your gear’s hidden nuances elevates your home brewing from good to exceptional.
Maintaining your espresso equipment isn’t just about cleaning; it’s about ensuring optimal performance and longevity. As I’ve learned through experience, the right tools and routine maintenance can prevent costly repairs and keep your brew consistent. One indispensable item I rely on is a high-precision grinder chute brush. Regularly cleaning the chute with this tool prevents clogs that cause uneven grind sizes, which directly impact shot quality. Additionally, I swear by a digital espresso scale with a built-in timer. It helps me dial in extraction times precisely, making each shot reproducible and easier to troubleshoot.
For internal maintenance, carrying a set of O-ring replacement kits is a game-changer. Watching a quick tutorial on this process saved me from calling a technician for a leaking steam wand. And for deep cleaning, I use a descaling brush designed for boiler interiors, ensuring the longevity of my machine’s heating elements.
How do I maintain my espresso machine over time?
Routine checks like inspecting seals, cleaning the group head, and descaling every few months are vital. It’s worth investing in a stainless-steel cleaner to keep your machine’s exterior pristine and resistant to corrosion. Moreover, lubricating moving parts with food-grade lubricant prevents wear and ensures smoother operation. In my experience, establishing a maintenance schedule—say, monthly—helps catch potential issues early. The trend is shifting toward smart maintenance devices that monitor pressure and temperature, providing real-time alerts, which I believe will become standard in the next few years—keeping your gear in peak condition without guesswork.
If you haven’t already, I highly recommend trying the technique of replacing your puck screen with a properly fitted one. This simple upgrade can improve heat distribution and reduce channeling, directly enhancing shot quality. Remember, consistent maintenance not only prolongs your machine’s life but also elevates your home barista game to true professional levels. Keep your gear in top shape, and your coffee will thank you for it!
The Hidden Battles of Home Baristas
Designing the perfect espresso experience at home isn’t just about grinding beans or pulling shots; sometimes, it’s about overcoming the unforeseen warriors within your machine. From loose screws to relentless vibrations, I learned that many common issues are surprisingly simple to tackle once you spot the real culprit. The lightbulb moment? Recognizing that external vibrations often originate from internal misalignments or unstable surfaces. These insights transformed my mornings—less noise, better shots, and a sense of mastery over my gear.
My Essential Toolkit for Espresso Quieting
- Anti-vibration pads: Protects your investment and dampens shakes—trust me, it’s worth trying.
- Precision screwdrivers: For tightening internal components without risking damage.
- Leveling tools: Smartphone apps or spirit levels help ensure your machine sits perfectly—eliminating wobble-induced noise.
- Proper maintenance guides: Certified resources that keep your espresso gear in peak condition, extending its lifespan and performance.
Embrace the Quiet: Your Next Step
Now is the time to transform your bustling kitchen into a peaceful haven where your espresso ritual is as serene as it is satisfying. Don’t let vibrations and noise rob you of your joy—use these insights and tools to craft a truly tranquil coffee corner. Every small fix brings you closer to barista perfection and mornings filled with calm confidence. Share your experiences or ask for tips below—together, we can elevate our home brewing to artful, peaceful heights.