How to Spot Scale Build-up in Your Heat Exchanger Machine
I remember the first time I started noticing my shots tasting a bit off—more bitter than usual, and the machine seemed to be taking longer to heat up. Turns out, I had overlooked a quiet culprit sneaking into my espresso routine: scale buildup inside my heat exchanger. That lightbulb moment hit me hard—how could something so small cause such a big mess?
Why Scale Build-up Should Be Your Wake-Up Call
Scale deposits are like tiny stone layers that form inside your machine, especially in the heat exchanger. Over time, they can insulate heating elements, disrupt water flow, and even cause uneven temperatures—leading to inconsistent espresso shots. As someone who’s been through the frustration of frequent repairs, I can tell you: ignoring this issue can seriously hurt your machine’s performance—and your coffee! Recognizing early signs of scale is crucial because preventive care is always easier (and cheaper) than repairs. Did you know that mineral deposits can begin forming in just a few weeks if you have hard water? The National Coffee Association reports that hard water is a major culprit in scale formation. That’s why understanding how to spot these deposits early can save you time, money, and a lot of coffee heartbreak.
Ever Faced this Problem? You’re Not Alone
When I first ignored the signs, I thought a simple descaling would do the trick. But I was wrong—those stubborn deposits kept returning. My mistake was waiting until the machine was visibly sluggish before taking action. Trust me, catching scale early makes all the difference. I learned that a combination of regular inspections and some basic knowledge about your machine’s internal health is key. Curious about the specific signs to look for? Keep reading, because I’ll guide you through how to identify scale buildup before it becomes a costly headache—and how to keep your heat exchanger running smoothly for perfect espresso every time.
By the end of this post, you’ll have practical steps to spot and tackle scale issues head-on. So, let’s dig into how you can safeguard your machine and maintain that pristine coffee quality you deserve!
Start by Emptying and Filling with Descaling Solution
First, turn off your espresso machine and ensure it has cooled down. Remove the water reservoir and pour in a descaling solution compatible with your machine. Fill with fresh water to dilute the solution if recommended. This initial step flushes out loose deposits and begins dissolving stubborn scale. I remember doing this with a home espresso setup and seeing a slight chemical fog, which signaled that the descaling process had started effectively.
Backflush to Dislodge Deposits
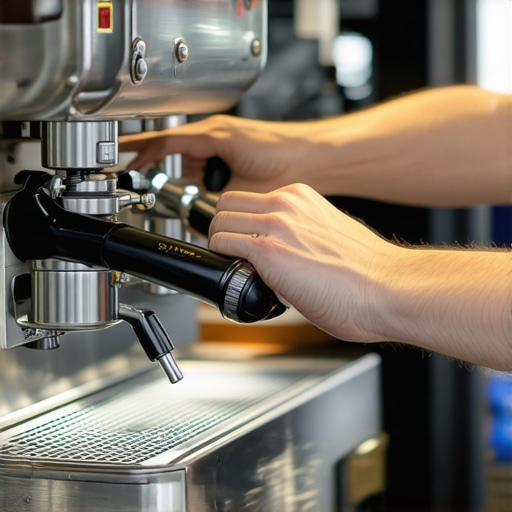
Next, use a blind filter with your portafilter basket to perform a backflush. Insert the basket into the portafilter, then run the pump at a low pressure. This process pushes the descaling solution into the heat exchanger and loosens stubborn scale buildup on internal surfaces. During my attempt, I used a toothbrush to gently scrub the gasket area, which helped dislodge deposits. Be cautious not to use excessive force, as this might damage the valve or gasket.
Use Proper Water Flow Techniques
To ensure optimal cleaning, open and close steam and brew heads to circulate the solution thoroughly. Mimic regular brewing cycles to push the solution through all pathways—this acts like flushing the internal circuits. As I discovered in my own machine, this step ensures the descaling solution reaches every hidden corner—it’s like clearing a clogged pipe with a powerful blast.
Perform a Hot Water Rinse
After the descaling cycle, drain the solution and refill the reservoir with fresh water. Run several brewing cycles without coffee to thoroughly rinse out any remaining descaling agent. This step is crucial; residual chemicals can alter taste or damage parts if left inside. I learned this the hard way—lingering residue once caused a bitter aftertaste that took days to fix. Rinsing makes my espresso taste crisp and balanced again.
Inspect Internal Components for Scale
For a deeper clean inside the heat exchanger, some machines allow partial disassembly. Carefully remove accessible panels or covers, and use a soft brush to gently dislodge scale deposits. Be sure to disconnect power first. During my last cleaning, I found mineral deposits caking small internal tubes—removing these improved both performance and longevity. If unsure, consult your machine’s manual or professional service guides.
Repeat Regularly to Prevent Future Build-up
Establish a routine—every 2-4 weeks depending on water hardness—to descale the heat exchanger. Use a descaling product designed for espresso machines and always follow manufacturer instructions. Remember, the key is consistency; it’s easier to prevent scale than to fight a heavy buildup later. I keep a calendar reminder now, avoiding the messy and costly scenario of blocked internal passages and uneven heating—saving hours of troubleshooting in the long run.
While many home espresso enthusiasts focus on precise grind size or tamping pressure, there’s a common misconception that more complex gear or advanced techniques automatically lead to better coffee. In reality, understanding the hidden nuances of your espresso setup is crucial; for example, most people overlook how different brewing temperatures can subtly influence extraction, sometimes causing bitter notes or sour tastes without obvious reasons. Experts know that even the type of coffee beans—stale vs. freshly roasted—plays a critical role, but many assume that buying premium beans alone is enough.
Why Does Your High-End Machine Sometimes Underperform?
This paradox often stems from neglecting machine calibration and maintenance. A sophisticated espresso machine can produce lackluster shots if it’s not properly tuned to your specific beans or environment. Calibration involves more than just setting boiler temperature; variables like pressure profiling, group head temperature, and even water mineral content can dramatically affect results. Proper bean freshness and machine setup are intertwined; neglecting one compromises the other. Interestingly, some baristas swear by using temperature surfing techniques—adjusting temperature profiles on the fly during extraction—to enhance flavor clarity, a strategy overlooked by most home users. Additionally, many believe that investing in premium barista gear guarantees perfect coffee. However, an advanced mistake is overfitting your machine’s settings; what’s optimal one day may be subpar the next due to ambient changes or bean batch variations. Regularly re-calibrating equipment and understanding the subtle interplay of variables can make the difference between good and exceptional espresso.
How Can I Avoid Common Mistakes in Espresso Crafting?
It’s vital to approach your gear with an analytical mindset. For instance, inconsistent microfoaming may be due to milk composition or wand technique rather than equipment malfunction. Instead of blindly replacing parts, be diligent in troubleshooting—check for wanded issues or gunk buildup first. Moreover, avoid the trap of believing that grind size adjustments alone will fix flavor problems; sometimes, the underlying cause is water quality or incorrect machine pressure settings. Investing in an external flow meter or pressure gauge can provide the clarity needed to refine your process. Finally, recognizing the importance of environmental factors—humidity, ambient temperature, and water hardness—can help prevent many headaches caused by seemingly ‘broken’ gear. Managing these variables ensures consistency and elevates your coffee game to professional levels. Remember, mastery lies in attention to detail and continuous learning, not just upgrading equipment. Have you ever fallen into this trap? Let me know in the comments.
Set Up for Long-Term Success
Investing in the right tools is crucial to maintaining your espresso setup effectively. I personally swear by a high-quality digital caliper for precise grinder adjustments—this ensures consistent grind size, which is vital for shot quality. Pair that with a stainless steel cleaning brush to reach into tough spots inside group heads and steam wands. Regular use of these tools has prevented many common issues like channeling and milk frothing problems, saving me time and expensive repairs. For software, I rely on grinder calibration apps that connect via Bluetooth, allowing me to fine-tune dose and grind consistency with pinpoint accuracy. These digital aids are future-forward and increasingly affordable, pushing the boundaries of home barista precision.
How do I maintain my equipment over time?
Consistent maintenance is the backbone of a reliable home espresso setup. I schedule a weekly deep clean of the brew group and steam wand, and monthly descaling using a dedicated descaling solution—never just rely on water runs. Additionally, periodically replacing worn-out parts like group gaskets helps prevent leaks and maintains optimal pressure profiles. To keep everything in check, I keep a maintenance log, documenting when I last cleaned or replaced parts, making it easier to spot emerging issues early. This disciplined approach helps my machine perform like new and extends its lifespan significantly.
Tools That Make Daily Maintenance a Breeze
Beyond the obvious cleaning brushes, I recommend a dental pick for removing stubborn coffee grounds from small crevices and a multitool screwdriver set for quick disassembly of removable parts. A drip tray encoder upgrade can also help monitor overflow issues before they escalate, giving peace of mind. For milk frothing, I use a silicone milk frothing pitcher that retains heat evenly, reducing the chances of overheating or uneven microfoam—a common source of disappointing latte art. Incorporating these tools into my routine ensures that minor issues don’t snowball into costly failures.
The Future of Home Espresso Care
As technology progresses, I foresee smarter espresso machines equipped with integrated diagnostic tools and self-cleaning functions becoming standard. AI-driven maintenance alerts could notify you precisely when parts need attention—imagine a machine that warns you before a gasket starts to leak. Staying ahead of these trends means investing in quality tools now, like moisture meters for water quality assessment or advanced calibrators for pressure profiling. This proactive approach guarantees your machine remains in prime condition, and your coffee experience stays exceptional.
Take Action Today
Don’t wait for issues to become apparent—try using a digital caliper to refine your grinder adjustments this week. The precision gained can noticeably improve your shot consistency and flavor profile, elevating your home barista game. Remember, a small investment in the right tools and a disciplined maintenance routine can lead to a lifetime of excellent coffee. For more advanced tips, explore how accurate calibration is crucial after changing grinder burrs, ensuring your grind size stays perfect every time. Begin today, and enjoy consistently stellar espresso!
Throughout my journey as a home barista, I discovered that the smallest details often make the biggest difference. One profound lesson I learned is that consistent maintenance and an understanding of internal machine health are crucial for exceptional espresso quality. Instead of chasing the latest equipment, I focus on preventative care, like regular descaling and internal inspections, which safeguard my machine’s longevity and ensure every shot tastes perfect. This approach has transformed my coffee experience from occasionally frustrating to reliably satisfying, proving that knowledge and routine are the true keys to mastering home espresso.
Lessons Hidden in Plain Sight from My Maintenance Mistakes
- Don’t wait for performance drops: Recognizing early signs of scale buildup—like longer heat-up times or subtle taste changes—can save you costly repairs and maintain your machine’s integrity. I once ignored slow heating, only to face a complicated clean-up that could’ve been avoided with regular checks.
- Clean deeper than surface-level: Internal disassembly and gentle brushing of accessible parts help prevent stubborn scale that hampers performance. Incorporating tools like a soft brush or even a group gasket removal manual has empowered me to stay ahead of internal deposits.
- Establish a routine that adapts: Water quality varies with seasons and source, influencing scale formation. Adjust your descaling frequency accordingly—every 2-4 weeks if you have hard water. Setting recurring reminders has kept my machine consistently running smoothly.
Tools and Resources That Elevate My Maintenance Game
- Digital Caliper: Precision in grinder adjustments helps prevent uneven extraction, ensuring each shot is balanced. I trust this tool to keep my grind consistent, which is paramount for flavor clarity.
- Soft Cleaning Brushes: These reach into tight spaces within the group head and steam wand, removing scale and residue with minimal abrasion. Regular use keeps performance piercingly sharp.
- Reliable Descaling Solutions: Brands recommended by experts specifically formulated for espresso machines work better than household vinegar, safeguarding delicate internal components.
- Maintenance Log: Tracking cleaning dates, parts replacements, and performance notes helps me catch emerging issues early, extending my machine’s life.
Keep Your Espresso Craft on the Right Track
Taking action today can prevent a future headache. Regularly inspecting and maintaining your heat exchanger and internal components is a small investment that pays off in excellent coffee and machine reliability. Embrace routine, leverage trusted tools, and stay curious about your machine’s inner workings—the rewards are worth it. Remember, mastery in home espresso isn’t just about technique; it’s about care and consistency, and every good habit you cultivate now sets the stage for barista-level results for years to come.
What’s the biggest maintenance lesson you’ve learned so far? Share your story below and help fellow enthusiasts keep their machines in top shape!
,