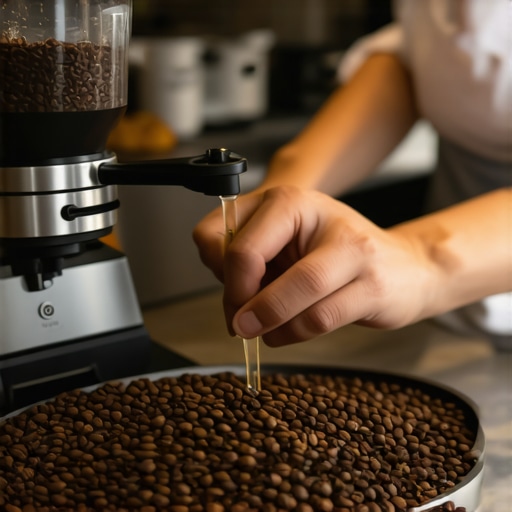
Why your first shot of the day always tastes metallic
Ever had that disappointing moment where your first shot of the morning greets you with a harsh, metallic taste? I remember countless mornings, fumbling with my espresso machine, only to be greeted by a bitter, tin-like flavor that seemed to ruin my entire day. It was frustrating—especially because I knew I was doing everything by the book. But one lightbulb moment changed everything for me, and I want to help you avoid the same pitfalls.
What’s Behind That Odd Metallic Edge in Your First Brew?
The truth is, that metallic taste isn’t just a fluke or a sign of bad beans. It often stems from issues lurking deep within your machine—things like residual mineral buildup, improper cleaning, or even the materials used in your equipment. I used to dismiss these as minor quirks until I realized how much they could impact flavor.
Is Your Equipment Causing More Harm Than You Think?
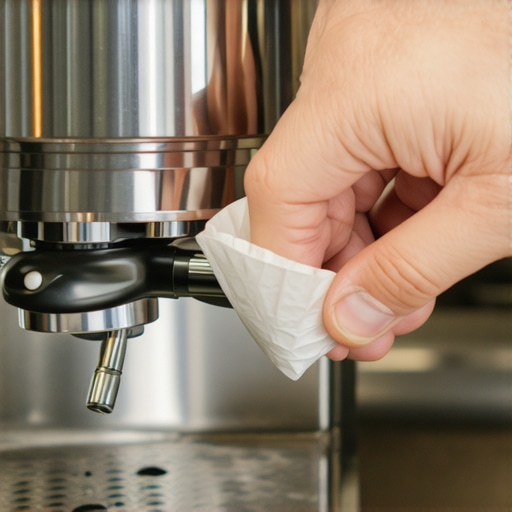
When I first started brewing at home, I made a rookie mistake: neglecting regular maintenance. I ignored routine descaling, didn’t clean my portafilter properly, and overlooked the importance of using the right utensils and materials. The result? A persistent metallic flavor every morning. If you’re experiencing something similar, you might want to consider whether mineral deposits or leftover cleaning agents are affecting your brew. This article on cleaning your espresso machine offers fantastic insights on how buildup impacts flavor.
But don’t worry—these issues are fixable with a few simple steps. By properly maintaining your gear and understanding the root causes, you can enjoy smooth, flavorful espresso right from the first shot of your day. Tomorrow, I’ll guide you through practical, actionable tips to banish that metallic taste for good and make every shot a celebration. Have you faced this metallic dilemma before? Let me know—I’d love to hear your experiences and help troubleshoot further.
Start with a Deep Clean of Your Equipment
Remove any residual old coffee oils and mineral deposits by descaling your machine regularly. Use a commercial descaler suited for your equipment rather than household vinegar, which can leave lingering flavors. For my own machine, I dedicated a Saturday morning to descaling—disassembling the group head and steaming wand, then running the descaling solution through the entire system. The change was immediate; the bitter metallic taste vanished after this thorough clean.
Clear Mineral Buildup in the Group Head
Mineral deposits often accumulate in the group head, causing water flow issues and flavor contamination. To fix this, remove the shower screen and soak it in a descaling solution. Use a dental pick to dislodge crusted-scale around the shower screen and gasket. Reassemble and run hot water cycles to flush out residues. For detailed guidance, see this tutorial. Regularly doing this prevents scale buildup and maintains water purity, directly improving flavor clarity.
Maintain the Grinder for Freshness and Clarity
Old, oily beans or dull burrs can introduce metallic notes into your espresso. Always grind fresh beans and replace dull burrs promptly—generally every 5,000 to 8,000 shots. When trying to diagnose flavor issues, consider whether your grinder’s burrs are causing channeling or uneven extraction. Dull burrs produce inconsistent grind size, leading to over-extraction and bitterness. To check for dullness, see here. If burrs are dull, replace or re-align them, and clean grinder chutes with a magnet-based tool to prevent old grounds from contaminating new brew.
Adjust Your Tamp and Basket Properly
Uneven tamping can create channels, leading to water rushing through the puck and extracting metallic flavors. Use a consistent pressure—aim for around 30 pounds—and verify your tamping technique with this guide. Also, ensure your basket size matches your beans; a mismatched basket causes uneven extraction, leaving behind metallic residues. For that, review this article. Practicing consistent technique and proper basket selection leads to cleaner, sweeter shots.
Replace Worn Seals and O-Rings
Seals prevent water from leaking and ensure proper pressure. Worn or damaged seals can introduce metallic taste and result in inconsistent extraction. Inspect seals in the portafilter and group head; if they look cracked or hardened, replace them. For a safe and effective procedure, consult this resource. Replacing seals restores proper pressure and prevents contamination, significantly improving flavor quality.
Clean Milk and Steam Components Regularly
Milk residue and bacteria in steam wands can cause off-flavors that mimic metallic notes. Use a cleaning solution recommended for your wand material, and regularly purge it with steam to clear out buildup. For stubborn crust, the this cleaning technique works wonders. Keeping your steaming components hygienic prevents flavor contamination and preserves the purity of your coffee’s taste.
Establish a Routine Maintenance Schedule
Create a checklist for weekly, monthly, and quarterly maintenance tasks—descaling, replacing filters, checking seals, and deep cleaning. Over time, these routines prevent scale buildup, mineral deposits, and equipment deterioration. Remember, consistent care is key; neglecting small issues leads to flavor compromises and bitter, metallic notes over time. Developing a habit of proactive maintenance ensures you consistently enjoy crisp, flavorful espresso.
Many home baristas operate under misconceptions about espresso machines, milk frothers, and grinders that can ultimately hinder their progress. Let’s dig deeper into some of these nuanced pitfalls. Contrary to popular belief, investing in high-end equipment doesn’t automatically guarantee perfect results if you’re not aware of the intricacies involved. For example, many assume that an expensive grinder is foolproof, but without proper maintenance—such as regularly removing baked-on coffee oils—you risk dull burrs and static buildup that compromise flavor and consistency.
Misconception One: More Power Means Better Coffee
Often, enthusiasts think that higher wattage or pressure translates directly to superior espresso. While these specs matter, the real magic lies in precise temperature control and stable extraction pressure. Overlooking these nuances can lead to over-extraction or under-extraction, resulting in bitter or sour notes, respectively. Advanced home setups benefit immensely from machines with PID controllers that maintain consistent brewing temperatures, a feature often misunderstood by beginners.
Trap to Avoid: Falling for the hype of over-specified gear without understanding its actual capabilities can lead to unnecessary expenses. Instead, focus on how well your machine maintains stable temperature and pressure during extraction.
Can Your Home Machine Handle Advanced Techniques?
Advanced users often wonder whether their equipment supports nuanced adjustments like pre-infusion or pressure profiling. Many forget that such features require proper understanding and handling to be effective. For instance, using a machine with adjustable pre-infusion settings can reduce channeling and improve shot uniformity, but only if you control the timing precisely. It’s worth investing time in learning how to harness these features, as they can elevate your espresso quality considerably. Studies from the Specialty Coffee Association highlight how pressure profiling can improve extraction efficiency and flavor clarity.
Furthermore, a common myth is that milk frothers handle all types of milk equally well. In reality, dairy content and temperature play vital roles, and inappropriate use can lead to curdling or flat foam. Proper cleaning of steaming components is often overlooked, but a dirty wand can harbor bacteria, affecting flavor and safety. Regularly cleaning and maintaining your gear with the appropriate techniques, like the steam wand cleaning method, is essential for optimal performance.
Have you ever fallen into this trap? Let me know in the comments. Remember, understanding these nuances will help you troubleshoot issues more effectively and prevent costly mistakes, leading to consistently great espresso at home.
Keeping Your Gear in Top Shape for Consistent Espresso
Achieving barista-quality espresso at home isn’t just about the initial setup; it hinges on regular, precise maintenance and using the right tools. Over time, equipment wear, mineral buildup, and neglected care can undermine even the best setups. I’ve found that investing in specific tools and sticking to structured routines keeps my espresso silky-smooth and reliable day after day.
One of my most trusted tools is a dedicated grinder brush. Unlike household brushes, these are designed specifically to clean burrs without dislodging delicate components. I personally use a magnet-based brush because it efficiently clears coffee oils and static, significantly improving grind consistency and flavor.
For descaling, I prefer a pH-balanced descaler like Urnex or similar brands. Regular descaling—every 2-4 weeks depending on water hardness—eliminates mineral deposits that cause bitter metallic flavors. During my routine, I follow detailed steps, including removing shower screens and steaming wands, ensuring every nook is clean. This diligence prevents issues like scale-induced pressure drops, which can leave milk frothing unevenly. To get a step-by-step, see this guide on priming your pump.
How do I maintain my equipment over time?
Consistent, scheduled maintenance is key. I set reminders on my phone for weekly filter checks, monthly deep cleans, and quarterly parts replacements. For example, seals and O-rings in the group head degrade over time; inspecting and replacing them as needed restores proper pressure. If you’re unsure whether seals need replacing, check out the tutorial here. Additionally, a tune-up kit that includes a new shower screen, gasket, and portafilter gaskets can save money and maintain quality.
When it comes to grinder maintenance, replacing burrs at the 8,000-shot mark is a rule of thumb I follow—sharpened burrs produce cleaner, brighter coffee free of static-related messes. Dull burrs not only damage flavor but can strain your grinder’s motor, so stay vigilant. You might also consider magnetized dosing funnels to keep grounds neat and reduce waste.
Scaling your setup for the long haul
Future trends point towards smarter, more connected equipment—like app-controlled heaters and maintenance alerts. However, the foundation remains routine care and high-quality tools. Regularly updating your maintenance checklist and investing in trusted accessories ensures you preserve the flavorful integrity of your espresso. As a final tip, I recommend trying the 10-second flush technique after every shot to prolong your machine’s lifespan and keep flavor profile optimal.
So, adopt a personalized maintenance routine today, pick up that dedicated grinder brush, and enjoy consistently excellent espresso for years to come. What’s one tool you rely on the most? Drop a comment and share your favorite maintenance hack!
Behind Every Good Espresso Is a Lesson Learned
My most profound insight came from the realization that even the finest equipment won’t save you from complacency. Regularly running descaling routines and paying attention to worn gaskets transformed not only my machine’s performance but also the flavor profile of my espresso. The hidden truth? Sometimes, the small overlooked details make the biggest difference.
Another eye-opening moment was understanding that high wattage or pressure specs are superficial if your temperature control isn’t precise. I learned that a PID controller isn’t just a luxury but a necessity for consistent shots. These lessons remind me that mastery isn’t about finding the perfect gear but cultivating good habits and paying attention to the nuances.
Finally, I discovered that even seemingly minor tweaks—like proper tamping pressure or cleaning the steam wand—accumulate for a richer, more satisfying coffee experience. Small consistent actions pave the way for big improvements over time.