Why Your Burr Grinder Is Throwing Grounds Out the Back Side
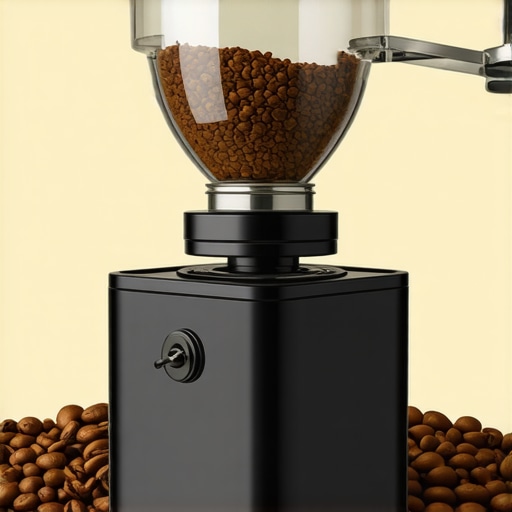
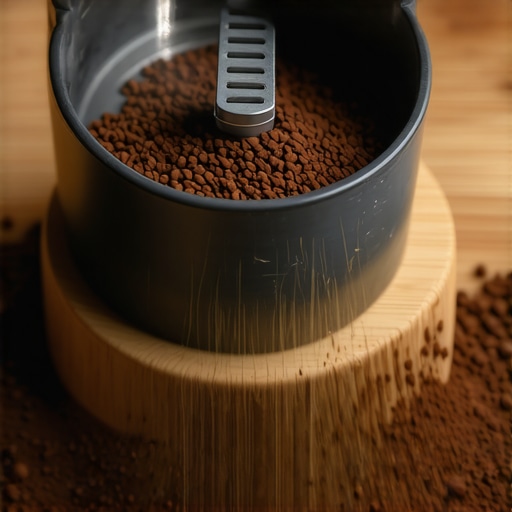
It happened again. I was in the middle of my morning routine, patiently waiting for that perfect grind to start my day, when suddenly I noticed a fine shower of coffee grounds spilling onto my counter and pooling at the back of my burr grinder. Frustration bubbled up—what’s going on here? Isn’t a burr grinder supposed to produce a consistent grind without mess?
As a fellow coffee enthusiast who has spent countless mornings troubleshooting my own gear, I know this problem all too well. That unexpected grounds spilling is more than a minor annoyance; it’s a sign that something’s off with your grinder’s alignment or seal. If you’ve ever wondered why your grinder’s grounds are ending up behind the machine instead of in the portafilter, you’re not alone—and more importantly, you’re not powerless.
Today, I want to shed light on this issue, break down why it happens, and most importantly, how you can fix it once and for all. Think of this as your friendly neighborhood guide to stopping the grounds from escaping and keeping your espresso routine smooth.
Why Grounds End Up Behind Your Burr Grinder
One common culprit is misaligned burrs. When the burrs aren’t perfectly parallel or are slightly loose, grounds can escape through tiny gaps, especially under high pressure or when using oily, dark roasts. This problem often occurs after servicing or replacing burrs, or if the grinder hasn’t been calibrated properly.
Another often-overlooked cause is a worn or compromised seal around the burr chamber. Think of it like a gasket that keeps everything contained; if it’s damaged or improperly fitted, grounds will find their way out, turning your workspace into a coffee battlefield.
Now, I admit I made a costly mistake early on—assuming that regular use wouldn’t affect my grinder’s alignment. I skipped proper calibration after cleaning and saw grounds start to sneer out the back. That oversight cost me extra cleaning and, more significantly, impaired my shots. Learning from that, I now regularly check and maintain my grinder’s burr alignment. To avoid similar pitfalls, I recommend this comprehensive guide to [how to properly align your burrs](https://espressotechguide.com/how-to-align-your-grinder-burrs-using-a-dry-erase-marker).
Understanding these root causes puts you ahead of the game. Next, we’ll explore practical steps to identify and fix the issue, ensuring your grinder keeps every bean in check and your mornings mess-free.
Inspect the Burr Alignment and Tighten Them Properly
Start by unplugging your grinder and removing the hopper. Check the burrs—conical or flat—using a flashlight. If you notice they are misaligned or wobbling, it’s crucial to realign them. Use a shim or a flat shim-like object such as a piece of paper or a thin card (like from your contact lenses case) to gently correct the alignment. When fixing my grinder after noticing grounds pooling behind, I realigned the burrs following this method: loosening the screws, inserting a paper shim to ensure perfect parallelism, and tightening everything back. The result was a significant reduction in grounds leakage.
Replace or Tighten the Seals
Next, examine the seal around your burr chamber—look for cracks, tears, or any signs of wear. If the seal is compromised, replace it with a genuine part or a compatible gasket. For a quick fix, tighten any loose screws or clamps that hold the seal. During my own repair, I ordered a new seal from the manufacturer and replaced it following their instructions, which stopped grounds from escaping through the chamber’s gaps. Proper sealing creates a micro-environment, preventing grounds from leaking out during high-pressure grinding.
Clean the Grinder Thoroughly
Residual coffee oils and grounds can cause buildup, leading to uneven burrs and leakage. Regular cleaning is essential. Disassemble the burrs and use a brush or vacuum to remove all loose grounds. For oily beans, use a grinder cleaning tablet or a damp cloth with a mild detergent. When I cleaned my grinder recently, I made sure to remove all stuck residue—then reassembled carefully, ensuring everything fit tightly. Cleanliness ensures that no debris interferes with burr operation, reducing grounds spillage.
Calibrate the Grinder After Reassembly
Once everything is cleaned and reassembled, recalibrate your grinder. Many models have a calibration procedure—consult your user manual or follow online tutorials for your specific brand. During my calibration, I ran test beans and observed the ground flow, fine-tuning until grounds distributed evenly without spillages. Calibration aligns the burrs accurately, minimizing gaps where grounds might escape.
Adjust the Grind Settings for Optimal Containment
If leaks persist, consider adjusting the grind fineness. Finer settings bind grounds better, reducing escape, but avoid excessive fineness that causes clogging. This adjustment can be done incrementally—test after each change. I found that gradually tweaking the grind size improved containment and improved shot quality, while also reducing messes.
Use Proper Dosing and Tamp Technique
Overloading the grinder or tamping unevenly might create pressure points that dislodge grounds. Consistently dose your beans and tamp evenly—for example, using a calibrated tamper or a dosing funnel. During my routine, I noticed that heavy tamping led to minor leaks, so I adjusted my tamp pressure accordingly. Proper technique ensures the grounds stay within the basket during grinding and extraction, preventing spillage.
Regular Maintenance to Prevent Future Issues
Implement a maintenance schedule—clean every few weeks, check burr alignment monthly, and replace seals annually. A proactive approach keeps your grinder operating smoothly. When I stuck to this routine, I saw fewer issues with grounds escaping, making my mornings cleaner and more efficient.
Remember, each grinder model differs. For specific guidance, visit our contact page or explore detailed tutorials on aligning burrs. Proper maintenance and timely repairs transform your espresso experience, ensuring no grounds end up where they shouldn’t.
When it comes to building a perfect home espresso setup, many enthusiasts rely on popular advice that misses the mark. A common misconception is that more expensive equipment automatically guarantees better results. In reality, understanding the nuanced differences between budget and high-end gear can mean the difference between mediocre and exceptional coffee. For instance, some believe that commercial-grade espresso machines are essential for home brewing, but studies suggest that with proper calibration and maintenance, mid-range models can perform just as well, offering better value for your investment.
Is Top-Tier Equipment Worth the Extra Cost for a Home Barista?
While premium gear like precise grinders and temperature-stable machines might cost more, experts advise evaluating your specific needs and skill level before investing heavily. Overcomplicating your setup can lead to more frequent errors and maintenance issues, which diminishes the overall experience. A notable trap is the assumption that cutting-edge features—such as automatic tampers or built-in grinders—enhance every shot equally. In my experience, mastering manual controls often yields better results, as outlined in [mastering the art of home espresso](https://espressotechguide.com/mastering-the-art-of-home-espresso-tips-for-beginners). Additionally, beware of the myth that ceramic burrs are always superior to steel ones. While ceramic burrs resist dulling longer, they are more brittle and prone to chipping if not handled carefully, which can lead to inconsistent grinds—a mistake many make when upgrading their burr set. To avoid these pitfalls, researching the specific characteristics of your grinder’s burrs and tailoring your maintenance routine is crucial. When selecting barista gear, don’t forget that proper technique often surpasses equipment quality. For guidance, check out [choosing the best barista gear](https://espressotechguide.com/choosing-the-best-barista-gear-for-coffee-enthusiasts). Finally, remember that consistency is king. Regular calibration, cleaning, and understanding your equipment’s limits will always yield better espresso than simply chasing the latest model or feature. Are you guilty of any gear misconceptions? Have you ever fallen into this trap? Let me know in the comments below!Maintaining your coffee equipment is crucial for consistent, high-quality results and prolonging the lifespan of your investment. When selecting tools, I prioritize durability and precision; for example, a high-quality torque driver helps me tighten burrs evenly without over-tightening, which is vital for preventing grounds from escaping. I also rely on a digital calibration scale, like the Acaia Pearl, which offers 0.1-gram accuracy—essential for dialing in grind settings and dose consistency, especially when switching between beans or recipes. Regular calibration ensures your grinder and espresso machine operate at peak performance, reducing waste and improving flavor.
Beyond tools, establishing a maintenance routine saves time and money. I recommend cleaning your grinder and espresso machine thoroughly every two weeks. Use a dedicated grinder brush to remove residual grounds from burr holes—this prevents clogging and static buildup, which can lead to uneven grinds. For detailed cleaning, I follow the steps outlined in [this guide](https://espressotechguide.com/how-to-clean-buried-coffee-oils-out-of-your-grinder-chute), which emphasizes disassembling burrs safely and using food-safe cleaning tablets to eliminate oils.
To keep your equipment performing well long-term, monitor wear parts like seals and gaskets. Replacing them proactively before failure ensures your machine maintains proper pressure and prevents leaks. I suggest sourcing genuine parts directly from manufacturers or authorized dealers—familiarity with your gear’s specific parts makes maintenance smoother. For instance, replacing the shower screen in an E61 group head can significantly improve water flow and extraction quality, as detailed in [this technical article](https://espressotechguide.com/why-your-e61-group-head-is-leaking-from-the-exhaust-valve). Regular maintenance combined with quality tools creates a reliable routine that enhances your coffee experience.
Predicting future trends, I believe smart diagnostics and IoT integration will become standard, enabling equipment to alert owners of impending issues before they escalate. Imagine receiving a notification on your phone that your grinder’s burrs are dulled or seals are compromised—saving you from downtime and costly repairs.
**How do I keep my espresso gear performing flawlessly over time?** Consistency in cleaning, using the right calibration tools, and staying ahead of wear parts are key strategies. Don’t forget to schedule periodic deep cleaning sessions and calibration checks—these small investments today save significant frustration tomorrow.
For a practical step, I recommend trying the advanced calibration tip of using a precision digital scale during the last step of grinder setup. This technique ensures your doses are exact, leading to more stable shots and fewer clean-ups caused by grounds leakage. Curious to see how this method boosts your espresso quality? Visit our [contact page](https://espressotechguide.com/contact-us) for personalized advice or beginner tips.
Three Mistakes I Wish I Never Made with My Barista Gear
One of the toughest lessons I learned was neglecting regular calibration. During my early days, I trusted that new equipment would stay perfectly aligned, only to discover that even the best grinders drift over time, especially if you switch beans or roast levels frequently. Now, I make calibration a weekly ritual, and it’s truly transformed my espresso consistency.
Another eye-opener was underestimating the importance of sealing seals and gaskets. I assumed they’d last forever, but a small tear or loose fit caused grounds to escape and mess up my workspace. Replacing these tiny parts has saved me countless cleaning hours and improved shot quality.
Lastly, I used to think that more expensive tools automatically meant better results. That misconception led me to invest in high-end milk frothers and grinders, only to realize that technique, maintenance, and understanding your gear matter far more. My favorite tip? Mastering basic controls and routine upkeep often beats chasing the latest gadget every time.