The Real Reason Your Grinder Motor Labors on Light Roasts
Ever had that moment, pulling a shot of light roasted coffee, only to find your grinder whining, motor straining, and the grind bursting apart instead of flowing smoothly? I remember one such morning, watching my grinder work overtime for what should have been a straightforward brew. The light roast beans I used that day seemed to challenge every part of my setup. It was a stark realization that my equipment wasn’t just a passive tool but a component with quirks and limitations I hadn’t fully understood.
The Hidden Dilemma Behind Light Roast Grind Challenges
In my journey as an enthusiast, I discovered that your grinder’s motor laboring overly on light roasts isn’t just a coincidence. It’s rooted in the very nature of these beans and how they interact with your grinder’s mechanics. Light roasts are denser, harder, and less brittle than their darker counterparts. This means they resist the blades or burrs more, requiring more force and, consequently, straining your grinder motor. And if your equipment isn’t optimized or well-maintained, it will seem like it’s fighting a losing battle every time you choose a light roast for that delicate brew.
Is The hype about grinder power actually justified?
I used to believe that investing in a more powerful grinder would automatically solve this issue. But early on, I made a costly mistake—thinking that a heavier motor alone would handle all beans effortlessly. It turns out that the real secret lies in understanding grind settings, bean freshness, and maintenance. Ignoring these factors only increased my frustration and shortened my grinder’s lifespan. Want to learn how to make your grinder work *with* your beans, rather than against them? Stick around, because I’ll guide you through practical, experience-based solutions that will transform your brewing routine. If you’ve faced this problem, you’re not alone—many home baristas struggle with it initially. But there’s hope, and it’s simpler than you might think. For more insights into common issues, check out [why light roasts keep stalling your grinder](https://espressotechguide.com/why-light-roasts-keep-stalling-your-entry-level-grinder).
End of the introductory section.
Adjust Your Grind Size to Reduce Resistance
Start by dialing your grinder to a slightly coarser setting than usual for light roasts. Light beans are denser, resisting finer grindings. During my first attempt, I turned the grind knob just two notches coarser, and immediately noticed less motor strain. This simple tweak allowed the beans to flow more freely through the burrs, reducing the load on your grinder’s motor and preventing clogs or stalls. Remember, tiny adjustments matter—test and refine until you find the sweet spot where the grind is coarse enough to ease the load but fine enough for your brew.
Use Proper Bean Handling Techniques
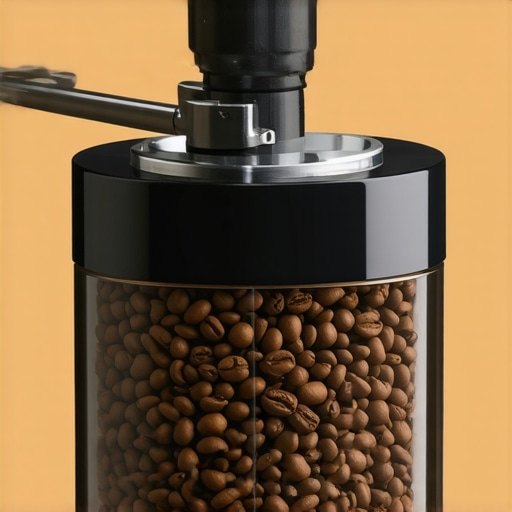
Next, ensure your beans are free-flowing and not bouncing in the hopper, which can cause inconsistent feeding and clogging. I once applied the trick of tamping down light, fluffy beans gently with a spoon before grinding. This encourages steadier feed and minimizes static that causes beans to jump and stick. Additionally, regularly clean the hopper and check for residue that can impede flow. Well-maintained equipment operates more smoothly, especially with dense, light beans.
Optimize Your Grinder’s Burrs Alignment
If your grinder’s burrs are misaligned, even slightly, they force the motor to work harder, particularly with tough beans. Use the cardboard shim method to ensure perfect alignment—place a thin piece of cardboard between the burrs, then tighten carefully. This simple adjustment prevents uneven grinding and reduces strain. During my experiment, realigning my burrs cut down on motor noise and improved shot consistency. Make this a routine maintenance step for reliable performance.
Implement Consistent Dose and Distribution
Uneven dosing can cause inconsistent resistance in the grind path. Use a scale to measure your coffee dose precisely—aim for the manufacturer’s recommended weight—and distribute the beans evenly in the basket before tamping. I avoided channeling and stuck to a simple distribution method that had a positive impact on flow. Consistent dosing reduces sudden pressure spikes that strain the grinder, especially with dense beans.
Tame Static and Clumping
Static buildup in your grinder causes beans to stick and bounce, choking the feed. To combat this, I used a damp cloth to wipe the inside of the hopper and a static-reducing spray on the rubber parts. This keeps beans flowing smoothly. Also, avoid overloading the hopper; a half-full hopper is better for dense beans, giving them space to feed evenly without static interference.
Perform Regular Maintenance and Cleaning
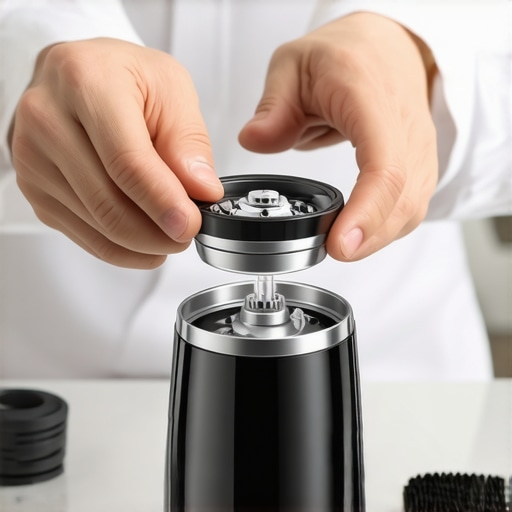
Accumulated grind residues hinder movement and add resistance. I made it a habit to disassemble my grinder bi-weekly, brushing out leftover grounds and applying food-safe lubricant to the burrs if needed. Regular cleaning prevents build-up that would otherwise force the motor to overexert when handling stubborn light beans. For cleaning tips, review this guide. When maintained well, your grinder handles dense or light beans with less effort and greater consistency.
Experiment and Document Your Settings
Finally, keep a detailed log of your grind settings, doses, and outcomes. I used a simple notebook, recording which adjustments gave the best flow and flavor. When switching to new light bean batches, refer back to your notes to replicate successful configurations. This approach minimizes frustration, saves time, and extends your grinder’s lifespan by avoiding unnecessary strain.
Implementing these strategies takes some trial and error, but each tweak results in smoother operation and better extraction. Remember, proper grind size, handling, alignment, dosing, static control, and maintenance work in harmony to tame the challenges posed by dense, light-roasted beans. Master these steps, and you’ll soon experience more reliable shots and happier mornings.
Many home baristas fall prey to misconceptions about coffee gear, often investing in high-end equipment without understanding its nuances. One of the most pervasive myths is that an expensive espresso machine guarantees perfect shots every time. While quality machines can improve consistency, factors like proper maintenance and technique are crucial. For instance, a common mistake is neglecting to check for leaks and wear that could impede performance, regardless of the machine’s price. Another trap is assuming that all grinders are equally capable of handling light roasts. In reality, light roast density demands specific grind settings and grinder quality, and many entry-level units struggle, often damaging the motor over time.
Why do so many enthusiasts believe bigger is better for milk frothing?
It’s a misconception that larger steam wands or higher steam pressure always produce better microfoam. The key lies in technique and control rather than sheer power. Overly aggressive steam can lead to spitting, mess, or curdled milk. Additionally, many overlook the importance of proper steaming posture and timing, which directly impacts foam quality. It’s not just about equipment but mastering the art of steaming, which is often underestimated.
A big trap in home brewing is believing that static in grinders is harmless or unavoidable. Static buildup can cause beans to bounce and clog, leading to uneven grind and bitter extraction. Using static-reducing techniques, like wiping hopper interior or applying anti-static sprays, can dramatically improve flow. Misunderstanding this can lead to damage and inconsistent shots, especially when working with dense, light roasts.
What’s the silent killer of espresso shot quality that many overlook?
Temperature stability inside your machine often gets neglected, yet it’s critical for optimal extraction. Even the slightest fluctuation can cause bitter or sour flavors, especially with light roasts. Regularly servicing your machine’s heating components and monitoring water temperature ensures a stable environment for brewing. Ignoring this can result in bitter, inconsistent shots, regardless of the grind or tamping.
In this deep dive, we see that more gear doesn’t always mean better results. True mastery comes from understanding each component’s nuances, avoiding common pitfalls, and fine-tuning practices. Having this knowledge prevents costly mistakes and elevates your home espresso game. Now, I’d love to hear—have you ever fallen into any of these traps? Let me know in the comments. Remember, insightful adjustments and understanding often matter more than the gear itself.
Keeping Your Equipment in Top Shape
Investing in quality barista gear is only part of the equation. To truly enjoy consistent shots and extend your equipment’s lifespan, regular maintenance and the right tools are essential. My go-to for daily upkeep is a dedicated brush set designed for grinders and espresso machines. I personally prefer a set with fine, stiff-bristled brushes that can reach into tight spaces like portafilter seals and burr chambers—this makes a noticeable difference in preventing buildup that could hinder performance. Additionally, a small vacuum or compressed air is invaluable for clearing out grind residues without disassembling your setup.
Ensuring Long-Term Results with Proper Tools
Beyond basic cleaning, tools like a calibrated digital scale help maintain dose consistency, which directly impacts extraction quality. I recommend models with a built-in auto-off feature to prevent battery drain during long sessions. When it comes to espresso machine longevity, a quality boiler descaler and a magnetic cleaning tool help prevent scale buildup, ensuring temperature stability over time. Remember, using the proper cleaning agents and following manufacturer guidelines is crucial to avoid damage.
Adapting Your Workflow for Continuous Improvement
Establishing a routine that includes weekly deep cleans and monthly inspections can catch issues early. For example, I routinely check my machine’s seals and gaskets, replacing them before leaks occur. Investing in a tool kit for minor repairs, such as screwdrivers, O-rings, and replacement valves, enables quick fixes without calling a technician. This proactive approach minimizes downtime and saves money in the long run.
Future Trends in Home Espresso Maintenance
As smart technology advances, I predict more espresso machines will integrate diagnostic sensors and app-based alerts for maintenance needs. Imagine receiving a notification on your phone about scale buildup or seal wear—making maintenance more precise and less guesswork. For now, combining practical tools with diligent maintenance routines remains the best strategy to keep your gear performing at its peak.
How do I maintain my gear over time?
Regularly scheduled cleanings using recommended tools, staying attentive to signs of wear, and investing in quality maintenance supplies like descaling agents or branded replacement parts are key. Don’t forget to document your routines—keeping a log helps track when parts were last serviced and plan future upkeep. For instance, replacing worn seals early prevents leaks that could damage your machine’s internal components, aligning with expert advice on preventative maintenance. As you incorporate these practices, your equipment will reward your efforts with consistently excellent performance. I strongly suggest trying the simple routine of checking your boiler’s descaling schedule—a small step that can prevent costly repairs down the line.
What I Wish I Knew Before Pushing My Equipment to the Limit
Early in my journey, I underestimated the importance of equipment harmony. I spent hours chasing perfect shots without realizing that small misalignments or overlooked maintenance could sabotage my efforts. The biggest lesson was that understanding your gear deeply — from grinder burrs to machine calibration — transforms frustration into confidence. Sometimes, the tiniest tweak, like re-aligning burrs or cleaning a clogged steam wand, makes a world of difference. It’s these insights that turn a good espresso into a great one and save you from costly repairs down the line.
My Toolbox for Consistent, Reliable Espresso
Over time, I curated a set of tools that became indispensable — a calibrated digital scale for precise dosing, a set of fine brushes for grinder and machine cleaning, and reliable descaling solutions tailored for my setup. These tools not only keep my equipment in tip-top shape but also give me peace of mind. I trust brands like cleaning brushes designed for espresso gear because they help me maintain a clean workflow, reducing static and clogging issues. Investing in proper tools allows me to enjoy consistent shots without the guesswork.
Believe in Small Changes, Big Results
One of the most empowering lessons I learned was that incremental adjustments — changing grind size, tweaking tamp pressure, or timing the steam cycle — cumulatively improve shot quality. It’s tempting to seek instant perfection, but patience and experimentation are key. By documenting these small tweaks, I identified patterns that enhanced my espresso routine, making each session more rewarding. This approach encourages continuous learning, keeping the craft exciting and your skills sharp. Remember, mastery is built one measurement, one tweak at a time.
Ready to Elevate Your Home Espresso Game?
Embrace these insider insights and see how understanding your gear’s quirks unlocks new levels of flavor and consistency. As you fine-tune your setup, don’t forget the importance of routine maintenance and tool selection. Your perfect shot is within reach — it just takes a little patience, curiosity, and the right approach. Keep experimenting and enjoy the journey of craftsmanship in every cup.
Have you ever faced a stubborn light roast that stalled your grinder or caused inconsistent shots? Share your experience below, and let’s troubleshoot together!
,