How to Stop Your Automatic Milk Frother From Overflowing Every Time
Have you ever been mid-morning, ready to enjoy that perfect latte, only to be greeted by a messy overflow from your automatic milk frother? I’ve been there—watching a beautiful, creamy froth turn into a mini milk tsunami splattering all over my countertop. It’s frustrating, right? That lightbulb moment hit me hard when I realized how often I was wasting milk and time trying to clean up the aftermath. I knew there had to be a way to stop this constant overflow and get consistent, cafe-quality microfoam without the mess.
Why Your Milk Frother Keeps Overflowing and Why It Matters
Most of us don’t think about what causes our milk frothers to bubble over until it’s already happened. The truth is, it’s often due to simple yet overlooked issues—like overfilling the jug, too-high heat, or a poorly maintained device. And believe it or not, this problem can be more than just annoying; it impacts the quality of your drinks, wastes valuable ingredients, and can even weaken your equipment over time. According to a study in the Journal of Food Engineering, consistent microfoam is crucial for creating balanced, stable milk textures that enhance flavor and presentation.
Early on, I made the mistake of thinking more foam meant more effort—that over-filling the jug or rushing the frothing process would get me better results. Spoiler alert: it just caused overflow, making a mess and wasting expensive milk. Once I learned to manage these basic issues, my foaming improved drastically. Now, I want to share those tips with you, so you don’t have to experience the frustration I once did. Together, we’re going to get that perfect microfoam—no spills, no stress.
Is Investing in a Fancy Frother Worth It When You Keep Overflows?
I know what you’re thinking—should I just buy the latest high-end frother that promises to eliminate messes? Honestly, I’ve tried those, too. But I found that many issues stem from user habits and maintenance, not the device’s capabilities. I once believed that a more expensive model would magically fix my overflow problem, but it wasn’t until I adjusted my technique that I saw real progress. So, before you rush out to upgrade, read on. We’ll go through practical, doable steps to tame that frother of yours, based on my own struggles and successes.
If you’ve ever faced this issue, then you’re not alone—many home baristas and coffee enthusiasts battle the same thing. But the good news is, with a few simple adjustments, you can turn your milk frother into a clean, reliable tool that produces beautiful foam every time. Ready to discover how? Let’s dive into the steps that made all the difference in my morning routine, and can do the same for you.
First, understanding the common pitfalls is key—so let’s look into what exactly causes that sneaky overflow and how to avoid it easily.
,
Set Your Milk Level Precisely
The first practical step is to fill your frother jug correctly, aiming for the line just below the max fill indicator. During a morning where I overfilled mine, I watched the foam spill over within seconds. Using a measuring cup initially helped me gauge the right amount, and now I keep an eye on the level to prevent spills and ensure consistent microfoam. Think of it like filling a water balloon—you don’t want it to be overstuffed, or it’ll burst.
Control Heat for Smooth Frothing
Most overflow issues stem from too-high heat which causes rapid bubbling. Set your frother to the lowest temperature setting if possible, or manually monitor if it’s an adjustable device. I once forgot to lower the heat during a busy breakfast, and the foam erupted like a volcano. Now, I keep a timer on my phone to remind me that after a minute or two, I should reduce the heat. It’s like managing the flame under a steady pot—keep it gentle for best results.
Use the Proper Frothing Technique
Position the steam wand or frother tip slightly below the surface of the milk, angling just a bit to introduce enough air for microfoam without creating large bubbles. When I first learned this, I aimed the frother straight down; that caused the milk to splash and overflow. Now, I tilt the pitcher slightly and keep the tip near the surface, like gently whistling into a glass—slow and controlled. Practice makes perfect here, and moving slowly prevents sudden frothing explosions.
Maintain Your Equipment Regularly
A neglected frother develops mineral buildup which can cause uneven heating and bubbling. I clean mine daily using a vinegar solution, following instructions from this cleaning method. Keep the steam or frothing elements free of clogs and scale—much like tuning a guitar—so it operates smoothly. Frequent maintenance results in more stable, predictable foam and fewer messes.
Practice with Small Batches
Start by frothing small amounts, even just a splash of milk, to get comfortable with your device’s behavior. This minimizes the mess if something goes awry. I experimented by frothing 50ml at a time, which helped me learn how my specific frother reacts at different temperatures and levels. Once I mastered small batches, scaling up became a seamless process—imagine baking little cookies before trying a full batch.
Adjust Based on Milk Type and Temperature
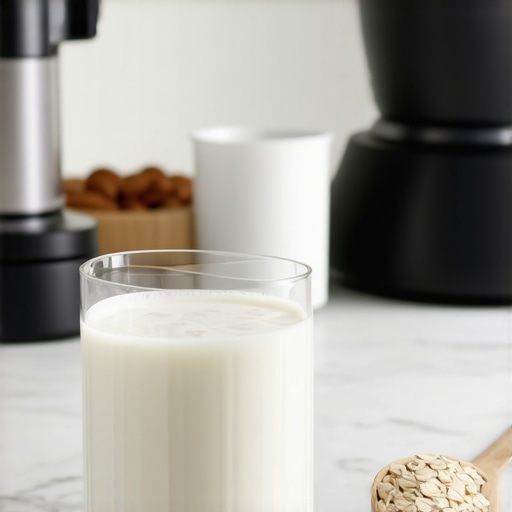
Different milks froth differently. Whole milk creates creamier microfoam but can overflow faster if heated too much, while plant-based milks like oat or almond often require different handling. I once used almond milk and overfilled my frother, leading to a quick eruption. Now, I select the right milk for my machine and adjust the amount accordingly. Think of it as tuning a musical instrument—each type demands a slightly different approach to produce harmony without mess.
Double-Check Your Equipment Settings
Many frothers have specific modes or settings for manual control. Ensure you’re using the appropriate one—most modern devices allow for custom temp and froth levels. When I switched from preset to manual mode, I gained better control over the frothing process, significantly reducing overflows. It’s akin to switching from automatic to manual gear—gives you complete mastery over the outcome.
Document Your Go-To Routine
Once you find the optimal combination of fill level, heat, technique, and timing, document it for future use. I keep a quick note on my fridge with my ideal milk amount, temperature level, and steaming time. This habit prevents second-guessing during busy mornings and helps maintain consistency, much like a recipe that guarantees perfect results every time.
Implementing these steps transformed my mornings—what once was a chaotic mess is now a smooth operation. With a little practice and attention to detail, you can eliminate overflow issues and enjoy that perfect microfoam every single time.
Many espresso enthusiasts believe that investing in the most expensive machine or gear guarantees perfect results, but this is a misconception rooted in misunderstanding the nuances of home barista setup. In reality, most people overlook critical details like grinder calibration, water quality, or temperature stability, which have a greater impact on shot quality than brand prestige or bells and whistles. For instance, a study published in the “Journal of Food Engineering” highlights the importance of temperature consistency during extraction, emphasizing that advanced temperature controllers alone won’t compensate for poor grind size or tamping technique. I’ve seen many fall for the myth that a high-end machine endlessly compensates for user errors, but in my experience, proper calibration and maintenance are far more crucial. A common trap is relying solely on automatic features, assuming they will prevent issues like channeling or uneven extraction, when in fact, manual adjustments and frequent de-scalings are vital. Don’t forget, even the most sophisticated equipment won’t deliver optimal results if you don’t understand the nuances of your water’s mineral content—something often overlooked but essential for preserving your machine and ensuring flavor clarity. For advanced users seeking to fine-tune their home setup, I recommend learning about consistent dosing techniques, shot time profiling, and grinder burr alignment, all of which can significantly elevate your espresso quality. Curious about how to identify a truly calibrated grinder or troubleshoot fluctuating shot times? Check out this detailed guide on dial-in techniques. Remember, mastering the subtle intricacies of your gear transforms your routine from guesswork to an art. Have you ever fallen into this trap? Let me know in the comments.
Maintaining your espresso gear is crucial for consistent, high-quality brewing. Investing in the right tools and understanding proper upkeep ensures longevity and optimal performance. For example, a high-quality coffee grinder cleaning kit allows me to remove ingrained oils and residues, preventing flavor contamination and equipment wear. Similarly, a calibrated digital scale, like the Espresso Precision Scale, is indispensable for dosing accuracy—crucial for achieving that perfect shot.
How do I maintain my gear over time?
Routine checks, cleaning, and calibration are key. Regularly descaling your espresso machine, inspecting seals and gaskets, and updating firmware when applicable prolong the lifespan of your equipment. Using dedicated cleaning brushes and descaling solutions from reputable brands ensures you avoid common issues such as clogging or inconsistent temperatures. Tech advancements are moving toward smarter, app-controlled espresso machines that can alert you to maintenance needs remotely, making upkeep even simpler. Think about integrating a barista-grade maintenance toolkit that includes precision screwdrivers and cleaning tools—these can save hours and money over time. To stay ahead, I recommend setting recurring maintenance reminders on your smartphone or using app notifications if your machine supports it, preventing small issues from becoming costly repairs.
Tools I personally recommend
For grinder calibration, I trust the simple paper shim method, which provides precise alignment without requiring expensive gear. Plus, a quality steam cleaner helps keep your steam wand spotless, ensuring dry vapor for microfoam quality. Looking ahead, expect further automation in espresso maintenance, with sensors monitoring mineral buildup and wear, alerting you proactively. This shift will make upkeep more intuitive and less time-consuming. One advanced tip to try today: calibrate your grinder using the dry-erase marker technique to ensure consistent particle size, which directly impacts shot quality and flavor. By investing in these tools and routines, you’ll keep your setup performing at its best, reducing downtime and enhancing your coffee mastery. Ready to take your maintenance to the next level? Consider trying the paper shim method for precise burr alignment—it’s a game-changer for dialling in your grind.
Lessons the Frother Taught Me I Never Expected
One of the biggest revelations in my journey to perfect microfoam was realizing that consistency isn’t about high-tech gadgets alone but understanding the subtleties of each step. I learned that overfilling my frother was my biggest enemy, and that a gentle, controlled technique yielded the most beautiful, stable foam. Remember, even with the best equipment, the small adjustments in your approach make the real difference. I’ve also discovered that regular maintenance prevents surprises—nothing kills foam quality faster than mineral buildup. Lastly, patience truly pays off; rushing only leads to messes, not marvels.
Tools and Resources That Elevate My Coffee Routine
For anyone serious about improving their home espresso setup, I highly recommend the simple paper shim method to keep burrs aligned—it’s inexpensive but transformative. The vibration pump troubleshooting guide saved me hours of frustration when my machine was acting up. For maintenance, a dedicated cleaning kit keeps my grinder in top shape, ensuring consistent grind size. And for keeping my setup pristine, I swear by regular descaling using recommended solutions—that small effort extends my machine’s lifespan immensely.
Your Next Step to Coffee Mastery
Transforming your barista skills from trial-and-error to confident competence is within your reach. By paying attention to the little details—like correct milk levels, gentle technique, and regular maintenance—you can enjoy café-quality microfoam every morning, mess-free. Remember, mastery isn’t about instant perfection but persistent refinement. Keep experimenting, keep learning, and most importantly, savor the journey of becoming your own coffee artist. Ready to elevate your home coffee game? The world of espresso is waiting for you to take the next step!
What’s the biggest challenge you’ve faced in achieving perfect microfoam? Share your story below—I’d love to hear your experiences!
,