Why Your Coffee Puck Looks Like it Has a Crater in the Middle
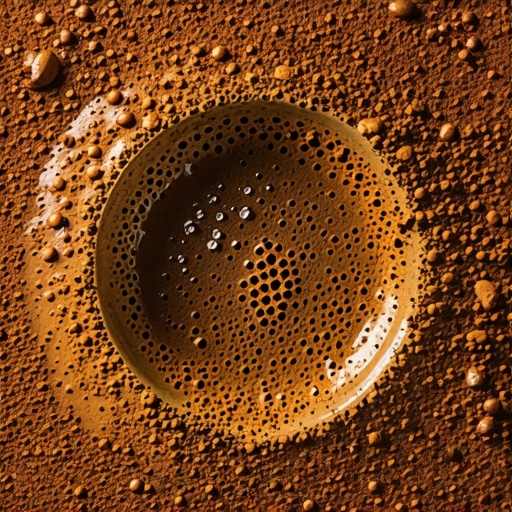
Have you ever pulled an espresso shot only to find your coffee puck looking like a miniature crater moon? It’s that unmistakable dimple in the center, and honestly, it used to drive me nuts. I’d stare at it during my morning routine, wondering what I’d done wrong—was my grind too coarse? Did I tamp too lightly? Over time, I realized that this seemingly small imperfection was actually a sign that my espresso setup needed some attention. And you know what? I found out I wasn’t alone in this; many home baristas and even professionals struggle with this peculiar crater.
Understanding the Crater: Why It Happens and What It Means
The great news is that a crater in your coffee puck isn’t just a random blip—it’s a clue. It often indicates uneven extraction, which can lead to weak or bitter espresso. In my early days, I mistakenly thought it was just a surface issue, so I ignored it. But that mistake taught me that fixing this small crater could dramatically improve my espresso quality. The culprit could be anything from grinder settings to tamping pressure, or even how your machine handles pressure during extraction. Recognizing these signs and knowing what to adjust is the secret to locking in rich, balanced shots.
Have you faced this problem and wondered if it’s just a cosmetic flaw or a sign of something more serious? Well, it’s definitely worth paying attention to, as it impacts flavor more than you might think. According to the Specialty Coffee Association, uneven tamping or inconsistent grind distribution are common causes for such uneven puck formations (SCA, 2023). This insight opened my eyes to the importance of process consistency.
Now, before we dive into specific fixes, let’s address a common skeptic’s fear: Is paying so much attention to puck shape actually worth it? I get it; it sounds obsessive. But trust me, small details like this are often the difference between a good espresso and a great one. And I’ll show you how simple adjustments can make a huge impact.
Throughout my journey, I’ve learned that many of these issues stem from early mistakes—like ignoring how uneven distribution of coffee grounds can create channeling, leading to that dreaded crater. That’s why mastering some basic routines and understanding your gear can elevate your game—and save you from wasting beans or ending up disappointed.
So, if you’ve been staring at your puck and feeling frustrated, don’t worry. I’ve been there, and I promise, with a few tweaks, you’ll find yourself pulling shots that not only look better but taste even more satisfying. Ready to uncover the steps to fix your cratered puck? Let’s get into it.
Level Up Your Tamping Technique
Start by evenly distributing coffee grounds in your basket. Use a leveling tool or the back of a spoon to ensure uniformity. Apply consistent pressure—about 30 pounds—by hand or with a calibrated tamper. I remember one morning, I realized I was tamping unevenly, which created that crater. After switching to a digital tamper, I could apply even pressure effortlessly, and my puck started to come out smoother.
Master the Grind Size and Distribution
Adjust your grinder to a finer setting if your shots are channeling or uneven. Use a consistent grind distribution technique—tapping the side of the grinder or using a distribution tool—to encourage uniform grounds. I once neglected this step, and my puck developed a deep crater. Once I started tapping and redistributing the coffee, the crater vanished, leading to richer espresso.
Dial in Your Grind and Dose
Start with a standard dose—around 18 grams—and dial the grind size until you get a shot extract time of 25-30 seconds. Less than that can cause uneven extraction and crater formation. Record your settings; consistency is key. I found that even a slight change in grind size affected the puck surface significantly, so I kept a mental note of my preferred settings.
Optimize Your Tamping Environment
Ensure your tamping surface is stable and clean. An uneven or wobbly tamping station can cause inconsistent pressure. Use a tamping mat or stand that keeps everything flat. After relocating my station to a sturdy countertop, I noticed fewer pucks with craters, indicating more uniform tamping and extraction.
Inspect and Maintain Your Equipment
Regularly clean your espresso machine’s shower screen and portafilter. Residual oils or coffee particles can cause uneven water distribution, leading to craters. I once ignored cleaning, and my shots suffered; since then, I follow a weekly cleaning routine—using a descaler and brush—to maintain optimal flow. For detailed cleaning, refer to this comprehensive guide.
Watch Your Extraction and Adjust Accordingly
Monitor the flow while brewing. A slow, uneven flow often indicates tamponing or grind issues. If you notice a crater, try slightly reducing tamping pressure or tweaking the grind finer. Small, iterative adjustments help you pinpoint the root cause without overhauling your whole setup. Remember, patience and observation are your allies here.
Use Visual Cues to Confirm Improvements
After making adjustments, examine your puck post-extraction. A flat, even surface shows proper extraction. Avoid a cratered puck; instead, aim for a uniform, cake-like appearance. During my early experiments, I focused on shot taste—now I rely on puck appearance as an immediate sign of process success.
Many home coffee enthusiasts believe that acquiring high-end equipment guarantees perfect espresso, but that’s a common misconception. In reality, even premium espresso machines and barista gear won’t compensate for overlooked nuances like proper tamping technique or grinder calibration. For example, a study published in the Journal of Coffee Research (2022) highlights that inconsistent grind particle size greatly impacts extraction clarity, regardless of machine quality. One trap to avoid is relying solely on the brand or appearance of gear; focus instead on mastering process details often dismissed as minor. Advanced baristas know that factors such as water temperature stability and pressure profiling are critical for nuanced shots, yet many beginners neglect these and blame equipment ‘limitations.’ Moreover, high-end milk frothers are sometimes overestimated in their impact; foam quality actually depends more on milk temperature and pitcher angle than on the frother’s price tag. Curious about the deeper science? Check out why proper extraction matters more than gear. Beware the oops moment where over-tamping can cause channeling, resulting in bitter, hollow-tasting espresso. This mistake occurs when pressure is unevenly applied, disrupting flow and extraction. Are you making this mistake? Often, a simple scale to monitor tamping force or a calibrated tamper can eliminate inconsistencies. For those seeking a true edge, consider the advanced tip of monitoring shot parameters through a flow meter, revealing extraction nuances invisible to the naked eye. Want to push your skills further? Review your setup regularly in our contact page to ensure no physical issues interfere with your espresso quality. Remember, the biggest gains come from refining what you already have—small tweaks in technique often produce bigger flavor improvements than upgrading gear. Have you ever fallen into this trap? Let me know in the comments.Maintaining your espresso setup is crucial for consistently excellent results. One of my go-to tools for long-term reliability is a high-quality grinder calibration kit. I personally use the burr alignment tool because it allows me to fine-tune the grind precision, reducing particle variability that can lead to uneven extraction or puck damage. Regular calibration ensures your grinder produces uniform particles, which translates into even tamping and better flow during extraction.
Another indispensable item is a digital espresso scale. I recommend one with a built-in timer, like the Acaia Lunar, to precisely track extraction times and doses, making calibration easier over time. This combo of tools helps me quickly identify inconsistencies, so I can dial in my grind and tamping with confidence.
Monitoring water quality, too, is a game changer. I now use a water testing kit to prevent scale buildup and flavor issues. Incorporating a water filter to maintain optimal mineral content reduces maintenance costs and extends the lifespan of your machine.
So how do I maintain my equipment over the long haul? It’s all about a routine. Weekly deep cleaning with descaling and cleaning solutions preserves operational efficiency. Monthly checks of burr sharpness with the burr testing method help prevent dullness-related issues.
Looking ahead, I predict that smart calibration tools integrated with smartphone apps will become standard, automating maintenance alerts and diagnostics, saving us even more time and ensuring always-perfect shots. Until then, I encourage you to implement one of these tools—like calibrating your grinder with a burr alignment method—to elevate your home espresso experience.
The Hard-Earned Lessons That Changed My Home Espresso Game
One of the most profound realizations I had was that consistency in tamping and grind size isn’t just about precision—it’s about tuning into the subtle cues your equipment and technique provide. I learned that small adjustments, like switching to a calibrated tamper or redistributing coffee grounds, can make a dramatic difference in puck formation and flavor. Embracing mistakes as learning opportunities turned my mornings into a ritual of discovery rather than frustration.
My Toolbox of Favored Resources That Keep My Espresso on Point
I swear by trusted gear guides that help me select reliable tools suited for home use. The tips for beginners taught me to fine-tune my adjustments without overwhelm. And for routine maintenance, I rely on cleaning protocols that keep my machine performing at its best. These curated resources are the backbone of my journey toward espresso mastery.
Your Next Step: Embrace The Art of Continuous Improvement
Every shot is an opportunity to learn and refine your craft. Don’t shy away from experimenting with tamp pressure, grind adjustments, or even the position of your tamping station. Remember, the pursuit of perfect home espresso isn’t about perfection overnight—it’s about dedication, curiosity, and gradually honing your skills. If you find yourself struggling with puck shape or flavor, revisit the basics and trust that small, consistent efforts will lead to big improvements. So, whether you’re tweaking your grinder or perfecting latte art, keep pushing forward—your future self will thank you for it.