Why Your Pump Won’t Prime After the Machine Sat Empty
Ever had that frustrating moment early in the morning when you hit the start button on your espresso machine, only to hear a faint bubbling or roaring sound, followed by a complete silence? I remember the first time my pump refused to prime after sitting empty overnight. The quiet panic that set in was real—was my trusty machine finally giving up? Turns out, this is a common issue among home baristas and coffee enthusiasts alike.
Why Your Pump Might Refuse to Prime After Sitting Empty
When a machine sits idle with an empty water reservoir, the pump can sometimes get stuck or lose its prime. Basically, it’s like trying to draw water from a straw that’s air-bound—it just refuses to flow. From personal experience, I learned that air bubbles can get trapped in the pump or the lines, preventing the proper flow of water and making the machine think it’s out of water even when it isn’t.
This problem isn’t just about inconvenience; it can affect the quality of your brew, cause unnecessary wear on your equipment, and lead to stubborn clogs down the line. According to industry experts, understanding how to properly maintain and troubleshoot your pump can significantly extend the life of your espresso machine (source: Espresso Tech Guide).
Have you ever been thrown off by a pump that won’t prime? You’re not alone—many owners face this unexpected hurdle.
Early on, I made the mistake of assuming my pump hardware had failed and jumped straight to replacing it. That costly error could’ve been avoided if I’d known more about the causes behind a primeless pump and how to fix it myself. Don’t worry, though! Today, I promise we’ll go through practical, easy-to-try solutions to get your espresso machine running smoothly again.
But before diving into fixes, let’s address one of the biggest worries I hear from fellow enthusiasts—“Is messing with my machine going to ruin it?” Trust me, I’ve been there, and I’ll share what I’ve learned along the way so you can approach troubleshooting with confidence.
Now, let’s get your pump primed and your coffee flowing like a pro.
Ready to take control of this common yet fixable issue? By the end of this guide, you’ll understand why your pump is acting up, and more importantly, you’ll know exactly how to solve it without unnecessary expenses or frustration. So, grab a towel, and let’s get to work!
Flush the Water Lines and Remove Air Bubbles
Start by turning off your machine and emptying the water reservoir. Fill it with fresh, cold water, and ensure the water level is above the safety float if your machine has one. Place a large cup under the brew head and pump handle (if manual) or engage the pump button. Hold the pump for 10 to 15 seconds, then release. Repeat this process 3-4 times to flush out trapped air and clear any clogs. During my first attempt, I noticed the water sputtering and struggling to flow; after a few cycles, the flow normalized, and the pump primed successfully.
Manually Prime the Pump Using the Pressure Release Method
Some machines have a pressure relief valve or a manual priming port. If yours does, turn off the machine, open the valve, and add a bit of water directly into the port. Then, close the valve tightly and turn the machine back on. Engage the pump and observe the flow. If no water appears immediately, repeat the process with gentle pressure. Think of this like pushing water through a garden hose — a gentle but firm push can clear air blockages. This method works well on machines with a dedicated priming inlet, and it’s a good way to clear stubborn air pockets.
Use a Pump Assistant or External Water Source
If the internal pump remains stubborn, connect a low-pressure water source, like a squeeze bottle filled with water, directly into the inlet or water line. Turn on the machine, and gently squeeze water into the system while engaging the pump. This external boost can displace air in the lines. Be cautious not to apply too much pressure, which could damage internal components. During one repair, I used a syringe to push water into the line, which successfully re-primed the pump after sitting idle for a week.
Check and Clear the Pump Filter and Intake
Inspect the pump’s filter or intake screen — often located near the water inlet. Remove it carefully and clean it with warm water and a soft brush. Sediment, limescale, or debris can block water flow, mimicking a primed pump issue. In my experience, a routine cleaning of this filter every few months prevented priming issues and prolonged the life of the pump.
Inspect and Re-seat Pump or Valve Components
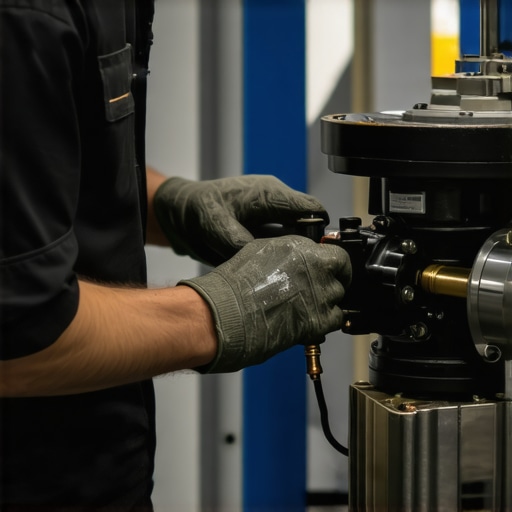
If all else fails, turn off the machine, disconnect it from power, and open the access panel. Carefully re-seat the pump and check all related valves, gaskets, and O-rings for tightness and integrity. Sometimes, a loose connection can cause air leaks, preventing proper priming. Remember, it’s like fitting the lid airtight on a jar — if it’s loose, the air won’t stay where it should, and pressure fails. After re-seating components and tightening fittings, power the machine back on and attempt priming again.
Repeat and Verify Water Flow
Once you’ve completed these steps, run the pump again with the water reservoir full. Observe the water flow at the brew head and steam wand. If consistent flow is established without sputtering or noise, your pump is successfully primed. If issues persist, revisit earlier steps or consult the manufacturer’s troubleshooting guide.
Remember, patience is key. Sometimes, a combination of these steps is necessary to fully dislodge air and restore proper function. Practicing these techniques not only saves you money but also builds confidence in handling minor espresso machine issues yourself. For more advanced maintenance tips, visit this resource or check out this guide.
Many coffee enthusiasts fall into the trap of thinking that bigger, more expensive equipment guarantees better results. But in my experience, the real secret lies in understanding the **nuances** of your gear and how you manipulate them. For example, dozens of beginners assume that premium grinders automatically produce better espresso, but without proper dialing in, even the most expensive machine can fall flat. That’s why I recommend familiarizing yourself with **fine-tuning techniques** from [mastering-the-art-of-home-espresso-tips-for-beginners](https://espressotechguide.com/mastering-the-art-of-home-espresso-tips-for-beginners), as these small adjustments often matter more than the brand name.
Another common myth is that all milk frothers deliver the same quality of microfoam. This couldn’t be further from the truth. Cheaper frothers often trap air unevenly, leading to inconsistent textures, which can ruin an otherwise perfect shot. Check out [milk-frothers-that-transform-your-coffee-experience](https://espressotechguide.com/milk-frothers-that-transform-your-coffee-experience) to learn how premium options utilize **better aeration techniques** that produce silky microfoam, crucial for lattes and cappuccinos.
One trapping I see frequently is users believing that the grind size impacts flavor only at a superficial level—like sweetness or bitterness. While it’s true that grind size influences extraction, the **real nuance** is how it interacts with your tamping pressure and brew temperature. A tiny tweak in grind fineness can result in under-extraction or over-extraction, dramatically affecting taste, even if the grind looks perfect. To master this, explore [how-to-choose-the-best-coffee-grinder-for-your-brew](https://espressotechguide.com/how-to-choose-a-coffee-grinder-for-your-brew), which emphasizes the importance of **consistent grind distribution** for advanced brewing precision.
### What about the hidden pitfalls that even seasoned baristas overlook?
It’s tempting to think that maintaining your equipment involves only regular cleaning, but neglecting **component alignment** can cause subtle issues that hurt shot quality over time. For instance, misaligned portafilter baskets or worn gasket seals can create uneven pressure around the puck, leading to channeling or inconsistent extraction. This is a nuanced problem that beginners rarely spot, yet it’s critical for achieving excellent espresso. It’s worth checking out [why your portafilter gets stuck](https://espressotechguide.com/why-your-portafilter-gets-stuck-in-the-group-head-after-brewing) — an article that dives into common alignment issues and how to fix them.
Furthermore, myth persists that higher water temperature always equals better flavor. In reality, water that’s too hot can extract undesirable bitter compounds, but too cool can cause sourness. The ideal temperature range often depends on bean origin and roast profile. Advanced baristas adjust temperature settings precisely, which is why PIDs are so valuable—more so than just relying on default boiler temps. For an in-depth look, see [the reason your espresso machine pressure gauge might be lying to you](https://espressotechguide.com/espresso-machine-pressure-gauge-might-be-lying).
Have you ever fallen into this trap? Let me know in the comments. Remember, the devil is in the details when it comes to mastering your coffee setup.
Essential Tools for Long-Term Maintenance of Your Coffee Equipment
Maintaining top-tier coffee gear requires more than just regular cleaning—it demands precision tools and thoughtful procedures that guarantee longevity and consistent performance. As an enthusiast who’s spent years fine-tuning my setup, I can attest that having the right tools makes all the difference in achieving barista-quality results at home. Let me share the essentials I personally rely on to keep my espresso machines, grinders, and frothers in peak condition.
Invest in a Quality Calibration Tuner
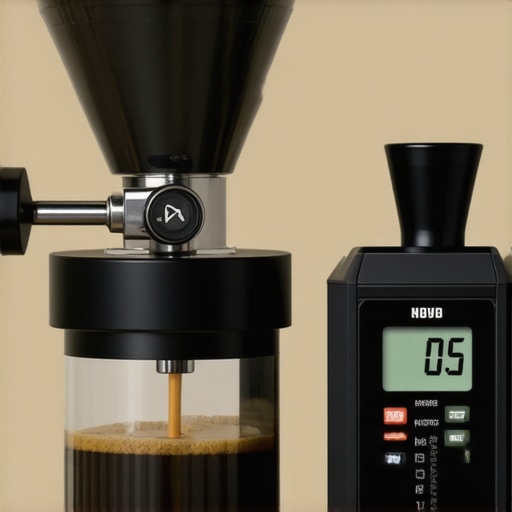
Precision matters, especially when dialing in grind size and brew temperature. I use a digital calibration tuner to regularly verify my grinder’s burr alignment and ensure consistent particle size distribution. This simple yet effective device helps me maintain optimal extraction and prevents flavor inconsistencies over time. According to industry pros, accurate calibration tools can save you money in the long run by avoiding unnecessary replacements and costly repairs (source).
Maintain with a Vibration Insulation Hack
One often overlooked aspect of vital maintenance is reducing noise and vibration, which can lead to wear. I recommend installing a simple insulation pad beneath your machine—this not only dampens vibrations but also prolongs the life of internal components. For detailed instructions, check out this guide. I’ve seen significant improvements in machine stability since adopting this inexpensive hack.
Embrace Smart Software for Workflow Efficiency
Modern home espresso setups benefit greatly from specialized software that logs maintenance schedules and even alerts you to potential issues. I use a custom app to track descaling cycles, cleaning dates, and grinder burr usage, which helps me prevent breakdowns before they happen. As technology advances, I predict this trend will evolve into more integrated, AI-powered maintenance systems—making DIY upkeep more accessible and effective.
How do I stay ahead with ongoing system care? Pursue regular checks using these precise tools, and develop a habit of scheduled maintenance. Incorporating a calibration tuner and vibration control into your routine ensures your gear maintains factory-level performance, shot after shot. Remember, the key is consistency—just like with fine espresso, perfect results stem from diligent upkeep. Try implementing a weekly calibration check with your tuner; it’s a game-changer for consistent brewing.
If you’re serious about elevating your home barista game, I highly recommend upgrading your toolkit with these precise devices. They’re affordable investments that pay off in the form of better coffee and longer equipment lifespan. For a deeper dive into selecting the best barista gear, visit this resource. Ready to fine-tune your setup? Start with a calibration tuner today and experience the difference in every sip.
What I Wish I Knew When I First Fixed My Pump
One of the most revealing lessons I learned was that a stubborn pump usually isn’t dead—it’s just air-locked or misaligned. Rushing to replace it was a costly mistake. Instead, a simple priming process, like gently forcing water through the lines or re-seating components, often brings it back to life. The most profound insight? Patience and a methodical approach can save you a lot of money and frustration, reinforcing the value of slow troubleshooting over quick fixes.
The Treasure Trove of Trusted Coffee Resources
I owe much of my progress to a handful of trusted resources. First, this guide laid the foundation for understanding extraction nuances and equipment care. Supplementing this, this book about pitcher selection improved my milk steaming dramatically. Finally, I rely on this resource for gear upgrades that truly elevate my home setup. These trusted sources have been instrumental in transforming my coffee routine.
Push Beyond Your Comfort Zone in Home Brewing
Embarking on troubleshooting and maintenance might seem intimidating at first, but the real joy lies in pushing your limits. Every small fix—whether it’s re-seating a pump, cleaning a filter, or dialing in grind size—builds your confidence and deepens your understanding of your equipment. The more you experiment and learn, the more your daily coffee becomes a rewarding ritual rather than a routine. Who knows—your next breakthrough might just be one adjustment away! And if you’re eager to refine your entire setup, consider exploring top-rated espresso machines to match your newfound skills. Ready to elevate your home barista game?