How to Fix a Clogged Steam Tip in Under a Minute
Ever had that sinking feeling when steaming milk for your morning latte and suddenly feeling that the steam wand isn’t working properly? I remember a chilly Saturday morning when my well-loved espresso machine refused to produce steam, right before I wanted to impress my friends with homemade cappuccinos. My heart sank—I was about to tackle a diy fix, but I knew I had to act fast. That’s when I had my lightbulb moment: a clogged steam tip is often an easy fix if you know what to do, and it can take less than a minute!
Today, we’re diving into a straightforward method to clear that stubborn clog and get your milk steaming smoothly again. Whether you’re a seasoned home barista or just starting your coffee journey, understanding how to quickly fix a clogged steam tip can save your day and preserve your coffee routine.
Why a Blocked Steam Tip Can Ruin Your Coffee Moment
Is Fixing a Steam Tip Worth the Hassle?
Many enthusiasts underestimate how crucial a clean steam tip is to perfect frothing. I used to think that regular descaling was enough—until I faced that disappointing disappointment with gurgling steam and no foam. Early on, I made the mistake of ignoring these signs, which only led to more stubborn clogs and longer downtime. Trust me, neglecting a simple clog can turn into bigger repairs.
Recent studies suggest that mineral buildup causes most steam tip blockages, especially in areas with hard water, making routine maintenance essential. Learning how to deal with these clogs promptly not only saves time but also extends the lifespan of your equipment. We’ll explore a proven method that I swear by—quick, effective, and gentle—that you can do yourself.
Now, are you tired of waiting for your espresso machine to clear that steam blockage? Ready to master a quick fix that keeps your mornings running smoothly? Great, let’s get into the step-by-step process that will have you steaming again faster than your coffee brews! If you’ve ever faced this problem or want to prevent it, keep reading—you’re about to become your machine’s best friend.
Disassemble the Steam Tip Carefully
Start by unplugging your machine to ensure safety. Gently unscrew the steam tip using a small adjustable wrench or pliers, mimicking the way you would remove a favorite coffee filter—the goal is to grip firmly without damaging the delicate threads. Once removed, immediately notice how mineral deposits or old milk residue might have built up inside. I recall a time when I used a clean, lint-free cloth to gently wipe the outer surface before soaking the tip in warm water, which loosened stubborn deposits effectively. Keep the disassembled parts nearby for the cleaning process.
Soak and Clean the Nozzle
Place the steam tip in a cup of warm water mixed with a pinch of citric acid or descaling solution. This solution helps dissolve mineral buildup, much like how a dishwasher’s rinse cycle works to remove stubborn residue. After soaking for about 10-15 minutes, use a soft-bristled brush or a toothpick to gently dislodge any remaining debris. Be cautious not to scratch the metal surface—think of this as cleaning a fine watch, not scraping paint off a wall. During my first attempt, I accidentally scratched the nozzle surface, which made it more prone to corrosion, so gentle handling is key.
Use a Pin or Needle to Clear the Hole
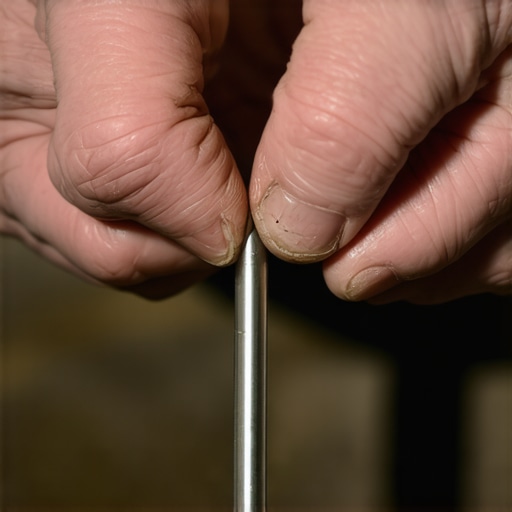
This is the most critical step for a clogged micro-hole—using a pin or a needle that fits snugly into the opening. Carefully insert the pin and gently wiggle it to dislodge any blockages lodged deep inside. It’s similar to cleaning a clogged earring hole with a fine needle, where force can cause damage. Once cleared, run hot water through the nozzle to flush out loosened deposits. I once pushed the pin too vigorously and bent the nozzle slightly, leading to uneven steam flow, so take your time and be gentle.
Reassemble and Test the Steam
After cleaning, dry all parts thoroughly with a lint-free cloth. Screw the steam tip back onto your espresso machine, ensuring it’s snug but not overtightened to avoid threading damage. Power on the machine and activate the steam wand to check for a smooth, steady flow—think of the steam like a fine champagne bubble, light and consistent. If flow remains uneven, repeat the cleaning process or inspect for damage. This method has been a game changer for me, saving trips to service shops and keeping my routine seamless.
Prevent Future Clogs with Regular Maintenance
To minimize new blockages, perform weekly backflushing and descaling routines, especially if you use hard water. Be proactive—like changing your car’s oil—regular upkeep keeps everything running smoothly. Additionally, always wipe the steam tip after each use and consider installing a water softener if your area has hard water. For more tips on maintaining your gear, visit the best barista gear. Consistent maintenance reduces mineral buildup, ensuring your steam wand stays as reliable as your favorite coffee beans.When it comes to mastering your coffee setup, many enthusiasts fall for misconceptions that can hinder progress. A prevalent myth is that investing in high-end equipment automatically guarantees barista-quality results. In reality, even the most expensive machines won’t compensate for improper technique or maintenance. Skilled baristas understand that nuances like grind size, tamping consistency, and water temperature are critical; gear alone isn’t enough.
Why do many overlook the importance of grinder retention?
Often, newcomers believe that a more powerful grinder equals better coffee, but overlooking grind retention can lead to uneven tamping and inconsistent shots. Excess coffee left in the grinder’s chute or burrs impacts flavor extraction, emphasizing the need for regular cleaning routines, such as the simple daily grinder maintenance. Additionally, high-retention grinders tend to clog or stale quickly, which can be masked by chasing finer settings, ultimately damaging equipment and wasting beans.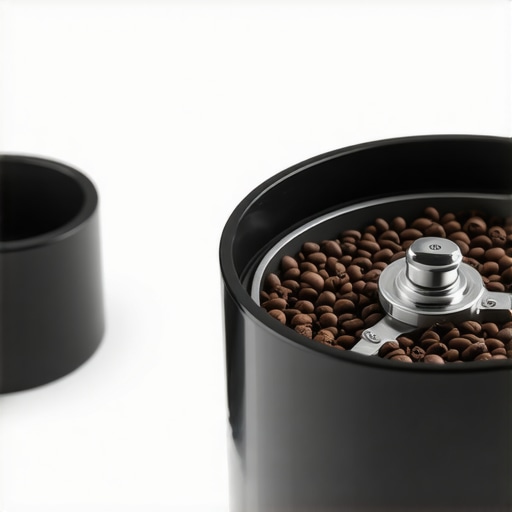
Many believe that all coffee grinders serve the same purpose. However, selecting the right grinder involves understanding its retention, burr type, and grind consistency. For perfect extraction, consider a grinder that minimizes static and particle distribution issues — a subtle detail that can dramatically affect flavor. For more insights, see how-to choose the best grinder. Remember, the devil’s often in the details—like the micro-adjustments you make during dialing in your grind.
Home espresso machines are frequently misunderstood as complex, intimidating devices that only professionals can operate. In fact, many digital or semi-automatic models now feature intuitive controls designed for enthusiasts. But beware: beginner users often get lulled into complacency, neglecting routine tasks like backflushing or descaling, which are vital for longevity. Ignoring these can lead to issues like uneven pressure or temperature fluctuations. Advanced users prioritize understanding the machine’s nuances, such as water flow and boiler pressure, to truly elevate quality. For a comprehensive guide, check home espresso tips.
Another misconception is assuming that barista-grade gear means expensive, complicated appliances. Yet, selecting equipment that suits your skill level and budget is better than overinvesting without proper knowledge. For example, a quality manual grinder paired with a simple espresso machine can outperform a cheap, high-end setup that’s misused. Proper gear choice and routine upkeep, like cleaning portafilters and steam wands, matter more than the brand name. Interested in upgrading? Start with best barista gear recommendations tailored for home use.
Have you ever fallen into this trap? Let me know in the comments.Maintaining your coffee equipment is essential for long-term performance and consistent results. Investing in quality tools like a precision burr grinder or an ultrasonic cleaner can significantly extend the lifespan of your espresso machine and grinders. For example, I personally swear by using a specialized grinder-cleaning brush to prevent static buildup and blockages, ensuring uniform grind size with every pull. Regular lubrication of moving parts, such as the group head gasket and portafilter hinge, using appropriate food-safe lubricants, keeps the machine operating smoothly and reduces wear. Keeping a detailed maintenance schedule—checking seals, descaling every three months, and replacing worn-out gaskets—helps avoid costly repairs down the line. Looking ahead, automation and smart diagnostics are poised to revolutionize how we maintain our gear, with IoT-connected sensors providing real-time performance data. To stay ahead, I recommend integrating a dedicated maintenance app into your routine for alerts and tips. {‘How do I maintain my espresso gear over time?’} A consistent, proactive approach involves scheduled deep cleans and part inspections—think of it as tuning a musical instrument. Using a high-quality daily grinder routine is an excellent starting point, but don’t overlook the importance of annual calibration checks. I recommend setting reminders to verify grind consistency and shot quality; tiny adjustments can make a noticeable difference. Remember, equipment like your grinder and espresso machine are investments—treat them well, and they’ll reward you with delicious coffee every time. If you’re ready to upgrade your maintenance game, try implementing these expert tips: regularly calibrate your grinder using the burr alignment technique. Taking this small step can drastically improve extraction and flavor.
The Unexpected Lessons from My Espresso Journey
One of the most valuable insights I gained was realizing that consistent maintenance during my pursuit of perfect milk froth dramatically improved my experience. Small actions like regular cleaning and paying attention to mineral buildup saved me countless hours of troubleshooting and prevented frustrating downtime. Sometimes, the simplest habits—like soaking the steam tip periodically in descaling solution—can make the biggest difference in creating silky microfoam with ease.
Smart Tools That Keep Your Milk Steaming Smoothly
Over time, I discovered that investing in a quality descaling brush and a water softener significantly reduced clogs and mineral deposits. These tools have become my trusted allies, ensuring my barista skills stay sharp without interruptions. For anyone serious about home espresso, I recommend trying a dedicated steam tip cleaning kit and considering water treatment options to prevent future issues.
Embrace the Art of Routine Care
Consistency is key. Developing a quick weekly routine—like soaking the steam tip, checking for residue, and flushing with hot water—has transformed my ability to produce perfect steamed milk every time. Remember, good maintenance isn’t an extra task; it’s the foundation of reliable, high-quality coffee that elevates your entire brewing experience. Incorporating these habits ensures your espresso magic continues seamlessly, and your gear lasts for years to come.