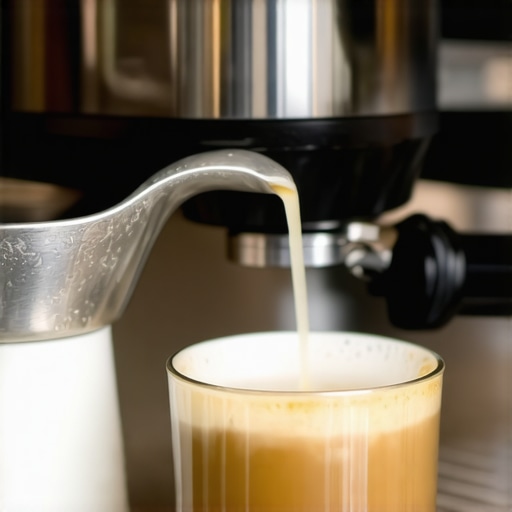
Why Your Latte Art Always Looks Like a Cloud Instead of a Heart
I remember the first time I tried to pour a perfect heart in my home espresso mug. I was so excited—hand trembling, milk steaming perfectly, and my favorite beans freshly ground. But instead of a crisp, velvety heart, I ended up with a fluffy mist that looked like a cloud drifting over my coffee. Frustrating, right? That lightbulb moment hit me hard: I was missing something crucial in my technique, and honestly, my equipment wasn’t helping either.
Let’s fix that blurry, cloud-like latte art once and for all
Is your milk froth just not cooperating, making your latte art look blurry and unrecognizable?
Early on, I made the mistake of thinking that perfect latte art just magically happens if you steam the milk enough. Nope. It’s all about the right milk texture—keeping it silky, shiny, and free of big bubbles. Achieving this requires understanding your steaming process and a bit of practice, but it’s doable. Trust me, once I nailed the texture, my designs gained clarity. Curious to learn how? Stick around, because I’m going to walk you through the simple steps that transformed my cloudy mess into beautiful hearts and rosettas.
If you’ve ever felt your latte art resembles more of a cumulus cloud than a heart, you’re not alone. Many home baristas struggle with this—myself included—until I figured out the crucial role of proper milk texture and steam pressure. Did you know that improper steaming can cause the milk to froth unevenly, leading to fluffy tops that ruin your design? According to coffee experts, achieving microfoam—tiny, uniform bubbles—is essential for smooth, pourable latte art (source). It’s a game-changer, and I’ll show you how to get there.
So, are you ready to ditch the clouds and pour gorgeous, defined shapes? Let’s dive into the nitty-gritty of milk steaming and discover the secrets behind those crisp, beautiful latte art hearts you’ve seen in cafes—and finally make them yours at home.
Mastering Milk Texture for Sharp Latte Art
First things first, don’t underestimate the power of proper milk preparation. The key is creating microfoam, which is just a fancy term for very fine, velvety froth. Start with cold, fresh milk and use a steaming pitcher that you’ve cleaned thoroughly—check out this guide for tips. Position your steam wand just below the surface to introduce air slowly, then submerge it deeper to heat the milk evenly. Don’t rush—good things take time. Once steaming, swirl the milk gently to integrate the foam and milk seamlessly. A silky, shiny texture should be your end goal, not big bubbles or frothy clumps.
Remember, practice makes perfect. It took me numerous tries to get a consistently smooth microfoam, but once I did, my latte art improved dramatically. If you’re still struggling, check out our comprehensive tutorial on how to master home espresso art. And if your milk isn’t frothing properly despite following instructions, it might mean your milk temperature or steam pressure needs tweaking. For more troubleshooting, visit this calibration guide.
Now, with better milk texture in your arsenal, you’ll find your latte art becoming sharper and more expressive—no more clouds, just beautifully poured hearts that impress everyone, even yourself. Ready for the next step? Let’s explore equipment adjustments that can make or break your foam quality.
Controlling Your Milk Steaming Process
Start with Cold, Fresh Milk
Fill your steaming pitcher with cold, fresh milk straight from the fridge. The colder the milk, the better control you’ll have over texture. Place your pitcher under the steam wand, making sure the wand’s tip is just below the surface of the milk to introduce air gradually.
Once you hear a gentle hissing sound, slowly lower the pitcher to submerge the wand deeper, heating the milk evenly. This step prevents uneven microfoam and over-foaming, which can ruin your latte art quality. Practice controlling the steam pressure to maintain a steady flow—think of it as singing a lullaby to the milk, encouraging it to become silky and smooth.
Creating Perfect Microfoam
Microfoam is the cornerstone of crisp latte art. Aim for a velvety texture with tiny, uniform bubbles—almost like a shiny paint consistency. To test, swirl the pitcher gently after steaming. If the milk resembles wet paint and flows smoothly, you’re on the right track. If it feels too thick or frothy, slightly reduce the steam pressure or adjust the wand angle.
During my first few attempts, I noticed that increasing steam pressure caused larger bubbles, making the foam fluffy rather than velvety. By dialing back the pressure and practicing the motion, I achieved the microfoam needed for precise pouring. Check out this guide to keep your equipment in top shape and prevent residual oils from affecting foam quality.
Nailing the Perfect Pour
Align Your Cup and Hand
Position your cup on a flat surface and hold the pitcher at about 45 degrees. Start pouring from a higher distance to let the milk flow steadily, then gradually lower the pitcher closer to the surface as you pour, controlling the flow with your wrist—imagine you’re writing a signature.
Pour slowly at first, allowing the microfoam to rise to the surface of the espresso. When you see a white circle forming, gently tilt and wiggle the pitcher to guide the foam into a beautiful heart shape. During my messy first tries, I struggled with uneven shapes, but focusing on a consistent pour speed made a huge difference.
Refining the Heart Shape
To sharpen your design, practice the ‘wiggle’ motion at the end of the pour—this helps to create the characteristic point at the top of the heart. Keep your wrist steady, and aim to finish with a quick, decisive pull to cut through the foam, leaving a crisp outline. Remember, the key is patience; rushing will flatten or smudge your design.
If your designs are blurry or uneven, consider adjusting your grind size or tamping pressure to ensure a consistent espresso shot, as inconsistent base shots can distort your latte art. Check out this gear guide for advice on optimizing your setup.
Final Tips for Consistent Creativity
Keep practicing by pouring into different cups and experimenting with pouring speeds. Record your progress and observe what works—small tweaks in tilt angle or pour height can make significant differences. Remember, even the best baristas had their mess-ups; persistence is your best tool for mastering this art form.
Most importantly, maintain clean equipment. Residual oils and old milk residues can impair foam quality. Regularly deep clean your pitcher with this cleaning routine to keep your foam silky and your shapes sharp.
Many home baristas believe that owning the latest espresso machine or a high-end grinder guarantees perfect coffee, but in my experience, this is a myth that can lead to costly mistakes. One widespread misconception is that more expensive equipment automatically produces better results. While quality gear matters, it won’t compensate for improper technique, such as inconsistent tamping or incorrect grind size. For example, an overly fine grind can cause over-extraction, leading to bitter shots, regardless of your machine’s price point. To optimize your setup, focus on calibration and technique, not just gear upgrades.
Are you overlooking crucial setup details that influence extraction quality?
Another hidden nuance is the importance of routine calibration and maintenance. Many enthusiasts neglect these steps, assuming their gear remains “set and forget,” but even minor misalignments or dirt buildup can significantly impair performance. For instance, inconsistent tamping pressure can lead to varied extraction times, affecting flavor and crema. Regularly cleaning your portafilter and calibrating your grinder ensures consistent results—more than just a good grinder or machine. Check out this guide to select the right grinder and master your technique.
An advanced mistake often made involves not understanding the impact of brewing environment variables, such as ambient temperature and humidity, which can subtly affect grind consistency and shot timing. For example, humid conditions can cause coffee grounds to clump, leading to uneven tamping and extraction issues. Using tools like a moisture-proof storage container and adjusting grind settings accordingly can help mitigate these effects. Furthermore, understanding the relationship between shot timing and grind size is crucial for perfect extraction. For deeper insights, see this troubleshooting resource.
The myth that premium beans alone make superior coffee also deserves busting. While high-quality beans are essential, even the best beans can yield subpar shots if other variables are neglected. Freshness, grind consistency, tamping pressure, and water temperature all interact complexly. A common trap is assuming that roasting quality negates the need for precise brewing parameters. The reality is, you need a holistic approach—focusing on mechanics, environment, and technique—because each element impacts flavor deeply. To refine your approach, consider implementing routine calibration routines like PID calibration. In summary, becoming a true home barista involves more than just owning top-tier gear. It’s about mastering the subtleties, understanding the hidden nuances, and regularly maintaining your setup. Have you ever fallen into this trap? Let me know in the comments.Maintaining your home espresso setup is crucial to ensure consistent flavor, performance, and enjoyment over years. I rely on specific tools and routines that have proven effective in my experience. For instance, a high-quality tamper with a precise weight (like the stainless-steel tamper) helps me achieve uniform tamping pressure, which directly impacts extraction consistency. Regularly calibrating my grinder using the PID calibration tools ensures the temperature stability needed for optimal espresso shots. For cleaning, I prefer using the deep cleaning routines involving a dedicated brush and descaling agents to keep my machine and accessories in top shape. Over time, I’ve noticed that investing in a professional-quality coffee grinder with burrs that stay cool during extended use preserves grind consistency, which is vital for long-term success. As technology advances, I predict intelligent sensors integrated with apps, providing real-time adjustments and maintenance reminders, will become standard. To truly elevate your routine, I recommend trying the paper filter trick for cleaner espresso shots, which I personally adopted after reading about this expert method. Regular maintenance takes effort, but it pays off with richer flavor and fewer troubleshooting surprises. Want to go a step further? Consider using a dedicated descaling cartridge regularly—this tiny step can prolong your equipment’s life and improve taste, as highlighted by technical experts in espresso machine maintenance. If you’re serious about lasting quality, reach out via our contact page for personalized advice or product recommendations.
Over the years, I’ve realized that the real magic in home espresso isn’t just about owning high-end gear—it’s about the lessons learned beyond the manuals. Those lightbulb moments, often born from trial and error, have shaped my journey from a confused beginner to a confident home barista.
What No One Tells You About Perfecting Your Espresso Ritual
- Consistency Is Your Ultimate Friend: I once thought that one perfect shot was a matter of luck, but I discovered that meticulous routines—like calibrating my grinder regularly—made all the difference. Tools like PID calibration tools are game-changers in maintaining stable brew temperatures.
- Technique Trumps Technology: Even with the best espresso machine, improper tamping or inconsistent grind size sabotages your efforts. Emphasizing technique and routine maintenance—such as cleaning your milk pitcher or flushing your group head—ensures quality shots every time.
- Small Variables Carry Big Weight: Ambient conditions, water quality, and even your mood influence the outcome more than you expect. Investing in a water filter or storing beans properly can noticeably improve flavor and extraction consistency.
Gear and Resources That Became My Secret Weapons
For anyone serious about elevating their home espresso game, here are the tools and sources that I trust:
- High-Quality Burr Grinder: Fresh and consistent grounds are the foundation of great espresso. Check out this guide for selecting the right grinder suited to your setup.
- Pressure and Temperature Calibration Devices: Precise control over these variables impacts shot flavor profoundly, supported by calibration routines.
- Cleaning and Maintenance Supplies: Regular upkeep, like deep cleaning your equipment, prevents flavor contamination and machine issues.
- Educational Resources: Deepen your understanding with trusted tutorials and articles—like our comprehensive home espresso tips—which demystify complex processes.
Your Journey Continues: Embrace the Craft with Passion and Precision
Becoming a home espresso enthusiast is a deeply rewarding pursuit that blends science, art, and patience. Every shot is an opportunity to learn, experiment, and celebrate your progress. Remember, even the most seasoned baristas keep refining their skills—so don’t shy away from trying new techniques or adjusting your routine. Your perfect cup is within reach, waiting for you to master the nuances along the way.
What’s one small change you plan to make today to improve your home espresso game? Let me know below—your journey to better coffee starts now!
}3647}]}-}}}#20919}]}]}}}endof іскеfastdentist: `json= {