Why Your Portafilter Handle Keeps Coming Loose and How to Secure It
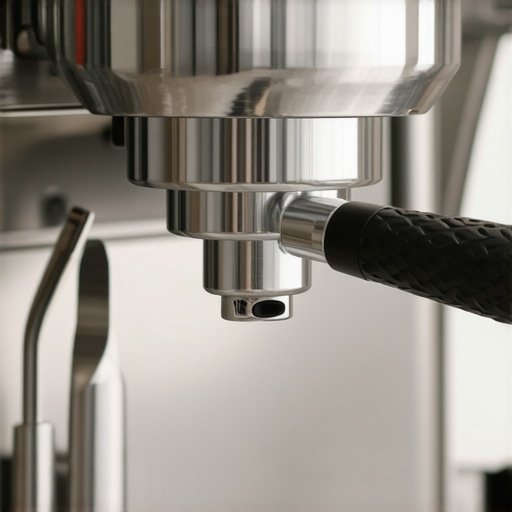
Have you ever been mid-pour, watching your carefully extracted espresso suddenly sputter and spill because the portafilter handle just won’t stay tight? I can’t count how many mornings I’ve struggled with a wobbly handle, feeling frustrated as my perfect shot dissolves into a mess. It’s a sinking feeling—like all that effort to craft a good brew is sinking into the drip tray. And honestly, it took me quite some time to realize that this common issue isn’t just a minor annoyance; it can directly impact the quality and consistency of your espresso.
Dealing with the Looseness Dilemma in Home Barista Life
The first time my handle came loose during an important guest visit, I was surprised. I had always assumed I was doing something wrong in the grind or tamp, but it was my portafilter’s connection that was slipping. Turns out, a loose handle isn’t just about inconvenience; it can lead to uneven extraction, possible damage to your machine, and even safety hazards if the handle detaches unexpectedly. As I dug deeper, I found that many coffee enthusiasts face this exact problem—sometimes more often than they’d like.
The good news? It’s a fixable issue. And understanding the root causes can save you from future messes and subpar brews. In my experience, one of the early mistakes I made was ignoring routine maintenance and not checking the tightness of my portafilter connection after a few uses—that’s a mistake I don’t want you to repeat. A simple awareness of these factors can dramatically improve your home brewing experience.
If you’re tired of handling loose portafilter handles and want to ensure your espresso is always top-notch, you’re in the right place. We’re going to uncover the reasons behind this issue and walk through practical fixes so you can get back to enjoying perfect pulls without the worry of splattering coffee or uneven shots.
But before we dive into the solutions, let’s address a common concern: you might be thinking, “Is this really worth the fuss?” Well, considering that even minor leaks or looseness can drastically affect your espresso quality, I assure you—yes, it’s absolutely worth it.
Is Your Handle Coming Loose Just Because of Poor Design or Wear?
In my early days as a home barista, I assumed that all portafilters were built equally. That was a mistake. Later, I learned the importance of regular checks and understanding the specific wear points of your machine. Sometimes, simple issues like worn gasket seals or debris buildup are the culprits, not just the user technique. For more tips on maintaining your gear and preventing similar frustrations, I recommend checking out our guide on selecting the best barista gear.
Now, with this foundational understanding, let’s get into the practical steps you can take to keep your portafilter handle firmly in place, ensuring each shot is as perfect as possible.
Check and Clean Regularly
Start by inspecting your portafilter’s connection point daily. Remove the handle and look for debris or oil buildup that can cause slippage. Use a soft brush to clean the connection area thoroughly, similar to cleaning the blades of a coffee grinder (see cleaning tips here). A clean, dry surface ensures better grip.
Adjust the Portafilter Gasket
If the handle still feels loose, examine the gasket seal inside the group head. Over time, gaskets wear out, losing elasticity. Remove the portafilter and check the gasket for cracks or flattening. Replacing a worn gasket restores proper tension, preventing handle wobble and ensuring even extraction. To replace or verify gasket condition, consult your machine’s manual or see this detailed guide.
Ensure Proper Tightening Technique
When reattaching the portafilter, don’t just lightly turn it until it clicks; tighten firmly until it feels secure. Think of it like tightening a screw: you want enough torque to prevent movement but not so much that you strip the threads. I once faced a loose handle after over-tightening; now I tighten just enough and test before pulling a shot. Practice makes perfect.
Inspect Handling Components for Wear
The handle itself might develop internal wear or cracks over time. Remove the handle periodically to check for fatigue or damage. If cracks are present, replace it entirely, which is a quick fix that can dramatically improve grip strength (see handle replacement tips here). Always opt for OEM parts for a reliable fit.
Implement Routine Maintenance Checks
Set a weekly routine to verify all connection points, clean seals, and tighten fittings. During one session, I noticed my handle was slightly loose after cleaning, so I tightened it an extra quarter turn. It made a significant difference in stability during my next brew. Remember, consistency in maintenance leads to better shots and fewer messes.
Upgrade Components When Necessary
If you’ve tried all these steps and still experience looseness, consider upgrading your portafilter handle or gasket kit. Investing in high-quality parts—like those reviewed in our latest machine reviews—can save you headaches long-term. Compatibility is key; always double-check specifications before purchasing.
When diving into home espresso setups, many focus solely on size, brand, or aesthetics, but there’s a deeper layer that often remains misunderstood: the subtleties and misconceptions about grinder calibration, espresso machine pressures, and milk frothing techniques. For instance, a common myth is that grinding finer always results in better extraction; however, in reality, over-fine grinding can cause excessive pressure buildup, risking damage to your machine and leading to bitter flavors. Understanding the precise relationship between grind size and machine pressure is crucial, especially since studies, like those from the Specialty Coffee Association, emphasize that optimal extraction isn’t solely about fineness but also involves consistent tamping and machine calibration.
Many amateurs fall into the trap of adjusting their grinders predominantly based on taste without considering other factors like humidity, bean age, or machine wear. This is a mistake because variables like ambient moisture levels can alter grind consistency, making a setting perfect one day and inefficient the next. Instead, developing an awareness of your environment and how it influences your grinder is a game-changer for consistency, as detailed in advanced guides linked here.
When it comes to milk frothing, many think the colder the milk, the better the foam. But the secret lies in the fat content and freshness, not just temperature. Cold milk offers better control, but over-foaming cold milk can lead to thick, unmanageable microfoam, especially if you’re using a less powerful steam wand. Advanced baristas often warm milk to just below boiling point, around 65°C (149°F), to achieve the best balance of temperature and texture. As research shows, microfoam quality hinges on controlling the micro-bubbles and milk composition, not just temperature, which is why detailed technique tweaks matter more than you think. Have you ever fallen into this trap? Let me know in the comments.
**How does your home setup handle pressure fluctuations with different beans or temperature swings?**
Many well-meaning enthusiasts overlook the importance of calibrating their espresso machine’s pressure profile, leading to inconsistent shots. High-quality machines often provide pressure profiling—a feature that blocks many from realizing its potential. Understanding and customizing pressure zones can bring out nuanced flavors and prevent over-extraction or channeling, especially when brewing darker roasts. Expert advice suggests investing in a gauge or PID controller, and fine-tuning pressure not just for the shot, but for each bean type. It’s a nuanced skill that separates average home brewers from seasoned experts.
In conclusion, the secret isn’t just having good gear but knowing how to fine-tune every aspect—grind, pressure, milk temperature—in harmony. Mastering these details ensures that your espresso isn’t just drinkable but truly outstanding. If you’re serious about elevating your coffee game, explore our comprehensive guides and consider upgrading your gear accordingly, but remember, even the best setup won’t compensate for overlooked nuances. Want to dive deeper? Visit our contact page to ask questions or share your experiences.Maintaining your home barista equipment is essential to achieving delicious, consistent espresso shots over the long term. From grinders to espresso machines and milk frothers, each component demands attention, proper tools, and a thoughtful approach. Investing in high-quality tools not only makes routine maintenance easier but also extends the lifespan of your gear, saving you money and hassle. For instance, a precision grinder calibration tool can help you fine-tune your grinder settings effortlessly, which is crucial when switching between different beans or roast profiles. I personally rely on a digital dial gauge for quick, accurate adjustments, inspired by professional baristas who swear by such devices for maintaining uniformity.
In the future, I predict that automation and smart maintenance sensors will become standard in high-end home coffee equipment, alerting users when parts need cleaning or replacing, much like smart thermostats for HVAC systems. Embracing these technologies today gives you a head start into this trend.
How do I maintain my espresso setup over time?
Routine checks are your best allies in keeping everything in top shape. Regularly inspect filters, seals, and gaskets for wear. For example, checking and replacing your portafilter gasket every few months prevents leaks and inconsistent pressure. Using a dedicated cleaning tablet designed for espresso machines ensures your machine’s internal pathways stay clear, maintaining optimal flow and temperature stability. Additionally, calibrate your grinder periodically; even a slight misadjustment can lead to over- or under-extraction.
For deep cleaning, consider investing in a dedicated brush set with fine bristles to clean grinder burrs and portafilter screens thoroughly—using the right tools makes all the difference. When it comes to milk frothers, descaling is crucial, especially in areas with hard water. A mixture of citric acid and water, run through your frother, can eliminate mineral buildup effectively.
One tip I recommend is regularly checking the pressure gauge of your espresso machine if it has one. Ensuring the pressure stays within optimal ranges (typically 9 bar) is vital for consistent extraction. If you notice fluctuations, consult your machine’s manual or contact expert services via [our contact page](https://espressotechguide.com/contact-us). Remember, the key to long-term success is consistency in maintenance routines—set aside time weekly to clean, inspect, and calibrate.
Replacing or upgrading components like a piston seal or portafilter handle when signs of wear appear can prevent future issues. High-quality parts can be sourced from authorized suppliers; always verify compatibility before purchasing. Over time, these small efforts preserve your equipment’s performance and your enjoyment.
Finally, stay informed by following dedicated guides and reviews, which can alert you to emerging tools that simplify maintenance or improve results. For example, upgrading your brewing pressure control with a PID controller, as noted in expert technical documentation, can dramatically improve temperature stability and shot consistency.
Start by trying out one new maintenance habit, like calibrating your grinder with a digital gauge. It’s a small step that can yield immediate benefits in cup quality. Remember, regular, attentive care is the backbone of a high-performing home coffee setup, ensuring every cup is just as satisfying as the first.
What The Real Lessons From My Home Barista Journey Taught Me
One of the most valuable lessons I learned was that consistency is built on small, deliberate habits—like regularly checking the tightness of my portafilter handle or calibrating my grinder. I once assumed that a sturdy machine didn’t need routine maintenance, only to discover that neglect leads to flavor inconsistencies and hardware issues. Another insight was that investing in quality tools, such as a precision grinder calibration device or a good milk thermometer, elevates the entire brewing experience far beyond just initial setup. And perhaps most surprisingly, I learned that embracing patience and curiosity, rather than rushing to perfect shots, unlocks a deeper understanding of how each component—from pressure to tamp—affects your final cup. These lessons came from trial and error, but they transformed my routine into a craft I genuinely enjoy, and I want you to experience the same growth with your home espresso setup.