How to Dial in Light Roasts Without Wasting Half the Bag
Ever handed the barista a bag of light roasted beans and watched them expertly dial in the grind and brew just right, all without a single shot going to waste? Now, picture yourself at home, eager to craft that perfect light roast espresso, only to end up tossing half the bag because you just couldn’t get it right. I can’t tell you how many times I’ve faced the frustration of over- or under-extracting, wasting precious beans, and feeling like I was missing a secret handshake.
The Challenge of Perfecting Light Roasts at Home
When I first ventured into the world of light roasts, I thought it was all about brighter flavors and higher acidity. But mastering the grind and extraction for these delicate beans is an art that requires precision. The biggest hurdle? Dialing in your grinder and espresso parameters without turning your kitchen into a bean graveyard. It’s easy to get discouraged, rip open a new bag, and dial in blindly—only to see half of it go straight into the trash or compost bin. Believe me, I’ve been there, and I’ve learned a few lessons the hard way that I want to share.
Is It Really Worth the Effort for Better Coffee?
Early on, I made the mistake of thinking that I could just back off on grind size and tweak the brew time. But that often led to inconsistent shots and wasted coffee. A key mistake I made was not paying attention to the subtle nuances that light roasts demand—like a need for finer adjustments and patience. Once I started experimenting with better techniques, my coffee dramatically improved. As per the Specialty Coffee Association, proper extraction reveals the true character of your beans, especially for light roasts which are more delicate and prone to under or over-extraction (learn why your espresso might taste burnt).
If you’ve ever stared at your grinder, wondering whether you should hit it again or abandon ship, rest assured—you’re not alone. But with a few focused adjustments and a clear process, you can cut down on waste and enjoy a more consistent, extraordinary brew. Ready to learn how to dial in light roasts without sacrificing a single bean? Let’s dive in.
Adjust Your Grinder Before Brewing
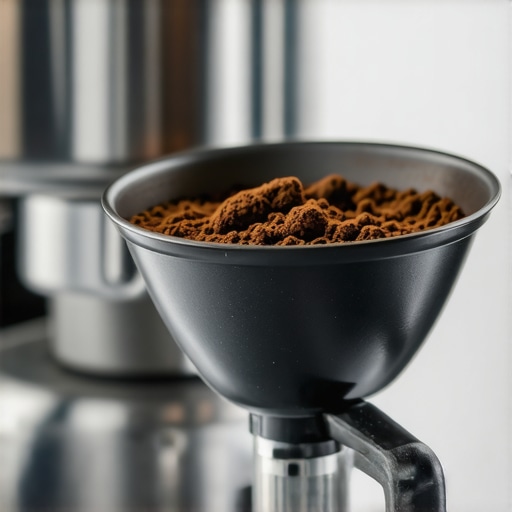
Start by setting your grinder to a slightly finer grind than you’d use for darker roasts. I remember the first time I tried this; my initial shot was over-extracted and bitter. I reduced the grind a tiny bit more, about a tenth of a millimeter, and pulled another shot. The crema was richer, and the brightness of the light roast came through clearly. Test multiple times, making small adjustments each time. For more insight, check out how to select the perfect grinder.
Master Your Dose and Tamp
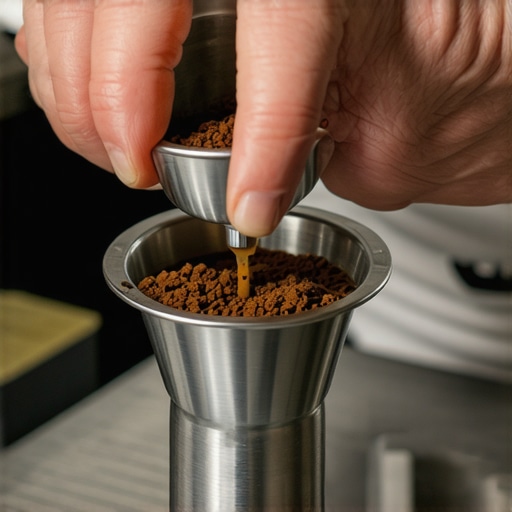
Use a consistent dose—typically around 18-20 grams for a double shot—using a precise scale. When tamping, apply firm, even pressure with a tamper, about 30 pounds of force. I once pressed too lightly, leading to uneven extraction, and the shot was sour. Once I increased pressure slightly and leveled the puck, the extraction improved dramatically. Think of tamping like planting a seed; uniform pressure creates an even foundation, ensuring water flows uniformly. For tips on tamping, visit tamping techniques.
Fine-Tune Your Brew Time
Light roasts are delicate—aim for a shot time between 25-30 seconds. Use your machine’s timer and watch the flow. My first few pulls were 20 seconds, resulting in thin, weak coffee, so I gradually extended the shot time. Adjust your grind size slightly until you hit that sweet spot. Remember, a longer shot can lead to over-extraction if the grind is too fine, while a too-coarse grind will under-extract quickly. For precise timing, consider calibrating your grinder.
Monitor and Control Water Temperature
Ensure your espresso machine reaches 195-200°F before pulling shots. Use a digital thermometer or check your machine’s temperature stability if equipped. I once pulled a shot at 190°F, and the flavors were muted; warming the boiler slightly elevated the temperature, accentuating the light roast’s brightness. Consistent water temperature helps extract nuanced flavors without bitterness. For troubleshooting, see water temperature issues.
Avoid Overloading or Underloading
Be precise with your coffee weight. Overloading causes the water to struggle through the puck, risking channeling, while underloading produces a weak or sour shot. Stick to a digital scale to load your basket accurately, and always distribute the coffee evenly before tamping. I learned this the hard way when a slightly uneven distribution resulted in a poor extraction—the solution was to use a distribution tool, which you can learn about here.
Experiment and Document
Keep a brewing journal: note grind size, dose, tamp pressure, shot time, and tasting notes. Over time, patterns emerge, guiding refinements. I once logged ten shots with slightly varying parameters, which helped me identify that a 0.2mm finer grind consistently yielded better brightness. This disciplined approach prevents guesswork and accelerates mastery. For additional tips, see home espresso tips for beginners.
By implementing these concrete steps—small adjustments, consistent measurements, and careful monitoring—you’ll minimize waste and significantly improve your light roast espresso quality. Remember, precision and patience are your best allies in this journey.
Why Equipment Isn’t Always the Bottleneck
Many enthusiasts believe that upgrading to premium espresso machines or barista-grade gear will instantly elevate their coffee. While high-quality equipment can significantly improve results, most failures stem from misunderstandings of the gear’s nuances. For instance, a quality grinder with poorly maintained burrs can produce inconsistent grounds, overshadowing the machine’s capabilities. Remember, even the best espresso maker won’t compensate for inconsistent grind distribution or improper tamping. Don’t fall into the trap of thinking that gear alone guarantees perfect espresso. Proper technique and understanding play vital roles in elevating your home brewing. Sometimes, simpler tools used with mastery outperform expensive setups used recklessly.
Milk Frothers Get Overlooked
Contrary to popular belief, not all milk frothers are created equal. Many assume that any device can produce microfoam comparable to professional microfoam, but this isn’t the case. Using a <$a href="https://espressotechguide.com/milk-frothers-that-transform-your-coffee-experience">cheapo milk frother might lead to inconsistent textures or over-oxidized milk, especially with non-dairy alternatives. Having the right frothing technique, combined with a high-quality frother, vastly improves your latte art and flavor profile. A common mistake is overfilling the pitcher or not purging the steam wand properly, which can cause spitting or uneven microfoam. Mastery over your frothing process, rather than relying solely on gadgets, is what truly makes the difference. Want to see the best options? Check out top-rated milk frothers.
Beware the Myth of the Perfect Grind
The notion that a specific grind size guarantees perfect extraction is flawed. Many home baristas obsess over dialing in a single setting, believing that a slight tweak will solve all issues. In reality, flat burrs or burr wear can subtly alter grind consistency over time, leading to unpredictable results. Environmental factors like humidity and bean age also play a part. This complicates the myth of a static perfect grind. Instead, aim to understand how your grinder responds under different conditions, and adjust incrementally. Regular maintenance and calibration are your allies in maintaining consistent grind quality and avoiding waste. For comprehensive insights, explore calibrating your grinder.
Advanced Baristas: How Can I Optimize Extraction for Niche Roast Profiles?
Many seasoned home brewers wonder how to adjust their process for less common roast profiles, like Cold Brew or Extended Dark roasts. These require nuanced modifications because their chemical structures differ from standard roasts, affecting extraction dynamics. According to a recent study in the Journal of Coffee Research, adjusting parameters such as temperature stability, flow rate, and shot timing can significantly enhance flavor clarity for these profiles. For example, reducing brew temperature slightly or employing pre-infusion techniques helps mitigate over-extraction bitterness. Remember, roasting level profoundly influences grind size, contact time, and extraction—the key to unlocking these profiles’ full potential lies in meticulous experimentation and documentation. Curious how to adapt your gear for niche roasts? Dive into our home espresso guides.
In essence, understanding the subtle intricacies and avoiding common pitfalls can dramatically improve your coffee experience. Have you ever fallen into this trap? Let me know in the comments.
Investing in quality equipment is just the beginning of a successful home coffee setup; regular maintenance and the right tools ensure your gear stays in top shape and continues to produce exceptional espresso. The key to long-term enjoyment lies in understanding exactly what tools to use and how to incorporate routine upkeep into your brewing habits.
Prioritize Regular Grinder Calibration
Your coffee grinder is arguably the most critical component in achieving consistent shots. I personally rely on calibration tools that allow me to fine-tune my burrs with precision. Over time, flat burrs can wear unevenly, leading to inconsistent grind size and flavor variations. Regular calibration—about every 100-200 pounds of beans—helps maintain a uniform grind size and improves extraction. I’ve found that investing in a burr calibration kit simplifies this process, saving me from guesswork and wasted coffee.
Maintain Your Machine with Specific Cleaning Supplies
Proper cleaning extends the lifespan of your espresso machine. I always stock up on high-quality descaling solutions and dedicated brushes. For example, periodically cleaning your plastic hopper prevents oil buildup that can taint flavor. A reliable group head brush ensures efficient removal of old coffee residues, which is vital for flavor clarity. Remember, a clean machine runs more efficiently and prevents issues like clogs or leaks. My routine includes a weekly backflush with a cafe-approved cleaner and monthly descaling—it’s a small investment of time that yields big flavor rewards.
Smart Storage for Fresh Beans
Keeping your beans fresh over the long haul involves the right storage tools. I recommend using opaque, airtight canisters designed for coffee—these block light and moisture. Proper storage preserves the aromatic oils necessary for vibrant flavor. For maximum freshness, I avoid freezer storage due to moisture risks, instead opting for a cool, dark pantry. Additionally, rotating beans buys you consistent quality—try to use older beans first. For tips on optimal bean storage, see this guide.
Monitor and Adjust Water Quality and Temperature Tools
Water quality dramatically influences espresso taste and equipment health. I use a digital water tester to routinely check hardness levels, ensuring I am not overloading the machine with minerals that can cause scale. A temperature strip on the boiler provides real-time feedback, helping me dial in ideal extraction temperatures. These tools help prevent common issues like scale buildup and temperature fluctuations, which can harm your machine over time. Expect to replace water filters every 3-6 months based on usage, further refining your water quality management.
Future Trends in Espresso Maintenance and Tools
Looking forward, automation and IoT integration will likely transform how we maintain our espresso gear. Imagine smart machines that alert you when a component needs cleaning or calibration, saving time and preventing breakdowns. Enhanced diagnostics could even recommend optimal parameter adjustments based on real-time data, pushing home brewing closer to professional standards. Embracing these advancements now, including investing in high-quality, reliable tools, will make ongoing maintenance more accessible and less intimidating.
By adopting these specific strategies—regular calibration, targeted cleaning supplies, proper storage, and detailed monitoring—you’ll significantly extend the lifespan of your equipment and maintain high-quality brews over the years. My personal recommendation for an immediate upgrade: integrate a burr calibration kit into your routine. Try calibrating your grinder this week and notice the difference in shot consistency and flavor clarity. Proper maintenance isn’t just about longevity; it guarantees a consistently excellent espresso experience. Want more tailored advice? Reach out via contact page anytime.
The Hardest Lessons I Learned About Home Espresso Mastery
One of the most eye-opening realizations was that even the best gear can’t compensate for inconsistent technique. I once thought that upgrading my machine would instantly elevate my espresso quality, but I discovered the importance of routine calibration and precise tamping. The subtle nuances in light roasts demand a meticulous approach—overlooking small details like water temperature or grind uniformity can turn a promising shot into wasted beans.
My Arsenal for Coffee Success
For anyone serious about elevating their home brewing, I swear by tools like a burr calibration kit, digital thermometer, and high-quality tampers. These aren’t just gadgets—they’re investments in consistency and flavor clarity. The precision they provide allows me to fine-tune parameters, especially when exploring niche roast profiles. Dive into calibrating your grinder to keep your extraction on point.
Embracing the Journey and Sharing the Passion
The path to phenomenal light roast espresso is ongoing—and that’s what keeps it exciting. I encourage fellow enthusiasts to document their adjustments, celebrate small wins, and remember that every shot is a chance to learn. With patience, curiosity, and the right tools, you can unlock flavors you never thought possible. Ready to turn your kitchen into a boutique café? Your next perfect shot is just a tweak away.