How to Fix a Squeaky Lever on Your E61 Group Head
Ever been in the middle of crafting that perfect espresso shot, only to be greeted by a loud, squeaking lever? It’s like your machine’s way of complaining, and honestly, it can be downright frustrating. I remember the first time my lever started squealing during a busy weekend morning—my heart sank. Instead of feeling like a barista, I felt like I was fighting with my own gear. But here’s the good news: a squeaky lever isn’t a sign your machine is doomed. It’s often a simple fix, and I’m here to walk you through it, step by step.
Why Your Squeaky Lever Needs Your Attention
That squeak isn’t just annoying; it’s a warning sign that some maintenance is overdue. Over time, tiny particles of coffee oil, dust, or mineral buildup can settle into the lever mechanism, causing it to stick or squeal when moved. Not only does this reduce the smoothness of your espresso-making process, but it can also lead to more serious issues if ignored. Regularly maintaining the lever ensures your espresso shot stays consistent and your machine lasts longer. Plus, fixing squeaks is often a quick and inexpensive task that can save you from costly repairs down the line.
Is Lubrication Really Necessary, or Just a Myth?
I’ll admit, my early mistake was rushing to lubricate everything without understanding what was really needed. I thought, “More oil equals smoother movement,” but that was a rookie oversight. As I learned from seasoned enthusiasts, using the wrong lubricant or overdoing it can attract dirt and actually worsen the problem. The key is to identify the specific part causing the squeak and use the right type of lubricant sparingly. This way, you restore the lever’s glide without inviting more trouble. If you’re curious about other maintenance tips, check out our guide on cleaning coffee oils.
Now that we understand why a squeaky lever matters, let’s delve into how you can quiet that noise and get your machine running as smoothly as it should. Ready to become your own espresso machine’s best friend? Let’s move on to the practical steps!
Remove the Lever Assembly Carefully
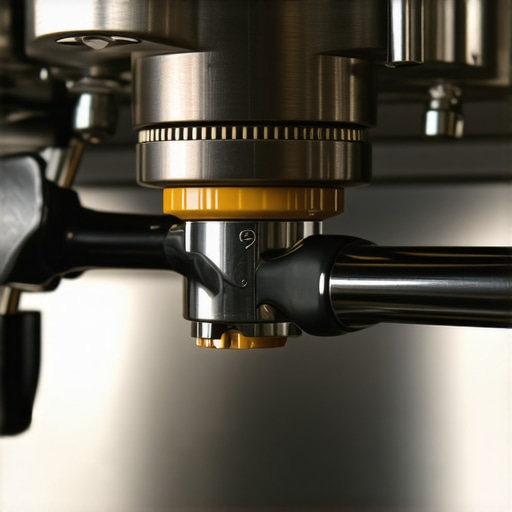
Start by turning off and unplugging your espresso machine to avoid any electrical hazards. Locate the lever mechanism—usually accessible from the front or side of the machine—and carefully detach it using a screwdriver, noting the placement of each screw. When I did this for my own setup, I used a small container to keep the screws safe as I disassembled the lever, making reassembly straightforward and preventing lost parts.
Clean and Inspect the Moving Parts
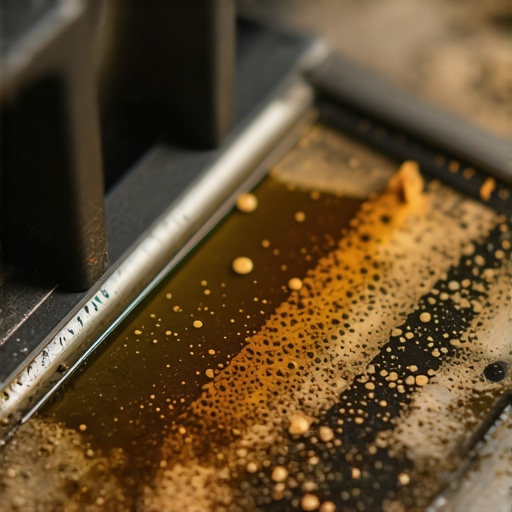
Once removed, use a soft brush or damp cloth to remove coffee oils, dust, or mineral deposits from the lever components. Pay close attention to the pivot points and contact surfaces. For stubborn buildup, a small amount of vinegar or dedicated cleaning solution can be applied. During my own cleaning, I discovered tiny coffee oil residues that had accumulated over months, which, once cleaned, dramatically reduced squeaking.
Identify the Friction Points and Lubricate
Examine where the lever pivots and contacts other parts. Apply a high-quality, food-grade lubricant—such as food-safe silicone spray or a lubricant recommended by the manufacturer—sparingly at these points. Do not overuse; excess lubricant can attract dirt. When I added a tiny drop to each pivot and worked the lever back and forth, I immediately noticed a smoother motion and silenced squeaks.
Reassemble and Test
Carefully reattach the lever to the machine, securing all screws in their original positions. Plug in the machine and perform multiple lever operations to ensure the squeak is gone and movement feels smooth. During my test, I made sure to cycle the lever multiple times, confirming that the noise was eliminated without any sticking or resistance. This quick maintenance keeps your espresso shots consistent and machine functioning optimally.
Regular Maintenance to Keep It Quiet
Implement a routine check every few months—clean the lever mechanism and reapply lubricant as needed. If you notice squeaks returning, revisit the cleaning process or try a different lubricant compatible with your machine. Remember, a well-maintained lever not only prevents noise but also extends the lifespan of your espresso machine, making every shot a pleasure.
While much has been said about choosing the right espresso machine or grind size, many enthusiasts overlook nuanced details that can drastically influence brewing success. Let’s cut through the noise and explore some misconceptions and advanced pitfalls that even seasoned home baristas often fall for.
Why Bigger Isn’t Always Better When It Comes to Coffee Equipment
A prevalent myth is that larger, more expensive gear automatically results in better coffee. However, oversized machines or extremely high-capacity grinders can introduce complexity and variables that hinder consistent results. For example, a commercial-grade machine might require more precise temperature management and maintenance routines to avoid temperature sags or overheating. In my experience, focusing on equipment that matches your skill level and space can be more beneficial than chasing the latest high-end models. For insightful guidance on choosing suitable gear, visit our barista gear guide.
What Are the Subtle Signs Your Grinder Isn’t Performing Optimally?
Many home baristas assume that a noisy or inconsistent grinder simply needs a cleaning or an adjustment. But ignoring grinder burr alignment or wear can cause uneven extraction and off-flavors. A subtle indicator is when shot times vary despite consistent dialing, hinting at burr dullness or misalignment. Regularly inspecting your grinder’s burrs and understanding the signs of wear can elevate your brewing game. For detailed steps, check out our burr cleaning and maintenance tips.
Common Mistakes with Milk Frothing That Sabotage Texture
Another often-underestimated nuance is milk texture. Many believe that just steaming longer or hotter will produce better microfoam. However, oversteaming milk can break down proteins, leading to larger bubbles and a froth that collapses quickly. The secret lies in controlling temperature and incorporating proper stretching techniques. Also, using a smaller milk pitcher can help you focus on micro-adjustments for silky foam. Want to master microfoam? Our milk frothing guide offers expert advice.
Why Home Espresso Goes Beyond the Equipment
Many believe that owning high-end gear guarantees perfect espresso. But, in reality, user skill, calibration, and process consistency matter more. Advanced mistakes include not pre-wetting the coffee puck properly or neglecting to calibrate your grinder for different bean profiles. Even the best machine can underperform if these details aren’t managed. For example, uneven tamping or inconsistent shot timing can ruin extraction, regardless of equipment quality. I recommend regularly reviewing your process, including techniques for precise tamping and timing.
Remember, every nuance in your approach contributes to that perfect cup. Don’t forget to calibrate your grinder, pay attention to milk temperatures, and select equipment that fits your experience level. Mastery is about understanding these hidden details and avoiding common pitfalls. Have you ever fallen into this trap? Let me know in the comments, and let’s refine our craft together!
Keeping your espresso machine and barista gear in peak condition requires more than just occasional cleaning; it involves selecting the right tools and adopting a disciplined maintenance routine. As a passionate home barista, I’ve found that certain equipment makes all the difference in achieving consistent results and prolonging the lifespan of my setup.
Invest in Quality Calibration Tools
Accurate calibration is the cornerstone of great espresso, and for that, a reliable digital pressure gauge is indispensable. I personally use the pressure gauge featured in this guide because it provides precise real-time feedback on your machine’s performance. Regularly checking your boiler pressure and pump pressure ensures you catch issues early before they affect shot quality. Additionally, a high-grade tamper and a calibration tool for grind size help maintain consistency, especially when switching beans or adjusting for roast levels.
Stick to Proper Cleaning Implements
Micro-fiber cloths, soft brushes designed for espresso machines, and a dedicated cleaning kit are essential. The specialized cleaning tools make scrubbing stubborn oils and residues easier, reducing the risk of flavor contamination. I also recommend a small, precise brush for the group head and steam wand, which I find crucial for preventing buildup that causes leaks or spitting. Regular use of these tools reduces long-term wear and helps maintain the ideal condition of critical components.
Using Software for Monitoring and Fine-tuning
Beyond hardware, implementing software solutions can elevate your long-term maintenance. For example, digital logging of shot times, pressure profiles, and temperature swings can help identify patterns that suggest wear or calibration drift. If you have a machine with integrated PID controllers, consider software that allows for custom profiling, enabling you to fine-tune temperature stability over time. This proactive approach prevents minor issues from escalating, saving you time and money.
How do I maintain my coffee grinder over time?
For the crucial grinder, regular cleaning is key, but choosing the right tools makes the process more effective. My preferred method is using a grinder brush and occasional use of a cleaning pellet, which you can find in renowned product reviews. Cleaning coffee oils from plastic hoppers is vital—dirt and oils impact flavor and can cause burr jams. Additionally, replacing worn burrs as the manufacturer recommends (often around every 300–500 pounds of beans) ensures that grind consistency and flavor extraction remain optimal. Keep an eye on the signs of grinder wear to catch these issues early.
Looking ahead, the integration of IoT and smarter sensors will likely automate routine checks, alerting you when maintenance is due. For now, I urge you to incorporate a quick weekly tune-up with your tools—your espresso shots will thank you.
Get Serious About Milk Frothing Equipment
Choosing the right milk frother isn’t just about foam texture but also durability. I personally use a high-quality electric frother that’s easy to clean and consistent. The recommendations in this guide helped me avoid inexpensive models prone to leaking or inconsistent performance. Regular descaling of the steam wand and replacing worn gasket seals are easy steps that prevent leaks and maintain the silky smooth microfoam you’re aiming for.
Lessons That Changed My Approach to Espresso Maintenance
One of the most profound realizations I had was that frequent, gentle cleaning of the lever mechanism prevents stubborn squeaks, saving me from surprise breakdowns. I also learned that using the right food-grade lubricant sparingly can turn a noisy machine into a silent performer, but over-lubricating often invites more problems than it solves. Patience during reassembly is key; rushing can misalign components, leading to future issues. Lastly, I discovered that regular calibration of pressure and grinder settings is like tuning a musical instrument—necessary for consistent, beautiful results every time.
My Essential Toolkit for Maintaining Your Espresso Gear
Having trusted tools makes all the difference. I swear by a high-precision digital pressure gauge—it’s invaluable for early detection of pressure inconsistencies that hint at deeper problems. A dedicated group head cleaning brush and a quality food-safe lubricant have become staples in my toolkit. For grinder maintenance, a specialized burr cleaning pellet and a soft brush ensure my grind remains uniform and flavorful. These tools, coupled with reliable online guides, empower me to keep my setup running smoothly without costly technician visits.
Your Turn to Elevate Your Coffee Game
Remember, every small tweak and attentive maintenance step brings you closer to brewing perfection at home. Embrace the nuances, experiment patiently, and don’t hesitate to invest in quality tools that support your journey. The world of home espresso is complex but incredibly rewarding—you’re already on the right path. So, what’s the first improvement you plan to make today? Share your thoughts below and let’s support each other in mastering this craft!
,