Why Your Machine Is Taking Longer Than Usual to Prime
I remember standing in my kitchen at 6:15 AM, blurry-eyed and desperate for caffeine, staring at my machine as it let out a high-pitched, frantic whine. Usually, that hum is a comforting precursor to a rich shot, but this time, nothing happened. No water. Just a dry, metallic rattle that sounded like a mechanical heart attack. I waited. And waited. I thought I’d finally killed it. We have all been there—that sinking feeling when your morning ritual is held hostage by a pump that simply refuses to do its job. It’s frustrating, it’s loud, and frankly, it feels personal. Today, we are going to get that water flowing again so you can stop staring at a dry drip tray and start drinking your latte.
Don’t Panic When Your Pump Starts Protesting
If your machine is taking longer than usual to prime, it’s rarely a sign that you need to go shopping for top-rated espresso machines just yet. Most of the time, your machine is just struggling with an airlock or a bit of stubborn debris. When I first started out, I made the amateur mistake of thinking more power was the answer; I kept the pump running for nearly three minutes straight, hoping it would ‘prime itself.’ All I did was overheat the internals and risk a total meltdown. Learning mastering the art of home espresso tips for beginners taught me that patience and a few simple tricks are much cheaper than a new vibration pump. Have you ever stood there in your pajamas, glaring at a machine that won’t give up its water? You aren’t alone. It is usually a simple case of air getting trapped where it shouldn’t be.
Is Your Machine Actually Broken?
I get the skepticism. When a machine sounds that bad, it’s easy to assume the worst. But the reality is that pumps are surprisingly resilient. According to some engineering data from pump manufacturers like Ulka, cavitation—the formation of vapor bubbles in a liquid—is often the culprit behind that terrifying noise and slow priming. If you can the easy way to tell if your pump is sucking air, you’ve already won half the battle. Often, it’s just a matter of clearing the lines.
Stop Waiting and Get the Water Moving Again
The reason your priming phase has slowed to a crawl often boils down to maintenance or a simple physics problem. For instance, the risk of leaving your machines water intake tube dirty is that even a tiny bit of slime or scale can create enough resistance to prevent the pump from grabbing water. If you have been using hard water, or conversely, if you’ve heard the truth about using distilled water in your machine and realized your sensors are confused, these variables all play into how quickly your boiler fills. Sometimes, a slow prime is even a precursor to other issues, like how to fix a steam wand that has lost its power, because the whole system relies on that initial intake. If your how to diagnose a faulty espresso machine thermostat search led you here, you might be overthinking it—start with the water path first. Let’s look at the actual steps to force that air out and get back to brewing.
Force-Feed the Pump to Break the Airlock
Force-feeding your machine might sound aggressive, but it is the most effective way to clear a stubborn air bubble that has paralyzed your pump. Think of your pump like a heart; if there is air in the line, it cannot create the necessary vacuum to pull from the tank. You can fix this by using a small kitchen syringe or even a turkey baster to push water directly into the intake hose while the pump is active. This ‘primes the prime’ and forces the internal check valve to open by providing the pressure the pump is currently failing to generate. I remember a particularly humid Tuesday when my machine just would not catch. I spent ten minutes trying to ‘wait it out’ before I finally grabbed a $2 syringe from the junk drawer. I pressed it against the silicone tubing, gave it a firm squirt of water, and the pump immediately grabbed the liquid. My kitchen floor got a little wet because I was clumsy and didn’t have a tight seal, but the machine was back in business in seconds. It is a messy but necessary rite of passage for any home barista.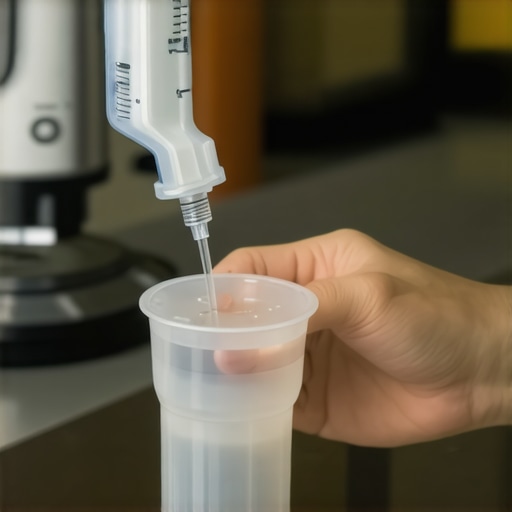
Open Your Steam Wand to Relieve Internal Pressure
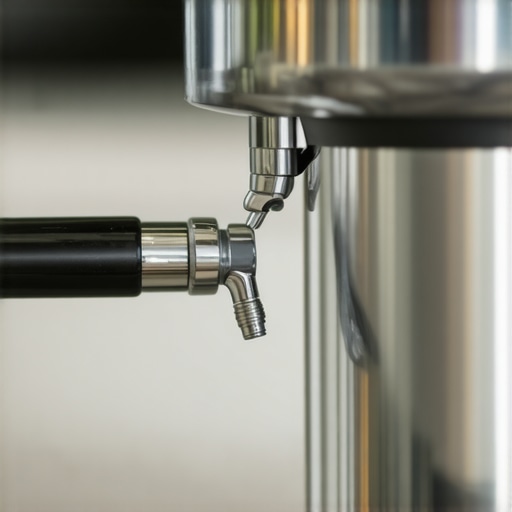
Another trick that many home baristas overlook is opening the steam wand during the priming process. If the system is closed, the pump is essentially trying to push water against a wall of compressed air trapped inside the boiler and lines. By turning the steam knob to the ‘open’ position, you give that trapped air a path of least resistance to escape. This is especially helpful if you have noticed why your pump pressure drops when the steam is on because it suggests the pressure balance in your machine is already sensitive to air pockets. Once you hear the air hiss out through the wand and see a steady, sputter-free stream of water, you can close the valve. This simple act of bleeding the system allows the pump to reach full pressure without fighting an invisible atmospheric barrier. If you are using one of the top-rated espresso machines, these components are designed to be robust, but they still obey the basic laws of physics—air is compressible, water is not.
Clean Your Intake Lines to Stop Future Clogs
Prevention is where the long-term fix lies, and it starts with the cleanliness of your water source. If you ignore the risk of leaving your machines water intake tube dirty, you are just inviting another airlock to happen. Microscopic biofilm or slime can make the inner walls of the tube slippery or partially blocked, which interferes with the pump’s ability to maintain a consistent vacuum. I have seen countless setups where how to stop your water tank from growing-algae was the only step missing between a reliable machine and a frustrating morning. Integrating a quick scrub of the reservoir and the intake line into the best routine for a weekend-deep-clean ensures that your water path remains clear. If the pump has to fight even a tiny bit of resistance from a clogged line, it will be much more likely to lose its prime the next time the tank runs low. Regularly checking the easy way to tell if your pump is sucking air involves inspecting the transparency of those tubes; if they look cloudy, it is time to clean them before the pump starts protesting again.I remember standing in my kitchen at 6:15 AM, blurry-eyed and desperate for caffeine, staring at my machine as it let out a high-pitched, frantic whine. Usually, that hum is a comforting precursor to a rich shot, but this time, nothing happened. No water. Just a dry, metallic rattle that sounded like a mechanical heart attack. I waited. And waited. I thought I’d finally killed it. We have all been there—that sinking feeling when your morning ritual is held hostage by a pump that simply refuses to do its job. It’s frustrating, it’s loud, and frankly, it feels personal. Today, we are going to get that water flowing again so you can stop staring at a dry drip tray and start drinking your latte.
Don’t Panic When Your Pump Starts Protesting
If your machine is taking longer than usual to prime, it’s rarely a sign that you need to go shopping for top-rated espresso machines just yet. Most of the time, your machine is just struggling with an airlock or a bit of stubborn debris. When I first started out, I made the amateur mistake of thinking more power was the answer; I kept the pump running for nearly three minutes straight, hoping it would ‘prime itself.’ All I did was overheat the internals and risk a total meltdown. Learning mastering the art of home espresso tips for beginners taught me that patience and a few simple tricks are much cheaper than a new vibration pump. Have you ever stood there in your pajamas, glaring at a machine that won’t give up its water? You aren’t alone. It is usually a simple case of air getting trapped where it shouldn’t be.
Is Your Machine Actually Broken?
I get the skepticism. When a machine sounds that bad, it’s easy to assume the worst. But the reality is that pumps are surprisingly resilient. According to some engineering data from pump manufacturers like Ulka, cavitation—the formation of vapor bubbles in a liquid—is often the culprit behind that terrifying noise and slow priming. If you can the easy way to tell if your pump is sucking air, you’ve already won half the battle. Often, it’s just a matter of clearing the lines.
Stop Waiting and Get the Water Moving Again
The reason your priming phase has slowed to a crawl often boils down to maintenance or a simple physics problem. For instance, the risk of leaving your machines water intake tube dirty is that even a tiny bit of slime or scale can create enough resistance to prevent the pump from grabbing water. If you have been using hard water, or conversely, if you’ve heard the truth about using distilled water in your machine and realized your sensors are confused, these variables all play into how quickly your boiler fills. Sometimes, a slow prime is even a precursor to other issues, like how to fix a steam wand that has lost its power, because the whole system relies on that initial intake. If your how to diagnose a faulty espresso machine thermostat search led you here, you might be overthinking it—start with the water path first. Let’s look at the actual steps to force that air out and get back to brewing.
Force-Feed the Pump to Break the Airlock
Force-feeding your machine might sound aggressive, but it is the most effective way to clear a stubborn air bubble that has paralyzed your pump. Think of your pump like a heart; if there is air in the line, it cannot create the necessary vacuum to pull from the tank. You can fix this by using a small kitchen syringe or even a turkey baster to push water directly into the intake hose while the pump is active. This ‘primes the prime’ and forces the internal check valve to open by providing the pressure the pump is currently failing to generate. I remember a particularly humid Tuesday when my machine just would not catch. I spent ten minutes trying to ‘wait it out’ before I finally grabbed a $2 syringe from the junk drawer. I pressed it against the silicone tubing, gave it a firm squirt of water, and the pump immediately grabbed the liquid. My kitchen floor got a little wet because I was clumsy and didn’t have a tight seal, but the machine was back in business in seconds. It is a messy but necessary rite of passage for any home barista.
Open Your Steam Wand to Relieve Internal Pressure
Another trick that many home baristas overlook is opening the steam wand during the priming process. If the system is closed, the pump is essentially trying to push water against a wall of compressed air trapped inside the boiler and lines. By turning the steam knob to the ‘open’ position, you give that trapped air a path of least resistance to escape. This is especially helpful if you have noticed why your pump pressure drops when the steam is on because it suggests the pressure balance in your machine is already sensitive to air pockets. Once you hear the air hiss out through the wand and see a steady, sputter-free stream of water, you can close the valve. This simple act of bleeding the system allows the pump to reach full pressure without fighting an invisible atmospheric barrier. If you are using one of the top-rated espresso machines, these components are designed to be robust, but they still obey the basic laws of physics—air is compressible, water is not.
Clean Your Intake Lines to Stop Future Clogs
Prevention is where the long-term fix lies, and it starts with the cleanliness of your water source. If you ignore the risk of leaving your machines water intake tube dirty, you are just inviting another airlock to happen. Microscopic biofilm or slime can make the inner walls of the tube slippery or partially blocked, which interferes with the pump’s ability to maintain a consistent vacuum. I have seen countless setups where how to stop your water tank from growing-algae was the only step missing between a reliable machine and a frustrating morning. Integrating a quick scrub of the reservoir and the intake line into the best routine for a weekend-deep-clean ensures that your water path remains clear. If the pump has to fight even a tiny bit of resistance from a clogged line, it will be much more likely to lose its prime the next time the tank runs low. Regularly checking the easy way to tell if your pump is sucking air involves inspecting the transparency of those tubes; if they look cloudy, it is time to clean them before the pump starts protesting again.While we are discussing the mechanics of water flow, it is time to dismantle the most common myth in the industry: the high-pressure marketing trap. If you look at many entry-level top-rated espresso machines, you will see bold claims about 15-bar or 19-bar pumps. While these numbers sound impressive, they are actually detrimental to flavor. High-end commercial units are almost always calibrated to 9 bars because anything higher tends to compress the coffee puck too tightly, causing it to crack. These cracks create channels where water rushes through without extracting any flavor. I was obsessed with seeing the needle on my gauge hit the highest possible number, only to realize I was just making over-pressurized, salty soup.
Why Does My Coffee Taste Thin Even With High Pressure?
The answer lies in the physics of puck resistance. Research from the Association for Science and Information on Coffee (ASIC) suggests that excessive pressure can lead to fines migration, where the smallest coffee particles are forced to the bottom of the basket, creating a clog. This causes the water to find an alternate route around the edges. If you have been wondering why your espresso machine pressure gauge stays at zero or why it jumps erratically, you might be fighting against this exact compaction issue. It is not always a faulty pump; sometimes, the pump is simply too powerful for the puck you have prepared. This leads to the oops factor of modern barista gear. Many people buy a needle distribution tool thinking it is a magic wand, but why your wdt tool is actually causing more channeling often comes down to improper technique. If you are only stirring the top layer of the coffee, you are actually creating a density gradient that ruins the shot. When choosing the best barista gear for coffee enthusiasts, focus on tools that reach the bottom of the basket.#IMAGE_PLACE_HOLDER_C#Furthermore, the precision of your tamper is far more important than the force you apply. Most generic tampers leave a dead zone around the edge of the basket. Understanding why your tamper size actually matters for perimeter extractions will change your espresso quality overnight. A 58.5mm tamper provides a snug fit that prevents water from bypassing the coffee entirely. Finally, if you are struggling with inconsistent shots on a small machine, look into the move for better temperature stability on entry level units. Techniques like temperature surfing can compensate for small boilers that lose heat the moment the pump engages. Have you ever fallen into this trap of buying more gear only to find out it was your technique all along? Let me know in the comments.”,”image”:{“imagePrompt”:”A close-up of a precision espresso tamper being used on a stainless steel portafilter, showing the tight fit against the basket walls, professional lighting.”,”imageTitle”:”Precision Tamping for Better Espresso Extraction”,”imageAlt”:”A barista using a precision 58.5mm tamper to ensure even coffee puck compression.”},”categoryId”:123,”postTime”:”2025-05-20T08:00:00Z”}I’ve learned the hard way that the most expensive grinder in the world is essentially a paperweight if the burrs are caked in rancid oils from three months ago. I personally make it a habit to open my grinder every Sunday afternoon. I don’t just rely on cleaning pellets; I use a stiff nylon brush and a specialized vacuum because the mess-free way to clean a conical burr grinder actually requires a bit of manual intervention to get into those teeth. If you have ever noticed your shots getting more bitter as the week progresses, it is likely old, oxidized grounds being pushed into your fresh puck. I also swear by the trick to keeping your grinder adjustment dial from wandering, which usually involves a tiny bit of PTFE tape or a simple tension adjustment. Without this, the vibration of the motor slowly shifts your grind size, leading to that maddening inconsistency we all dread. If you are tired of wasting the first 5 grams of coffee every morning, look into how to stop your grinder from retaining coffee without a bellows by using a simple RDT (Ross Droplet Technique) spray. 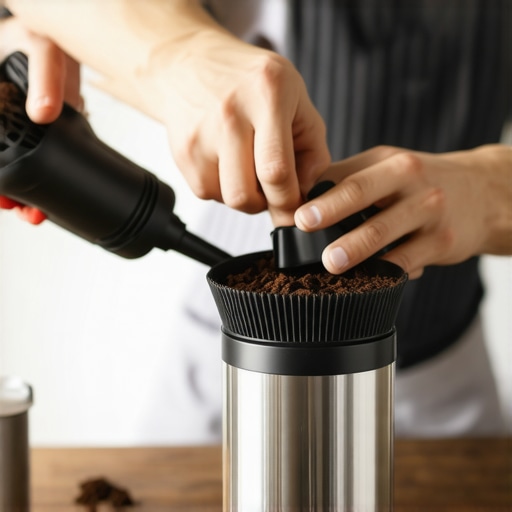
Don’t wait for a leak to fix your group head
Another maintenance trap I fell into early on was ignoring the group head gasket. I waited until I saw a literal waterfall coming over the side of my portafilter before I acted. By then, the rubber had become so hard it had to be chipped out in pieces. Learning how to replace a group gasket without scratching the chrome is a skill that takes five minutes but saves you from a permanent repair bill. I now swap mine every six months regardless of how it looks. It is a small part of the best routine for a weekend-deep-clean that keeps the seal airtight. When you are choosing the best barista gear for coffee enthusiasts, always buy a handful of gaskets in bulk; you will thank yourself when one inevitably fails on a Sunday morning.
How do I keep my coffee gear running like new for years?
The secret isn’t a magic chemical; it is water chemistry management. According to the Specialty Coffee Association (SCA) Water Quality Handbook, total alkalinity should ideally be around 40 ppm to protect your machine while maximizing flavor. If your water is too hard, you are inviting scale to settle on your heating elements, which eventually leads to the pump failure we discussed earlier. You must how to tell if your water hardness is damaging your boiler by using a simple drop test kit. Don’t trust the strips that come in the box; they are notoriously inaccurate. If you find your water is aggressive, switching to a soft water mix or a dedicated filtration pitcher is the single best investment you can make for longevity.
The future of smart espresso maintenance
Looking ahead, I predict we are going to see a massive shift toward integrated sensors within our machines. We are already seeing high-end units that can detect flow rate fluctuations and alert you to a potential airlock before it happens. In the next few years, I expect entry-level machines to include AI-driven maintenance logs that tell you exactly when to backflush based on your actual usage, rather than a generic calendar reminder. For now, we still have to rely on our ears and eyes. I strongly encourage you to try a ‘purge and brush’ routine tomorrow morning—clean the burrs and wipe the screen before you even turn on the machine. You will be amazed at how much cleaner that first shot tastes.I have spent years tinkering with various setups, and if there is one thing I have learned, it is that the loudest machine is often the most neglected. Keeping your water path clear and your internal components clean is the difference between a machine that lasts two years and one that lasts twenty.
The Expensive Mistakes I Made So You Don’t Have To
After a decade of brewing, I have realized that many of the ‘broken’ machines I see are just victims of a few common oversights. Here is what I wish I had known earlier:
- The Grip of Death: I used to think a tight seal meant cranking the handle as hard as possible. In reality, why your portafilter handle should never be tightened too far is a lesson in preserving your expensive gaskets and preventing group head damage.
- The Ghost in the Grinder: If your shots are inconsistent, it might not be the pump at all. I wasted weeks troubleshooting my boiler when the real issue was old coffee stuck inside the chute. Learning how to tell if your grinder is retaining too much coffee helped me realize I was brewing yesterday’s stale grounds.
- The Humidity Factor: Static electricity in the winter can make your grinder act possessed. If you find your counter covered in dust, why your grinders static gets worse in winter explains why a simple drop of water on your beans can save your sanity.
A Few Tools That Make the Maintenance Grind Easier
You don’t need a massive workshop to keep your machine in top shape, but a few specific pieces of choosing the best barista gear for coffee enthusiasts will make the process much smoother. I personally never start a session without a reliable scale, though it can be frustrating why your espresso scale turns off right when you start the shot if you haven’t mastered the auto-timer settings. I also highly recommend keeping a set of group gaskets and a high-quality 58.5mm tamper on hand, as the problem with cheap spring-loaded tampers is that they often lack the precision needed for a truly flat, level puck. Finally, always keep the SCA Water Quality Handbook bookmarked; it is the gold standard for understanding how to protect your boiler from the inside out.
Your Morning Ritual Is Worth the Effort
At the end of the day, an espresso machine is a complex beast, but it is one you can learn to tame. Don’t let a stubborn pump or a dry boiler discourage you from mastering the art of home espresso tips for beginners. Every hiss, rattle, and click is just your machine telling you what it needs. With a little patience and the right maintenance routine, you will be back to pulling those syrupy, rich shots in no time. The journey toward the perfect cup is never really over, and that is exactly what makes this hobby so rewarding. Have you ever had your pump refuse to prime right when you needed caffeine most? Let me know your survival stories below!