Why Your Pump Pressure Drops When the Steam Is On
I was standing there, bleary-eyed on a Tuesday morning, just waiting for that perfect golden stream of crema to fill my cup. The machine was humming along at a steady 9 bars. Then, I reached for the knob to start the steam. The moment that first hiss of vapor hit the pitcher, my pump pressure plummeted. It didn’t just dip; it fell off a cliff. My beautiful extraction slowed to a bitter, dark drip, and I realized I had no idea how to fix it. If you have ever felt that sinking feeling when your pressure gauge stays at zero or drops the second you start frothing, you are in the right place. Today, we are going to solve this multitasking mystery once and for all.
My Morning Coffee Routine Became a Pressure-Gauge Nightmare
When I first started diving into home espresso, I made a huge mistake: I assumed my machine could handle everything at once without a complaint. I even once tried to adjust the expansion valve while the steam was on, thinking I could just force the pressure back up. I almost ruined the thread on the valve because I didn’t realize the problem wasn’t the setting, but the shared resources of the machine. Whether you are using a top-rated espresso machine or a budget starter kit, the physics of water and steam don’t change. Most home units struggle to maintain pump pressure because the boiler is prioritizing the massive energy needed to create steam over the steady flow needed for the group head. [image]
Does This Mean My Boiler is Actually Dying?
It is the biggest fear every barista has. You hear your pump make a clicking sound and you think the end is near. But more often than not, it is just a case of ‘thermal competition.’ According to technical data shared by the coffee engineering community at Home-Barista, the electrical draw and water diversion required for high-velocity steam can sap the pump’s efficiency by nearly half on machines without dedicated dual boilers. We aren’t just talking about a minor annoyance; this can completely ruin the flavor profile of your beans. Have you noticed your shots getting thinner or more sour the moment you start using your milk frother? You aren’t crazy, and your machine likely isn’t broken—it just needs a better workflow. Before you go trying the easy way to test your pump pressure, let’s look at what is actually happening under the hood when those two systems collide.
Think of Your Boiler as a Single-Lane Highway
Most enthusiasts don’t realize that in many top-rated espresso machines, specifically single-boiler or heat-exchanger models, the water has to make a choice. Imagine you are trying to take a high-pressure shower while someone else flushes every toilet in the house. The water main can only provide so much volume at once. When you open that steam valve, you are essentially opening a massive ‘leak’ in the system’s pressure. If your pump isn’t high-capacity, it can’t maintain the 9 bars needed for the group head while simultaneously pushing vapor out of the wand. This often results in the reason your group head temperature drops mid-shot, leading to a sour, under-extracted mess. I remember a frantic Sunday brunch where I tried to pull four shots back-to-back while frothing a giant pitcher of oat milk. By the third drink, the pressure gauge was fluttering like a trapped bird, and the pump started making that dreaded ‘dry’ rattle because the boiler couldn’t refill fast enough to keep up with my demands. 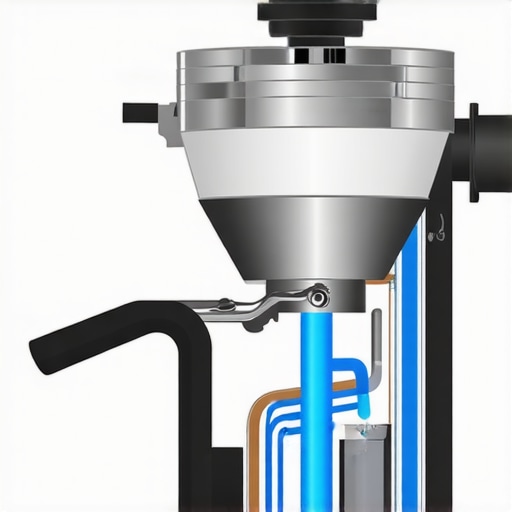
Check Your Pump Before You Blame the Steam
Before you start taking panels off, you need to isolate the variable. The most logical first step is to perform the easy way to test your pump pressure at home using a blind basket (a backflush disc). If the pressure holds steady at 9 or 10 bars with the steam valve closed but wavers when you open it, your pump is likely aging or your expansion valve is set too aggressively.
Master the Brew-First Workflow
If you are working on an entry-level machine, you have to accept the ‘Serial Workflow.’ In my early days of mastering the art of home espresso, I learned the hard way that brewing and steaming at the same time is a luxury reserved for dual-boiler beasts. For most of us, the move is to pull the shot entirely, set it aside, and then flip the switch to steam mode. If you’re worried about the shot ‘dying,’ look into the move for better temperature stability on entry-level units to keep your group head hot while you prep.
Inspect the Steam Valve for Internal Leaks
Sometimes the pressure drop isn’t about the pump’s strength, but a leak in the internal diverted path. If you notice the reason your steam wand is leaking water into your milk is a faulty gasket, that same gap could be bleeding off pressure during your extraction. Use a flashlight to check the internal tubing while the machine is pressurized; any hiss or drip near the boiler fittings is a sign that your pressure is escaping before it ever hits the coffee puck. This is especially common if you’ve been using your milk frothers heavily without regular descaling, as scale buildup can prevent valves from seating perfectly.Let’s dig deeper into a common industry myth: the idea that heat-exchanger (HX) machines are the perfect solution for multitasking. Marketing materials for top-rated espresso machines often claim you can brew and steam simultaneously without a hitch. But here is the contrarian truth: even if the plumbing allows it, the thermal mass of many home heat exchangers isn’t sufficient to prevent a massive dip in brew quality. When you open the steam wand, you aren’t just losing pressure; you are pulling energy away from the water that should be hitting your puck at a precise temperature. In my experience, even on a high-end HX unit, separating the tasks by just thirty seconds yields a significantly more balanced shot.  One major ‘oops’ factor I see with advanced hobbyists is the tendency to over-compensate for pressure drops by messing with their puck prep. You might think that choosing the best barista gear like a high-end needle distributor will solve the issue, but why your WDT tool is actually causing more channeling often comes down to how it interacts with fluctuating pump pressure. If the pressure isn’t steady because the steam valve is open, those tiny micro-channels created by poor distribution techniques become ‘super-highways’ for water, ruining your extraction before the pump can even recover.
Is Your Vibration Pump Losing Its Spring After Years of Use?
If you have noticed a gradual decline in performance, it might not be a sudden failure but rather pump fatigue. Vibration pumps rely on a small internal spring that can lose its tension over several thousand cycles. According to technical maintenance data from the Specialty Coffee Association (SCA), thermal stress from extended steaming sessions can accelerate the wear on these internal components by hardening the rubber O-rings and weakening the solenoid. This is why learning how to select the perfect coffee grinder is only half the battle; if your pump can’t maintain the 9-bar standard under load, even the best grind won’t save the shot. Another nuance people miss is the water chemistry. I have seen many people make the mistake of using distilled water in your boiler, thinking purity is key. In reality, sensors in many prosumer machines require minerals to detect water levels; without them, the pump might run dry or behave erratically during a steam cycle because the logic board thinks the boiler is empty. Always avoid the problem with cheap spring-loaded tampers that don’t provide a level seal, as any inconsistency in the puck density will be magnified the moment you hit the steam knob and the pressure begins to waver. Have you ever fallen into this trap of trying to fix a hardware pressure issue by changing your coffee dose? Let me know in the comments below.
Stop letting scale dictate your shot quality
If you have invested in one of the top-rated espresso machines, you owe it to yourself to be religious about maintenance. I learned this the hard way when my steam power started feeling ‘mushy.’ It turns out that the risk of leaving your machines water intake tube dirty isn’t just about hygiene; it’s about flow. Slimy buildup in that tube can restrict the water volume reaching the pump, making it work twice as hard to maintain pressure. For my personal setup, I’ve committed to the best routine for a weekend deep clean, which includes backflushing with detergent and a thorough inspection of the gaskets. I also keep a specialized brush handy because the trick for getting ground coffee out of tight corners in the group head prevents that stale, oily residue from tainting your next extraction. If you use a wand, don’t forget to learn how to clean burnt milk off a teflon steam wand without scratching it, as even a tiny bit of residue can clog the steam tips and cause that dreaded pressure drop. 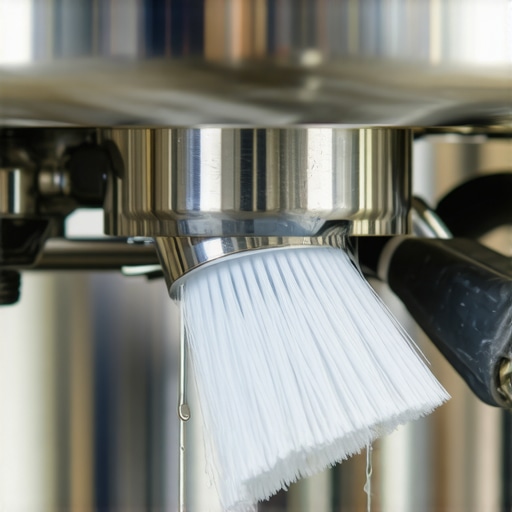
How do I keep my gear running like day one?
Maintaining a high-end espresso station requires more than just a quick wipe-down. According to the La Marzocco Home Preventative Maintenance Guide, parts like expansion valves and vacuum breakers should be inspected every six to twelve months to prevent catastrophic failures. This long-term thinking is what separates a hobbyist from a home barista pro. You should also be looking at your grinder; how to select the perfect coffee grinder is a great first step, but keeping it aligned is what maintains the quality. I’ve found that the right way to align your flat burrs for better shots involves using shims or specialized tools to ensure the burrs are perfectly parallel. If your burrs are dull, you need to know how to swap your grinder burrs without losing your settings so you don’t spend a week trying to dial back in.
Alignment and accessories make the difference
When choosing the best barista gear, I prioritize durability over aesthetics. A solid metal tamping station and a precision basket are non-negotiable for me. In the near future, I suspect we will see more home machines integrating AI-driven pressure profiling that automatically compensates for pump aging or slight scale buildup. Until then, we have to do the work manually. My challenge for you this week is to pull your shower screen off and give it a deep soak. You’ll be shocked at how much better your pressure distributes across the puck afterward. It’s a small step that makes a massive difference in your morning cup.
What Decades of Pulled Shots Taught Me About Thermal Balance
After years of tinkering with various espresso machines, I’ve realized that a pressure drop isn’t always a sign of mechanical failure. Often, it’s a sign that we are asking too much of our boilers at once. One of the biggest ‘lightbulb moments’ for me was realizing that the mistake of using distilled water in your boiler can actually mess with the sensors that tell the pump when to kick in during a steam cycle. Without minerals, the logic board gets confused, leading to erratic pressure behavior.
I also learned that a ‘Serial Workflow’ is your best friend on entry-level gear. You don’t lose quality by waiting thirty seconds; you gain consistency. If your pressure is still behaving strangely even when working in sequence, it is time to perform the easy way to test your pump pressure at home using a blind basket to ensure your internal hardware hasn’t finally met its match.
The Kit That Keeps My Setup Stable
Consistency is built on a solid foundation. When choosing the best barista gear, I focus on tools that remove variables. A precision scale and a high-quality distribution tool are essential. I also highly recommend looking into how to select the perfect coffee grinder because even the most stable pump pressure won’t save a shot if the grind size is fluctuating due to poor burr alignment or excessive retention.
For deeper technical dives, I personally trust the SCA Technical Manuals and community-driven teardowns on Home-Barista. They provide the engineering specs that help you understand the physics behind why milk frothers and group heads sometimes engage in a tug-of-war for energy.
Your Journey to the Perfect Cup
Solving pressure issues is a rite of passage for anyone serious about mastering the art of home espresso. It takes patience, a little bit of trial and error, and a lot of tasted (and sometimes wasted) shots. Don’t let a dipping needle discourage you; every vibration and hiss is your machine telling you how it wants to be handled. Once you find that rhythm, the reward is a shot that tastes exactly the way you imagined it. Have you ever noticed your pump pressure dipping specifically when you use high-powered milk frothers, or is it a constant struggle for your machine? Let me know below!