How to Adjust the Expansion Valve on Your Prosumer Machine
I remember staring at my pressure gauge, watching it pin at 12 bars while my $2,000 machine spat out a shot that tasted like battery acid and burnt tires. I’d bought the best beans, spent hours on forums, and I figured these top-rated espresso machines were supposed to be perfect right out of the box. Wrong. My kitchen smelled like a workshop, and my pride was as bruised as my over-extracted puck. It was a Saturday morning, I had a line of friends waiting for lattes, and I was panicking because my pump sounded like it was screaming in agony. That’s when I realized the factory settings on these prosumer beauties aren’t always your friend. If you don’t know how to tame the expansion valve—otherwise known as the Over Pressure Valve (OPV)—you’re basically driving a Ferrari in first gear without realizing there are four other speeds. Today, I’m going to show you how to stop the madness and get that pressure exactly where it needs to be so you can finally taste the notes of chocolate and blueberry you were promised on the bag.
Stop Letting High Pressure Ruin Your Morning Coffee
The expansion valve is the unsung hero of your brew path. It’s the gatekeeper that decides how much stress your coffee puck has to endure. Most machines come out of the box set to a “safe” 11 or 12 bars to accommodate people using pressurized baskets or older pods, but for those of us mastering the art of home espresso with freshly ground beans, that’s way too high. A surprising study published in the journal Matter suggests that the traditional 9-bar standard might actually be less efficient than lower pressures, as higher pressure can cause the coffee bed to compress so tightly that water can’t flow evenly. When I first started, I made the classic mistake of thinking more pressure meant more crema. I cranked my machine up, thinking I was a genius. Instead, I just got messy sprays from my bottomless portafilter and a shot that was both sour and bitter at the same time. It was a humbling lesson in physics that almost made me put my machine on Craigslist.
Is Opening Your Machine Actually Worth the Risk?
I know what you’re thinking. You just spent a month’s rent on this shiny chrome box; if you open the casing, will you blow it up? It’s a valid fear. We’re taught to fear the internals. But honestly, if you can use a screwdriver and have a little patience, this is the single most impactful adjustment you can make. You aren’t just testing your pump pressure; you are taking control of the mechanical soul of your kitchen. We’re going to fix that “vinegar” taste by getting your machine down to the sweet spot. Have you ever looked at your pressure gauge during a shot and wondered why it’s hovering way past the 9-bar mark? Tell me about your pressure struggles in the comments below! Setting the stage for this repair is easier than you think, and I’ll walk you through the guts of your machine next.
Crack the Case Without Breaking Your Spirit
Before you go poking around the internals, safety is your best friend. Unplug the machine. It sounds obvious, but when you’re excited to fix a sour shot, it’s easy to forget you’re dealing with a mix of high voltage and water. You’ll usually need a simple Phillips-head screwdriver and perhaps a small adjustable wrench to loosen the locknut on the valve itself. If you’ve been choosing the best barista gear for coffee enthusiasts, you likely already have a blind basket—that solid metal filter disc—which is essential for this process. This disc forces the water back through the system so you can see the maximum pressure your pump is hitting without wasting coffee.
Find the Valve That’s Choking Your Flow
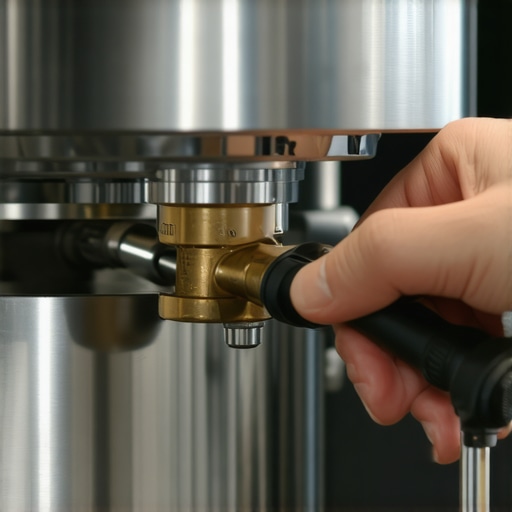
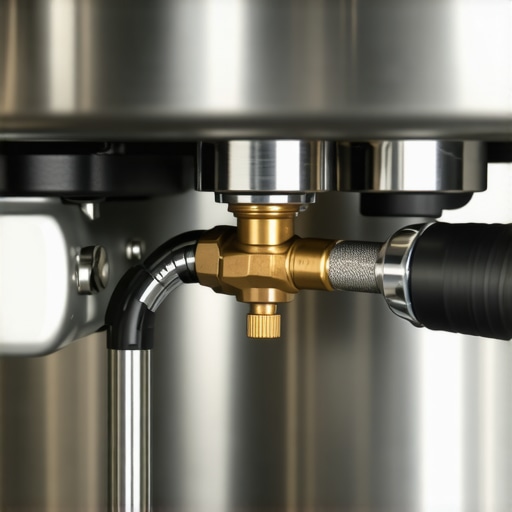
Once the top or back panel is off, look for a brass or plastic component connected to the pump or the boiler with a small silicone tube leading back to the water reservoir. That’s your OPV. Think of it as the overflow drain in your bathtub; once the water reaches a certain “height” (or pressure), the excess spills over and goes back to the tank instead of flooding your kitchen. When this valve is set too tight, it forces every bit of energy into your coffee puck, leading to the dreaded “channeling” that ruins your flavor profile. If you notice why your espresso machine is discharging too much water into the drip tray, it’s often because the OPV is working overtime to vent that excess pressure.
The Half-Turn That Changes Everything
To actually lower the pressure, you need to loosen the tension on the internal spring. On most prosumer machines, turning the adjustment screw counter-clockwise reduces the pressure. I recommend doing this in small increments—about a quarter-turn at a time. I learned this the hard way years ago when I got impatient. I gave the screw two full rotations on my old Rancilio Silvia, and the next time I engaged the pump, the pressure was so low it barely dampened the puck. Even worse, I hadn’t tightened the locknut, and the vibration caused the whole valve to rattle apart, spraying mist all over the electronics. It was a soggy, expensive lesson in patience. Now, I always use the easy way to test your pump pressure at home by running the pump with the blind basket after every tiny adjustment. You want that gauge to sit rock-steady at 9 bars while the pump is under load.
Verify Your Work Before You Brew
Once the needle hits 9 bars, tighten that locknut firmly but don’t go overboard; you don’t want to strip the threads on a brass valve. Reassemble the casing and pull a test shot. You might find that your previous grind setting is now too coarse. This is normal. Since you aren’t hammering the coffee with 12 bars of force anymore, the water won’t find those tiny “cracks” or channels as easily. You’ll need to adjust your perfect coffee grinder for your brew to a slightly finer setting to create the necessary resistance. The result? A syrupy, balanced extraction that actually tastes like the beans you paid for, rather than a chemistry experiment gone wrong.
Now that you’ve tackled the mechanical side, let’s talk about the mental game. There is a persistent myth in the community that if you buy the top-rated espresso machines and set them to 9 bars, you are guaranteed god-tier coffee. But here is the contrarian truth: consistency has less to do with your machine’s pump and more to do with your grinder’s thermal memory and the residual heat in your group head. I see so many people obsessing over the pressure gauge while ignoring why the first shot of the day is always a throwaway. Your machine’s internals might be at temp, but the old grinds trapped in the chute have oxidized, and the first pull is really just a sacrificial lamb to stabilize the system’s temperature.
Stop Over-Processing Your Coffee Puck
Beyond the machine, there’s a massive ‘oops’ factor in how we handle our gear. Most enthusiasts rush to buy every gadget available, but why your distribution tool might be ruining your extraction is a question rarely asked. You might think that spinning a heavy metal leveler on top of your grounds makes things perfect, but often it just creates a compressed ‘crust’ on top while leaving air pockets underneath. This leads to internal channeling that you can’t even see from the bottom. I’ve found that a simple WDT (Weiss Distribution Technique) tool—essentially just thin needles—is far more effective than those fancy spinning levellers that often do more harm than good by masking poor distribution rather than fixing it.
Why Does My Extraction Time Change Every Single Day?
It’s the most frustrating part of mastering the art of home espresso. You didn’t touch the dial, yet today’s shot ran five seconds faster. Coffee is hygroscopic—it absorbs moisture from the atmosphere. According to a study by the Association for Science and Information on Coffee (ASIC), humidity significantly changes the way beans fracture during grinding, creating more or fewer ‘fines’ depending on the air’s moisture content. This is exactly why your shot extraction time changes every single day, and why you must learn to ‘dial in’ every single morning rather than relying on a static setting. If you aren’t adjusting your grinder by at least a hair’s breadth each morning, you’re likely missing the sweet spot.
The Hidden Reason Your New Grinder Feels Inconsistent
If you’ve recently upgraded your setup, don’t forget how to properly season new steel burrs for better consistency. Raw burrs have microscopic imperfections and sharp edges that catch the coffee and create an uneven particle distribution. Until about 5-10 kilos of beans have passed through them, your shots will behave erratically. It’s a tedious ‘break-in’ period that most people ignore, leading to months of frustrating, inconsistent shots. Have you ever fallen into the trap of blaming your machine when it was actually the weather or unseasoned burrs? Let me know in the comments! Before you go chasing the next upgrade, make sure you’ve mastered the trick to finding the true zero point on your grinder. Without a clear reference of when the burrs actually touch, you’re just wandering in the dark.
Stop Ignoring the Sludge Inside Your Portafilter
It is easy to get caught up in the thrill of the pull, but the honeymoon phase ends the moment your coffee starts tasting like a dusty attic. This happens because coffee oils are volatile and turn rancid quickly when exposed to heat and oxygen. I cannot stress enough the danger of leaving old coffee oils in your portafilter spouts; it’s like cooking a five-star steak on a dirty, greasy grill from last summer. If you aren’t performing a chemical backflush regularly, you are essentially seasoning your fresh beans with the ghost of every bad shot you’ve pulled this month. I make it a habit to check why your machine needs a backflush every single week to ensure the three-way solenoid valve stays clear. If that valve clogs, you’re looking at a messy, pressurized ‘portafilter sneeze’ that sends hot grounds all over your face and your expensive machine.
How do I keep my espresso machine healthy for years?
Maintenance isn’t just about cleaning; it’s about water chemistry. According to the Specialty Coffee Association (SCA) water standards, your water should have a total dissolved solids (TDS) count of around 150 mg/L to prevent both corrosion and scale buildup. If your water is too ‘soft,’ it will eat your copper boiler; if it’s too ‘hard,’ it will choke your heat exchanger with calcium in months. I highly recommend the easy way to test your machines water hardness at home before you even think about plumbing a machine in. Once you know your numbers, you can build the best routine for a weekend deep clean that actually addresses the specific needs of your local water supply.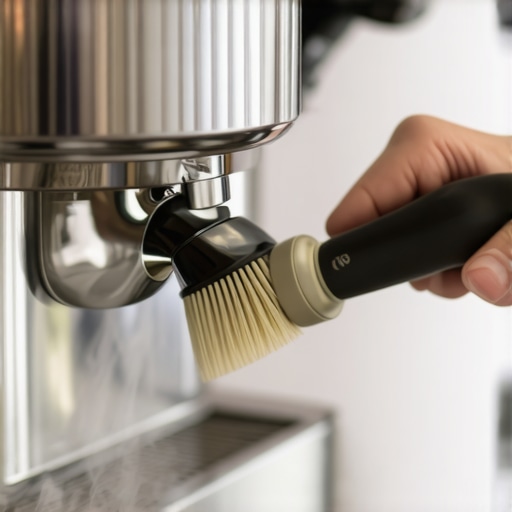
Get a Scale That Does Not Quit Mid-Shot
In my quest for choosing the best barista gear for coffee enthusiasts, I’ve realized that a bad scale is worse than no scale at all. There is nothing more infuriating than why your espresso scale turns off right before the shot ends. Most ‘smart’ scales have an auto-off feature that is far too aggressive, or worse, they aren’t water-resistant. When you are working with steam and splashes, a non-sealed scale will start drifting, showing you 18 grams one second and 22 the next. This phantom weight gain makes it impossible to dial in your recipe. I personally use a scale with a manual override for the timer and a silicone heat mat to protect the load cell from the heat of the drip tray. It’s these small, specific choices in gear that separate the hobbyist from the home pro.
Predicting the Move Toward Total Automation
The future of home espresso is clearly moving toward ‘smart’ profiling. We are already seeing machines that allow you to program the flow rate via an app, and I predict that within the next five years, even entry-level prosumer machines will feature built-in gravimetric sensors (scales) in the drip tray as a standard. We are moving away from ‘set it and forget it’ pumps toward adaptive systems that can sense why your shot extraction time changes every single day and adjust the pressure in real-time to compensate. It’s an exciting time to be a gear head, but no amount of AI can replace the fundamental need for a clean machine. My challenge for you tonight: grab a stubby screwdriver and remove your shower screen. If you see a layer of black goop behind it, give it a soak in backflush detergent. You’ll be shocked at how much cleaner your next latte tastes.
Hard Truths About Your Shiny Chrome Obsession
After years of tinkering, I have realized that even the most expensive top-rated espresso machines are just dumb heaters and pumps without your guidance. The hardest lesson I learned is that the machine doesn’t make the coffee; you do. If you are obsessing over the needle on the front while ignoring why the first shot of the day is always a throwaway, you are fighting a losing battle against physics. Consistency is not a setting you find in a menu; it is a ritual of cleaning, testing, and adapting to the beans in your hopper.
Another lightbulb moment for me was realizing that ‘perfect’ is the enemy of ‘delicious.’ I spent months trying to hit exactly 27.5 seconds for every shot, only to realize that some of my favorite pulls happened when I stopped looking at the clock and started smelling the aroma. If your pressure gauge stays at zero during a shot, it is a mechanical failure, but if it stays at 9.5 and the coffee tastes like burnt wood, that is a human failure. Don’t be afraid to trust your palate over the shiny chrome dials.
The Bare Essentials That Actually Save Your Shots
In the world of high-end coffee, it is easy to get distracted by flashy accessories. When you are choosing the best barista gear for coffee enthusiasts, focus on the tools that impact the chemistry of the cup. I personally rely on a few non-negotiables: a precision WDT tool to break up clumps, a high-quality scale that won’t fail mid-pull, and a simple water testing kit. Using the easy way to test your machines water hardness at home saved my boiler from a 500-dollar descaling disaster, and it’s a tool I trust more than any fancy leveler.
#IMAGE_PLACE_HOLDER_E#
Your Journey Toward the Perfect Pour Starts Now
The transition from a frustrated owner to a confident home barista happens the moment you stop fearing the internals of your machine. Whether you are adjusting the expansion valve or finally mastering the art of home espresso through better puck prep, every small tweak brings you closer to that café-quality experience. Take it slow, enjoy the process, and remember that the best shot you’ve ever pulled is always the next one. Have you ever opened up your machine only to find a complete mess inside? Let me know your maintenance horror stories in the comments below!