Why your pressure gauge stays at zero during a shot
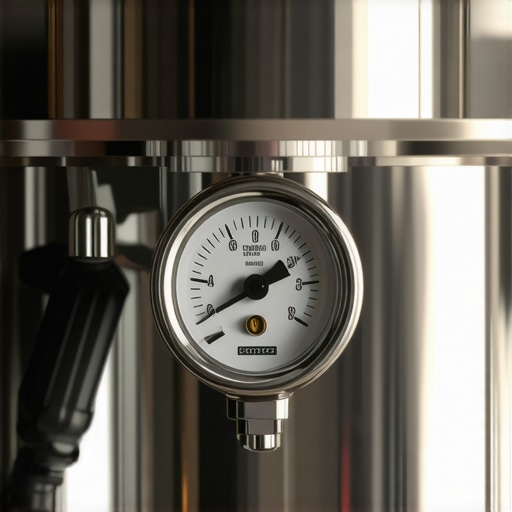
There I was, 6:00 AM, heart set on a syrupy double shot to kickstart the day. I had spent weeks choosing the best barista gear, dialed in my expensive new burrs, and carefully locked the portafilter into the group head. I flipped the lever. The pump hummed. Water began to flow. But the needle on that shiny circular gauge? It didn’t budge. Not a millimeter. It is a gut-wrenching feeling, watching a watery mess pour into your cup while the machine tells you there is absolutely zero pressure building up. You start smelling an expensive repair bill instead of fresh Arabica. I have been there, sweating over a cold machine, convinced I had broken the heart of my kitchen. Today, we are going to stop that panic and figure out exactly why your needle is playing dead and how to get that 9-bar satisfaction back.
Your Needle Won’t Budge and Your Heart Just Sank
It happens to the best of us, and usually, it happens when we are least prepared for a troubleshooting session. When I first started mastering the art of home espresso, I actually called a professional repair tech because my gauge stayed at zero for three shots in a row. I was convinced my vibration pump had kicked the bucket. I felt like a failure. Turns out, I was just using beans that were a month past their prime and a grind setting so coarse that the water was basically sprinting through the basket without any resistance. The gauge wasn’t broken; it just didn’t have anything to measure. If your espresso shot is running too fast, your machine physically cannot build pressure. It is like trying to blow up a balloon with a giant hole in the side—no matter how hard you blow, it won’t inflate.
Is your pressure gauge actually lying to you?
It is easy to get skeptical and think you have been sold a lemon. You might wonder if these gauges are just for show or if your machine is fundamentally flawed. However, espresso is a delicate game of physics and resistance. According to the Specialty Coffee Association (SCA) standards, the physical resistance of the coffee puck is what actually creates the pressure you see on the dial, not just the pump itself. If the water finds a path of least resistance, the gauge will stay flat. We need to determine if you are dealing with a simple “user error” in your prep or if you have a genuine hardware hiccup, like a stuck pressure stat or a clogged capillary tube. Have you ever stared at a dead gauge and wondered if you just bought a very expensive paperweight? You are definitely not alone in that morning panic. Let’s look at the first thing you should check before you start unscrewing the casing.
Put your machine to the ultimate test with a blind filter
The fastest way to stop the guessing game is to remove the coffee from the equation entirely. If you have a backflush disk or a blind filter basket—the one with no holes—pop it into your portafilter and lock it in. This creates an absolute seal. When you flip the brew switch, the pump should work against a brick wall. If that needle climbs steadily to 9 or 10 bars, congratulations: your machine is fine, and your coffee prep is the culprit. I remember a Tuesday morning when I was certain my pump had died. I was ready to order a replacement part until I ran this test. The needle shot up so fast it practically bounced. It turned out I had accidentally moved my perfect coffee grinder setting while cleaning it the night before, leaving me with a grind so coarse it was basically sawdust.
Tighten the grind and check your dose
If the blind filter test passes, you need to look at your resistance. Espresso pressure is created by the pump trying to force water through a tightly packed “puck” of coffee. If the water flows too easily, the gauge won’t register pressure. This usually happens if your beans are old and have lost their internal CO2, or if you aren’t using enough coffee. Make sure you aren’t falling into the trap of running too fast with a dry puck. Use a scale to ensure you are hitting your target dose—usually 18 to 20 grams for a double basket. If you are using budget barista gear, even a small 1-gram variance can cause a total pressure collapse.
Hunting for clogs in the capillary tubes
If the needle stays at zero even with a blind filter, we have a hardware issue. Before you panic, check the most obvious mechanical failure: the water supply. A clogged water filter in your reservoir can starve the pump of water. It is like trying to drink a thick milkshake through a crushed straw. If the pump can’t get water, it can’t build pressure. You might also hear a change in the pump’s pitch—a high-pitched whine or a hollow rattle. If you notice your pump runs non-stop without building pressure, there might be an airlock in the system or a failing vibration pump that can no longer push against resistance.
Dealing with scale and stuck components
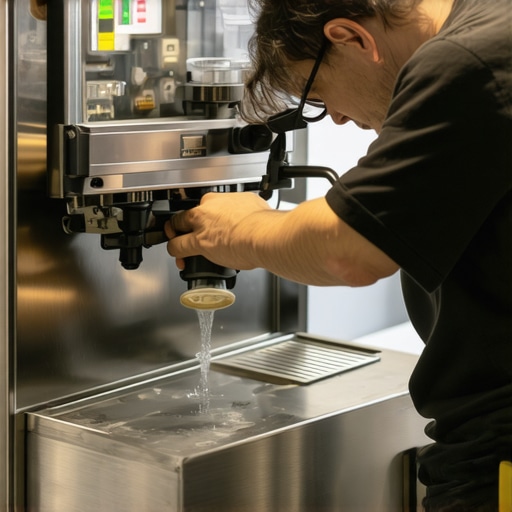
In older machines, the tiny tube leading to the pressure gauge—often called the capillary tube—frequently gets clogged with a single flake of limescale. The machine might actually be producing 9 bars of pressure at the group head, but the gauge can’t “see” it because the path is blocked. This is why you must backflush every single week to keep the internals clear of oils and debris. If you have ruled out the pump and the grind, you might be looking at a stuck pressure stat or a solenoid valve that is stuck open, dumping all your pressure straight into the drip tray. Check the discharge pipe; if water is gushing into the tray while you are trying to pull a shot, that valve is your smoking gun.Most people assume that if the gauge hits 9 bars, they’ve reached coffee nirvana. Here is the contrarian truth: many of the world’s best baristas are now pulling shots at 6 or 7 bars to reduce channeling and increase clarity. If you are obsessing over a needle that only hits 8.5, you might actually be tasting a better shot than a forced 9-bar extraction. According to research led by the Specialty Coffee Association (SCA), the 9-bar standard is more of a guideline than a physical law for flavor. In fact, higher pressure often compresses the coffee bed so tightly that it actually creates bypass channels, leading to a watery, sour cup despite what the gauge says.
Stop chasing the 9-bar Holy Grail
If you find yourself constantly adjusting your top-rated espresso machines for coffee lovers in 2025 just to hit a specific number, you’re likely missing the forest for the trees. I used to think my machine was broken if it didn’t hit 10 bars on the dot. But when I switched to the move for better espresso distribution without fancy tools, I realized that lower, steadier pressure often resulted in a much sweeter cup with a thicker crema. Don’t let a number on a dial dictate your palate. If the shot tastes great but the gauge is low, trust your tongue. However, if the gauge is low and your espresso shot tastes like cardboard, then we definitely have a resistance issue to solve, likely related to stale beans or a hollow puck.
Why does your shot time change every single day?
This is the question that drives home baristas to absolute madness. You didn’t change the grinder setting, the beans are from the same bag, and your tamping pressure was identical—yet the gauge reads lower than yesterday. The nuance here is environmental. Humidity is the invisible enemy of the espresso enthusiast. On a rainy or humid day, your coffee grounds absorb moisture from the air, which makes them expand. This creates more resistance, slower flow, and higher pressure. On a dry day, the opposite happens. This atmospheric shift is exactly why your shot extraction time changes every single day. Professionals know that the first shot of the morning usually requires a slight ‘dial-in’ adjustment on their barista gear to compensate for these micro-changes in air quality.
The expensive mistake hidden in your cleaning routine
Here is the ‘trap’ most people fall into: they are so diligent about cleaning that they actually accelerate the wear and tear of their machine. If you backflush with harsh chemical detergents every single day, you are stripping away the essential food-grade lubricants inside the group head and the 3-way solenoid valve. Eventually, the manual lever will start to feel stiff, and the pressure gauge might even start to stutter because the internal cams are grinding against dry brass. To keep your machine healthy, you need to learn how to properly lubricate your e61 group head cam at least every few months. Also, be careful with those trendy distribution needles. I’ve seen enthusiasts get so aggressive with their WDT that they create deep pockets at the bottom of the basket, which lead to the gauge fluctuating wildly during the shot. Understanding why your distribution tool might be ruining your extraction is vital if you want that needle to stay rock-solid. Have you ever fallen into this trap of over-cleaning or over-fiddling with your gear? Let me know in the comments below! If your machine is still acting up and discharging too much water into the drip tray, it might be time to inspect the internal seals rather than just buying a new pump.If you want to keep that pressure gauge needle behaving itself, you have to look at the gatekeeper: your grinder. I’ve seen many home setups fail because someone didn’t realize why your coffee grinder is stalling with dark roast beans. Those oily beans are delicious, but they act like glue inside your burr chamber, eventually causing your motor to strain and your pressure to fluctuate. I now make it a habit to use a specialized pipe cleaner—it’s a surprisingly effective way to clean the grinder chute without taking it apart and losing my dial-in setting. If you’re using high-end barista gear, you have to treat it like a high-performance engine. That means knowing how to tell if your espresso grinder burrs are dull before they start producing ‘fines’ that choke your machine and leave you staring at a 12-bar pressure spike. I personally swap my burrs every 500kg of coffee, even if they ‘look’ fine, because consistency is the soul of espresso.
How do I keep my espresso machine healthy over the long haul?
The number one killer of these machines isn’t usage—it’s scale. I’ve seen $3,000 dual boilers turned into scrap metal because of ‘hard’ tap water. You absolutely must perform the easy way to test your machines water hardness at home before you even plug it in. If your water is too hard, you’re just a few months away from a clogged gicleur or a dead heating element. Furthermore, don’t ignore the mechanical parts that move. If you have an E61 machine, you need to learn how to properly lubricate your e61 group head cam at least twice a year. Without that food-grade grease, the internal brass parts will grind against each other, leading to a stiff lever and potentially a failure to engage the pump. And don’t forget the steam path. It’s not enough to wipe the wand; you need to clean the inside of your steam wand pipe to prevent milk protein buildup from restricting your pressure. I predict we are moving toward a ‘smart’ maintenance era where sensors will tell us exactly when scale is forming, but until then, your best defense is a simple test strip and a regular backflush routine.Looking ahead, the industry is shifting toward ‘gravimetric’ machines—where the machine stops based on weight, not time. Until that becomes standard on budget models, you should learn how to calibrate your machines volumetric settings to mimic that precision. I’ve found that even a few grams of variation can be the difference between a sweet nectar and a shot that tastes like cardboard. I personally use a jeweler’s scale for every single shot because consistency is the only way to troubleshoot a jumping needle. According to technical documentation from Decent Espresso, monitoring the ‘flow rate’ alongside pressure is the true secret to identifying a failing puck before it ruins your morning. If the flow accelerates wildly while the pressure drops, your puck has likely channeled. My advice? Try this today: Pull your next shot onto a scale and backflush your machine immediately after. You’ll be shocked at how much cleaner the flavor becomes when you eliminate those old, pressure-robbing oils from the group head.
The Hardest Lesson I Learned While Chasing 9 Bars
After years of tinkering, I realized that a pressure gauge is a guide, not a drill sergeant. If your shot tastes like a dream but the needle is hovering at 7 bars, walk away from the screwdriver. Many of us get caught in the trap of over-correcting, which often leads to distribution tools ruining your extraction rather than helping it. Also, remember that the first coffee of the day is often a ‘sacrificial lamb’ to warm up the system; it’s why the first shot of the day is always a throwaway. Finally, never underestimate the power of a clean path. I’ve seen machines ‘fixed’ just by learning how to clean the grinder chute without taking it apart.
The Essential Gear I Use to Keep My Coffee Consistent
I don’t believe in buying every gadget on the market, but a few things are non-negotiable for me. I always recommend checking out top-rated espresso machines for coffee lovers in 2025 if you want a machine with a reliable rotary pump. Pairing that with a high-quality grinder is key, so take time choosing the perfect coffee grinder for your brew. I also keep a simple set of water test strips nearby because testing your machines water hardness at home is the single best way to prevent expensive repairs down the road.
Don’t Let Your Machine Win the Morning
It is easy to feel defeated when your gear doesn’t behave, but every failed shot is just a data point for your next masterpiece. Mastering the art of home espresso is a journey of patience and sensory discovery. Take a deep breath, adjust your grind, and trust your palate over the hardware. You have the skills to handle whatever your barista gear throws at you. Have you ever had a pressure gauge panic attack at 6:00 AM? Let me know in the comments below!