How to Calibrate Your Machine’s Volumetric Settings
I remember standing in my kitchen at 6 AM, bleary-eyed and desperate for caffeine, when I hit the ‘double shot’ button on my machine and walked away to grab a spoon. By the time I turned back, my favorite mug was overflowing with a watery, translucent mess that smelled more like burnt rubber than a balanced blend. It was a disaster, both for my countertop and my morning mood. I spent months blaming my coffee grinder or assuming my pump was failing, but the truth was much simpler: I had never bothered to teach my machine what a real shot of espresso actually looks like. If you have ever wondered why your espresso shot volume varies even with the same dose, you are likely dealing with uncalibrated volumetric settings. Today, I am going to help you stop the guesswork and finally get that consistent, café-quality yield every single time you press the button.
Stop Letting Your Machine Decide Your Coffees Fate
Let’s be honest, the factory settings on most top-rated espresso machines are just a suggestion. They are programmed in a lab using generic beans that were probably roasted six months ago. When you bring that machine home and pair it with fresh, specialty beans, those pre-set timers or flow meters become your worst enemy. My biggest mistake early on was thinking that ‘set it and forget it’ applied to home espresso. I wasted bags of expensive beans because I was too intimidated to touch the programming mode. But here is the reality: your machine is a tool, and a tool is only as good as its calibration. By taking ten minutes to dial in your volumetrics, you remove the biggest variable in mastering the art of home espresso. According to the Specialty Coffee Association (SCA), precision in extraction is the foundation of flavor, and even a 2-gram variance in yield can shift a shot from sweet to sour. Have you ever felt like your machine was working against you rather than for you?
Is it really worth the effort to reprogram your buttons?
You might be thinking that using a manual pull or a scale every single time is more ‘authentic,’ but for the home barista who wants a great latte before a 9 AM meeting, volumetrics are a lifesaver. The skepticism usually comes from a fear of technical menus, but once you find the rhythm, it becomes second nature. Proper calibration ensures that your barista gear is actually serving you. We are going to dive into the step-by-step process of using a scale to ‘teach’ your machine’s flow meter exactly when to cut the water, ensuring your 1:2 ratio is locked in for good.
Turn Your Machine Into a Precision Tool
Think of your espresso machine as a high-performance engine. If the timing is off, the car won’t run right. Most people rely on the factory timer, but that is like using a sundial to time a drag race. We need to use a scale to teach the machine’s internal flow meter when to cut the flow. This isn’t just about volume; it is about weight. I remember the first time I tried to program my Breville Dual Boiler. I was so focused on the screen that I didn’t realize my scale was sliding. I ended up with 50 grams of liquid for an 18-gram dose, and it tasted like battery acid. That experience taught me that preparation is everything. If you find that why your espresso scale is jumping numbers while the shot is pulling is a frequent issue, check your drip tray for stability before you start the programming sequence.
Lock in Your Dose and Grind First
You cannot calibrate a moving target. Before you touch the programming buttons, you must ensure your dose is consistent. Use a high-quality coffee grinder to get a uniform particle size. If your grind is too coarse, you might wonder why your espresso shot is running too fast but the puck is dry. Fix the grind first. Once you have a 1:2 ratio pulling in about 25 to 30 seconds manually, you are ready to save that setting into the machine’s memory. 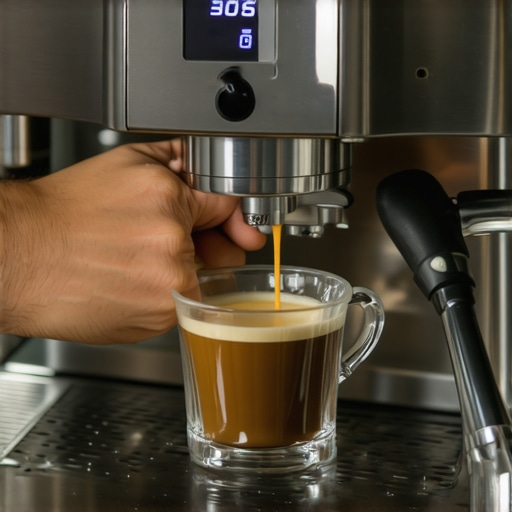
The Secret to Hitting Your Target Weight
Most machines have a ‘Program’ or ‘Menu’ button. Press it until the lights flash, then select the button you want to calibrate (usually the double shot). Place your cup on the scale, tare it, and start the shot. Here is the trick: you have to stop the shot manually about 2 to 4 grams before your target. If I want 36 grams in the cup, I hit the button to stop at 32 grams. This accounts for the ‘overrun’—the extra coffee still trapped in the group head that will trickle out after the pump stops. I once ignored this and ended up with a messy, overflowing cup because I didn’t realize how to measure your espresso yield without a scale in an emergency was a skill I hadn’t mastered yet.
Verify the Flow Rate Consistency
Once you have saved the setting, pull a second ‘test’ shot without touching the program button. Your goal is to see if the machine repeats the same weight. If the weight fluctuates by more than a gram, you should how to check your espresso machines group head flow rate to ensure there isn’t a partial clog in the gicleur. Also, make sure your scale is reliable; nothing is more frustrating than why your espresso scale turns off right before the shot ends, leaving you guessing if the calibration actually worked. Reliable barista gear prevents these tiny heartbreaks.
While most beginners think they have reached the pinnacle of home brewing once they hit a 1:2 ratio, experienced baristas know that calibration is a living, breathing process. The biggest mistake you can make at this stage is assuming your machine or coffee grinder settings are static. You might have noticed why your shot extraction time changes every single day even if you haven’t touched the dial. This isn’t a ghost in the machine; it is usually a result of hygroscopic changes in the beans and ambient humidity. Everyone says you should use the freshest beans possible, but in my experience, beans that are too fresh are a nightmare for volumetric consistency. Freshly roasted coffee is packed with CO2, which creates an artificial resistance in the puck that dissipates as the beans age. If you try to calibrate your machine using beans roasted yesterday, your settings will be useless by tomorrow morning. Have you ever fallen into this trap? Let me know in the comments.
Fresh Beans and the Degassing Myth
The common belief is that “fresher is better,” but the Specialty Coffee Association (SCA) research suggests that espresso typically peaks between 7 and 14 days post-roast. Using beans before this window can lead to why your freshly roasted beans are making your espresso taste like grass. The excess gas creates turbulence inside the portafilter, leading to micro-channeling that ruins the accuracy of your flow meter. When you are dialing in your barista gear, you are actually fighting against the chemistry of the bean. This is why I always recommend resting your coffee. If you don’t, you’ll find yourself constantly adjusting the grind, which leads to the move that saves your grinder from unnecessary wear: stop making micro-adjustments every five minutes. Wait for the beans to stabilize first.
Why Does Your Milk Texture Fall Apart on Single Boilers?
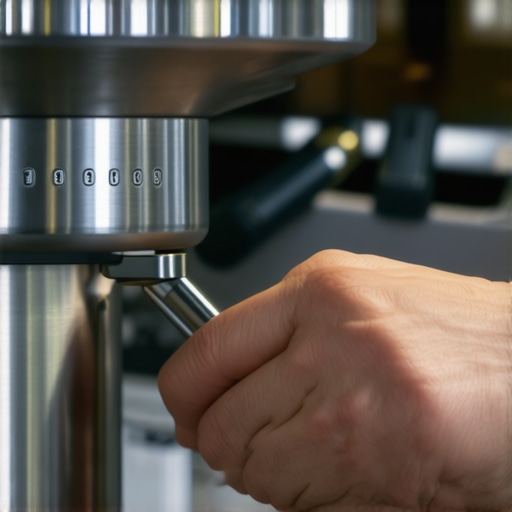
Another advanced nuance involves the steam wand. Many enthusiasts believe that a wand with more holes is objectively better, but for a home user, this can be a trap. If your machine’s boiler isn’t large enough, a four-hole tip will drain your steam pressure before you can even finish the stretching phase. This results in the reason your steam pressure dips when you open the valve, leaving you with thin, bubbly milk instead of silky microfoam. It is much better to master the secret to perfecting your milk texture on a single boiler by using a tip with fewer, smaller holes that preserves velocity. Also, watch your temperature; the reason your milk smells like its burning before the temp is right is often due to localized overheating from poor pitcher positioning rather than the actual thermometer reading. Precision is about the interaction between your technique and the machine’s specific limitations.
Avoid the Trap of the Clean Grinder
One of the most counter-intuitive advanced tips is regarding grinder maintenance. While keeping gear clean is essential, how to properly season new steel burrs for better consistency is a step most people skip. A perfectly clean, brand-new grinder often produces more static and less uniform grounds than one that has had a few pounds of coffee run through it. If you are experiencing why your burr grinder is throwing chaff everywhere, it might actually be too clean or too new. The oils from the coffee create a microscopic coating that reduces static and helps the grinds flow smoothly through the discharge chute. Don’t be afraid to leave a little bit of “seasoning” in the burrs. This level of nuance separates the casual enthusiast from the true home barista, ensuring your top-rated espresso machines actually perform to their full potential every single morning.
Maintaining your gear is the difference between a machine that lasts three years and one that stays in the family for twenty. I have seen too many beautiful top-rated espresso machines end up as doorstops because of mineral buildup. It starts small—a slight hiss or a drip—but eventually, you are scouring the internet for how to spot a failing solenoid valve before it floods your kitchen. The real enemy is usually your tap water.
Keep Your Boiler from Turning Into a Limestone Cave
If you aren’t filtering your water, you are playing Russian roulette with your heating element. Scale is an insulator; it makes your machine work twice as hard to reach temperature, which is why you might notice why your espresso machine takes longer to heat up recently. I personally use a BWT Bestsave pouch in my reservoir, but you should start by using the easy way to test your machines water hardness at home. According to the technical standards set by the Specialty Coffee Association (SCA) Water Quality Committee, the ideal water for espresso requires a specific mineral balance of calcium and magnesium—around 70-100 ppm—to avoid both corrosive and scale-forming behavior. If you ignore this, you will eventually face the nightmare of why your espresso machine pump runs non-stop because a sensor is caked in calcium. 
How do I keep my gear running like new for years?
Beyond water, mechanical maintenance is king. If you have a classic machine, you need to learn how to properly lubricate your your E61 group head cam every few months. Without food-safe Molykote grease, that lever will start to grind against the brass, leading to a gritty feel and eventual failure. Similarly, if you notice why your drip tray is filling up even when you arent pulling shots, it is a sign that your expansion valve or three-way solenoid needs a deep clean. Don’t wait for a total breakdown; preventative maintenance like backflushing with detergent once a week is the bare minimum for mastering the art of home espresso. You should also regularly learn how to clean the inside of your steam wand pipe to prevent milk proteins from baking onto the internal walls, which can lead to foul-tasting lattes.
The Future of Home Espresso Tech
Looking ahead, I suspect we will see even more integration of smart sensors and IoT connectivity. We are already seeing high-end machines that alert you to flow rate inconsistencies before they affect your shot. This trend toward “precision everything” means that our barista gear will become more capable of self-diagnosis, perhaps even telling us exactly when a gasket is about to fail or when it is time for how to fix a stuck pressure stat in an older machine. For now, my best advice is to stay proactive. Grab a water test kit today and check your hardness levels—it is the single most important thing you can do to save your machine from an early grave.
Mistakes I Made Before My Espresso Finally Tasted Good
Reflecting on my journey with home espresso, I realized that the most frustrating mornings weren’t caused by my machine, but by my own assumptions. First, I learned that purging is non-negotiable; even the most expensive coffee grinder retains a few grams of stale grounds that can ruin your first shot. Second, I stopped chasing the mythical ‘God shot’ every single morning. If your coffee is balanced and sweet, you have won. Third, I discovered that if your espresso shot tastes salty, it is almost always an extraction issue rather than a bean quality problem. Finally, I realized that a clean machine is a consistent machine; ignoring the simple way to fix a gritty texture in your espresso by deep cleaning your group head will eventually catch up with you. Don’t let these small oversights hold you back from greatness.
My Personal Toolkit for Bulletproof Consistency
To keep my workflow smooth and my results repeatable, I rely on a few trusted resources and tools. A high-quality, water-resistant scale is my most important piece of barista gear because it prevents the heartbreak of your equipment failing mid-pull. I also recommend exploring milk frothers that transform your coffee experience if you want to understand the physics of foam without the pressure of a steam wand. For maintenance, I always keep a bottle of citric-acid based descaler on hand, though you must be careful to avoid the common pitfall of why your coffee tastes like vinegar after descaling by rinsing twice as much as you think is necessary. These tools turn guesswork into a science.
#IMAGE_PLACEHOLDER_E#
Your Path to Mastering the Perfect Morning Pull
The transition from a coffee enthusiast to a home barista is one of the most rewarding culinary journeys you can take. While the technical side of top-rated espresso machines can feel overwhelming at first, remember that every mistake is just a step toward a better cup. With a calibrated flow meter and a well-seasoned grinder, you are already ahead of 90% of home users. Stay curious, keep tasting, and don’t be afraid to adjust the settings until the coffee in your cup matches the vision in your head. Have you ever struggled with getting your volumetric buttons to stop at exactly the right weight? Let me know your biggest calibration headache below!