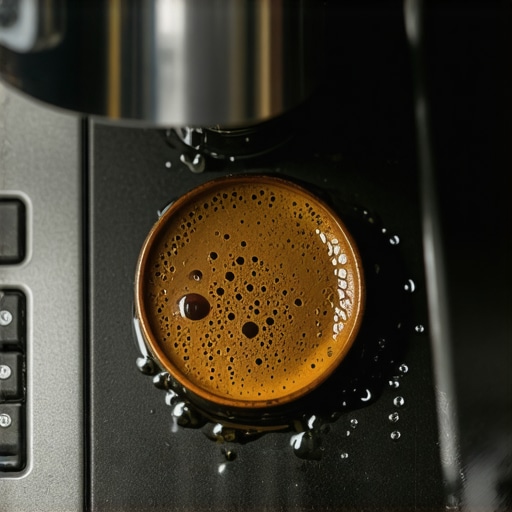
Why Your Espresso Shot Volume Varies Even with the Same Dose
The tiny “drip… drip… drip” of a stalled shot is the loudest sound in a quiet 6 AM kitchen. I remember standing there in my pajamas, staring at my scale with a mix of confusion and pure, unadulterated caffeine-deprived rage. I had measured out exactly 18 grams of beans. I used the same [coffee grinder](https://espressotechguide.com/how-to-select-the-perfect-coffee-grinder-for-your-brew) I’ve used for a year. Yet, the liquid barely covered the bottom of my cup. It felt like a personal betrayal by the laws of physics. We’ve all been there, haven’t we? You follow the recipe to the letter, but the result is a wild outlier that tastes like a battery. Today, I’m going to pull back the curtain on why your volume is jumping around like a toddler on a sugar rush, and I’ll show you it’s usually not the machine’s fault at all. [IMAGE_PLACEHOLDER]
Your Scale Tells the Truth But the Crema Is a Liar
One of the biggest mistakes I made when [mastering the art of home espresso](https://espressotechguide.com/mastering-the-art-of-home-espresso-tips-for-beginners) was focusing on the *visual line* on my glass rather than the number on my scale. Espresso is a gas-heavy extraction. If your beans are super fresh, they are packed with CO2. This gas creates that thick, beautiful crema we all crave, but it also takes up a massive amount of physical space while weighing almost nothing. This is why you might see [why your freshly roasted beans are making your espresso taste like grass](https://espressotechguide.com/why-your-freshly-roasted-beans-are-making-your-espresso-taste-like-grass) and why that volume looks “full” even when the actual yield is tiny. According to research from the Specialty Coffee Association, the rate of degassing can drastically alter the density of your espresso puck during the pull, changing how water moves through it. If you’ve noticed [why your espresso shot slows down midway through the pull](https://espressotechguide.com/why-your-espresso-shot-slows-down-midway-through-the-pull), you’re likely dealing with a density shift that volume-based measurements just won’t catch.
Is High-End Gear Really the Only Way to Get Consistency?
I used to think my entry-level setup was the culprit. I spent hours researching [top-rated espresso machines](https://espressotechguide.com/top-rated-espresso-machines-for-coffee-lovers-in-2025) thinking a shiny new dual-boiler would fix everything. But the truth? My biggest issue was actually grind retention. I’d dose 18g, but because of [why your coffee grinder retains more grounds](https://espressotechguide.com/why-your-coffee-grinder-retains-more-grounds-than-it-should), half a gram of yesterday’s stale, compacted coffee was ending up in my basket, while half a gram of my fresh beans stayed stuck in the chute. That tiny discrepancy—less than a gram—completely changes the resistance of the puck. It’s the difference between a syrupy dream and a watery nightmare. Plus, if the humidity in your kitchen changed since yesterday, you’re going to see [why your grinder settings feel like they changed overnight](https://espressotechguide.com/why-your-grinder-settings-feel-like-they-changed-overnight). Have you ever felt like [why your espresso scale is jumping numbers while the shot is pulling](https://espressotechguide.com/why-your-espresso-scale-is-jumping-numbers-while-the-shot-is-pulling) happened just to spite you? Let me know in the comments if you’ve ever felt like throwing your portafilter out the window! Before you go out and buy a new machine, we need to talk about the hidden variables that are actually pulling the strings in your portafilter.
Break Up Those Static Clumps First
Think of your coffee puck like a mountain trail. If there are huge boulders in the way, the water—which is the world’s laziest hiker—is going to find the easiest path around them rather than soaking through. This is why you see [why your coffee grounds are clumping together](https://espressotechguide.com/why-your-coffee-grounds-are-clumping-together). Those little rocks of coffee create paths of least resistance, leading to massive volume spikes in half the time. I remember a Tuesday morning where I was so rushed I skipped my distribution tool. The result was a ‘spurter’ that sprayed the wall and filled my cup in 12 seconds. Now, I use a simple needle tool to stir the grounds. It’s [the move for better espresso without buying a new machine](https://espressotechguide.com/the-move-for-better-espresso-without-buying-a-new-machine) that actually works because it ensures the water has to work equally hard to get through every millimeter of that coffee. If you don’t break those clumps, you’re basically inviting [how to prevent channelling in a bottomless portafilter shot](https://espressotechguide.com/how-to-prevent-channelling-in-a-bottomless-portafilter-shot) to become a daily struggle.
Check Your Basket Headroom
You might think putting more coffee in is always better, but if the dry puck is touching the shower screen before you even start the machine, you’re in trouble. Conversely, if there’s a giant canyon between the coffee and the water source, the force of the pump will shatter the puck’s surface like a hammer on glass. You need to know [how to tell if your basket is too large for your dose](https://espressotechguide.com/how-to-tell-if-your-basket-is-too-large-for-your-dose). I used to overstuff my 18g basket with 20g of dark roast, thinking I’d get a ‘stronger’ cup. Instead, the expansion of the wet grounds had nowhere to go, choking the machine until it finally burst through one weak spot, giving me a watery, bitter mess.
Level the Playing Field
Tamping isn’t a strength contest. I used to practically stand on my tamper, thinking 50 pounds of pressure would fix my bad grind. It didn’t. Consistency comes from being level, not heavy. If your tamp is even slightly tilted, the water will rush to the ‘downhill’ side. You’ll see one side of your basket looking dry while the other is gushing liquid. Learning [how to fix a portafilter that wont stay level](https://espressotechguide.com/how-to-fix-a-portafilter-that-wont-stay-level) is a game changer for your wrists and your taste buds. Keep your elbow high and focus on a flat seal; using [the best angle for tamping to avoid wrist strain](https://espressotechguide.com/the-best-angle-for-tamping-to-avoid-wrist-strain) ensures you aren’t introducing human error into the equation every single morning.
Purge the Old Grounds Every Single Time
If you adjust your grinder and the next shot still tastes the same, you’re likely tasting ‘retention.’ Most grinders hold onto a few grams of coffee in the chute. If you don’t clear those out, your first shot of the day is a Frankenstein’s monster of fresh beans and stale dust from yesterday. This is exactly [why your coffee grinder retains more grounds than it should](https://espressotechguide.com/why-your-coffee-grinder-retains-more-grounds-than-it-should), and it’s the primary reason your shot times might swing by 10 seconds for seemingly no reason at all. I now ‘sacrifice’ about two grams of beans after every adjustment to make sure the chute is clean, and the stability in my shot volume has been night and day ever since.
One of the most persistent myths I see in the community is the idea that a machine’s pressure gauge is the ultimate arbiter of quality. Everyone says you must hit 9 bars exactly, but in my experience, a slightly lower pressure—around 6 to 7 bars—actually yields a more forgiving and sweeter shot, especially for modern light roasts. When you push 12 or 15 bars of pressure through a puck, you’re often just begging for why your espresso shot is channeling on the left side only. High pressure doesn’t force flavor out; it forces the water to find the path of least resistance, which results in those frustratingly inconsistent yields. Have you ever fallen into this trap of chasing “ideal” numbers instead of trusting your palate? Let me know in the comments.
The Maintenance Trap That Ruins Your Flavor
Another common “oops” factor is the over-maintenance error. I’ve seen enthusiasts panic and descale their machines every few weeks without ever testing their actual water hardness. This aggressive cleaning can lead to the reason your espresso tastes metallic after descaling because the descaling solution can strip the protective oxidation layer from copper or brass boilers. If you notice why your espresso machine takes longer to heat up lately, it might be scale, but you should always verify your water chemistry first to avoid damaging the internals of your setup.
Why does my espresso taste thin even when the flow looks perfect?
This is the peak of frustration for the advanced home barista. Your scale says 36g, your timer says 30 seconds, and the flow looks like a beautiful “mouse tail,” yet the coffee tastes hollow. The culprit is often chemically “empty” water. According to research by chemist Christopher Hendon, co-author of Water for Coffee, the specific balance of magnesium and calcium ions is what physically pulls the flavor compounds out of the bean. If you are wondering how to tell if your water is too soft for brewing, look at the body of your shot; without those minerals, the espresso will always taste thin, no matter how much you spend on choosing the best barista gear for coffee enthusiasts. #IMAGE_PLACE_HOLDER_C#
Mastering the Variables Beyond the Bean
Consistency is about managing the things you can’t see. Even when your extraction is dialed in, failing to manage your steam wand can ruin the final experience. If you don’t purge the condensation out properly, you’ll find yourself searching for how to stop your milk foam from turning into a big bubble. That initial blast of water thins out the milk proteins, preventing that silky microfoam we all want. True expertise isn’t just about owning top-rated espresso machines; it’s about recognizing that every tiny detail—from the minerals in your reservoir to the air in your milk pitcher—is a lever you can pull to achieve the perfect cup.
I used to think the “perfect shot” was a destination, but after five years of home brewing, I’ve realized it’s more like a moving target. To hit it consistently, you need more than just luck; you need a workflow that accounts for the invisible wear and tear on your gear. Let’s talk about the specific tools I’ve added to my station that actually made a measurable difference. First off, let’s address the bottom of the basket. I noticed my shots were often pulling unevenly, which is why your espresso shot is extracting from only the edges of the basket. I solved this by adopting the simple paper filter trick for better bottomless shots. By placing a tiny 58mm paper filter at the bottom, I increased the flow resistance slightly but achieved a much more uniform extraction across the entire puck surface. It sounds like a gimmick until you see the data; it effectively filters out the ‘fines’ that usually clog the stainless steel holes.
Stop the Buildup Before It Ruins Your Morning
If your coffee starts tasting like a dirty penny, don’t blame the beans yet. Look at your shower screen. I realized why your group head shower screen is getting clogged so fast was due to my habit of leaving the portafilter in the group head for hours after brewing. The oils bake onto the metal. Now, I use a puck screen on top of my coffee. It’s the move for better espresso without buying a new machine that keeps your internals pristine. For the grinder, I’ve moved away from deep teardowns every week. Instead, I use the best way to clean a grinder without taking it apart by using cleaning tablets once a month to absorb those rancid oils that hide in the burr teeth.
How do I maintain my machine’s performance over the long haul?
The answer is water management. Scale is the silent killer of heating elements. According to the technical specifications in the La Marzocco Home Water Guidelines, maintaining a Total Dissolved Solids (TDS) level between 75-125 ppm and a total hardness of 3-5 grains is essential to prevent catastrophic failure. If you don’t track this, you’ll eventually wonder how to tell if your machine boiler is accumulating lime scale. I use a simple drop-test kit because digital TDS meters only tell half the story—they don’t distinguish between “good” minerals and “bad” scale-forming ones. Ignoring this leads to the reason your espresso tastes metallic after descaling, a situation you definitely want to avoid.
The Future of Home Brewing is All About Data
Looking ahead, I see the industry moving toward “smart” integration where machines and grinders communicate via Bluetooth to auto-adjust based on real-time flow data. We are already seeing this in choosing the best barista gear for coffee enthusiasts, where scales automatically start timers and communicate with apps to map your extraction curves. The days of manual guesswork are numbered. If you’re also doing milk-based drinks, remember that even a high-end setup requires technique to avoid how to stop your milk frother from burning the bottom of the jug. I want you to try something tomorrow morning: Grab a pack of those tiny paper filters and use one at the bottom of your basket. It’s the cheapest way to see if your extraction issues are purely mechanical. Let me know if it changes the clarity of your light roasts as much as it did for mine!
Hard Lessons from 1,000 Failed Pucks
After years of trial and error, I’ve realized that the most expensive top-rated espresso machines won’t save a shot if the fundamentals are shaky. Here is what I wish I knew sooner:
- The Humidity Factor: If it’s raining outside, your grind from yesterday is already wrong. Small adjustments are a daily requirement, not a sign of failure.
- Freshness Peak: Beans aren’t always best on day one. Most medium roasts hit their stride 7-14 days after roasting once they’ve finished the heavy degassing.
- Palate Over Piston: Don’t be afraid to break the “rules.” If 9 bars of pressure tastes harsh, drop it to 6. Your tongue is the final judge, not the gauge.
Gear That Actually Earned a Spot on My Counter
If you’re looking to upgrade, don’t just buy the biggest shiny thing. Start with the tools that provide the most data and control. I personally rely on these every single morning:
- A Reliable Milligram Scale: Precision is everything. Without knowing your input and output to the tenth of a gram, you’re just guessing. This is the cornerstone of mastering the art of home espresso.
- A Dedicated WDT Tool: Using thin needles to stir your grounds is the cheapest way to eliminate clumping and channeling.
- High-Quality Milk Frothers: When choosing the best barista gear for coffee enthusiasts, a standalone frother can help you practice texture without wasting espresso.
- The Right Burrs: Knowing how to select the perfect coffee grinder for your brew is more important than the machine itself.
Pull Your Best Shot Yet
Espresso is a journey of increments. Every “bad” shot is just data telling you what to tweak next. Don’t let the technicality of the craft overshadow the joy of the drink. With the right home espresso habits, you’ll find that consistency isn’t about being perfect—it’s about knowing how to fix the imperfections. Have you ever had a shot look like liquid gold but taste completely sour? Let me know your biggest espresso mystery in the comments below!