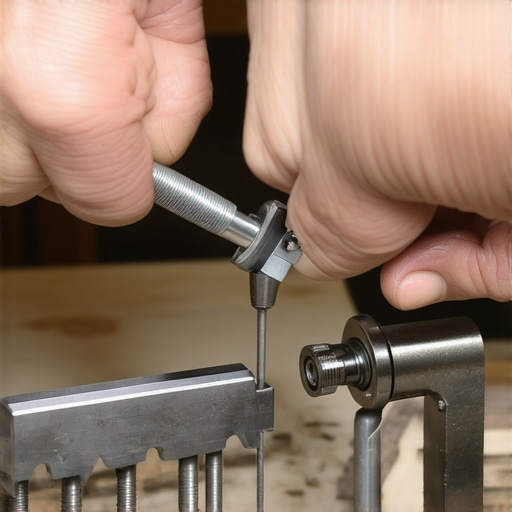
The 5-Minute Fix for a Squeaky Lever Action
Ever been mid-latte art, only for that dreaded squeak to break the moment? Or perhaps you’ve wrangled with a stubborn lever on your espresso machine, wondering if it’s time for a costly repair. I cringed the first time I heard that irritating squeal during a weekend brew, realizing my old lever-action espresso machine was crying out for some attention. It’s funny how a tiny noise can feel like a decibels of frustration—especially when you’re all set to enjoy that perfect cup.
The Secret to Quiet, Smooth Lever Actions
If your lever on your home espresso machine squeaks or feels stiff, you’re not alone. Many home baristas face this issue, often ignoring it until it worsens, but I’ve learned that a quick fix can restore that silky, quiet motion in just minutes. No need for expensive replacements or professional servicing. Today, I’ll walk you through a simple, effective routine that turns that squeak into silence and your lever into butter.
Is This Truly That Easy? Or Just Hype?
Early on, I made the mistake of overcomplicating the fix, thinking I needed specialized tools or an overhaul. But it’s surprisingly straightforward. The key is understanding what causes that squeak: lack of lubrication or accumulation of grime. Simply applying the right lubricant in the right spot makes all the difference. According to experts, regular maintenance can extend the lifespan of your machine significantly—saving you money and enhancing your coffee experience (source). I’ll share the exact steps I take that only take a few minutes.
Ready to restore that smooth, whisper-quiet lever action? Let’s dive into the practical fix and get your machine humming like new.
Prepare Your Workspace and Gather Supplies
First, power off your espresso machine and unplug it to ensure safety. Locate the lever mechanism and identify the lubricants recommended by your manufacturer or use a food-grade machine oil, such as silicone-based lubricant, which is safe for coffee equipment. Have a clean cloth, small brush, and cotton swabs ready for cleaning and applying lubricant. I recall the first time I fixed mine, I spilled a bit of oil, but it was a learning experience that paid off in smoother pulls.
Disassemble the Lever Assembly Carefully
Remove any panels or covers necessary to access the lever shaft. Use a screwdriver to gently detach parts, taking care not to strip screws. Think of this like opening a delicate jewelry box; patience is key. During my initial attempt, I overlooked a small clip, which led to unnecessary frustration. Taking photos during disassembly can help you reassemble correctly later.
Identify the Pivot Points and Moving Parts
Inspect the pivot points and hinges where the squeak originates. Typically, the squeak results from dry or dirty hinges analogous to a squeaky door hinge. In my case, I noticed dust and old grease built up, preventing smooth movement. Clean the parts with a dry brush or cloth, removing any debris or old lubricant. This step is critical for ensuring the new lubricant penetrates properly.
Apply Lubricant and Reassemble
Once cleaned, apply a small amount of food-grade silicone lubricant to the pivot points and hinges. Use a cotton swab to distribute the lubricant evenly without overdoing it—think of it like fine-tuning the oil on a bike chain. During my fix, I applied just enough to see a thin film, which eliminated the squeak instantly. Be cautious not to get lubricant on other parts, like seals or gaskets, to avoid affecting their function.
Check Your Work and Test the Machine
Reassemble the lever components carefully, referring to your photos if needed. Plug in the machine, power it on, and test the lever’s movement. It should now feel buttery smooth and silent. I remember the satisfaction of pulling that lever without any noise, turning what was a frustrating moment into a quick win. If you still hear squeaking, repeat the cleaning and lubrication process, ensuring no old grime remains.
Maintain Your Machine Regularly
Schedule periodic maintenance, similar to changing your car oil, to keep everything moving smoothly. Regularly cleaning and lightly lubricating the pivot points can prevent future squeaks and extend your machine’s lifespan. For instance, I now check my lever monthly, saving me from sudden noise disruptions and costly repairs. Proper maintenance not only preserves performance but also enhances your overall coffee experience—think of it as tuning your instrument for the perfect brew.
Many enthusiasts jump into DIY coffee setups believing that more expensive gear guarantees perfect espresso or the best milk foam. However, a prevalent myth is that top-tier equipment alone will make you a barista at home. In reality, understanding the nuanced interplay between grinder grind sizes, tamping pressure, and extraction time is crucial—an area often overlooked by beginners who focus solely on brand names or price tags. For example, even a premium machine cannot compensate for inconsistent tamping or poor grind calibration. Studies support this, highlighting that technique often outweighs equipment quality in influencing shot quality (source).
Another common mistake is assuming milk frothing is purely about equipment. While a dedicated milk frother or steam wand is essential, mastering the microfoam texture requires attention to milk temperature, frothing angle, and pitcher shape. Many forget that even a simple upgrade—like choosing the right pitcher—can significantly improve foam quality (link).
Furthermore, the myth persists that a high-end grinder automatically grants better espresso. This isn’t always true, as grinder calibration, burr alignment, and cleaning regularly impact consistency more than cost alone. The secret lies in matching your grinder’s settings precisely and maintaining it well—a process detailed in guides on choosing and calibrating coffee grinders (link).
Switching to barista gear, many believe that owning every tool will elevate their skills instantly. But without understanding the purpose of each item—such as tampers, distribution tools, or dosing scales—gear is just clutter. Proper technique combined with the right tools makes all the difference. Advanced readers can deepen their mastery by consulting expert tips on optimizing each piece of equipment, which are often underappreciated.
Finally, the most overlooked aspect is the importance of maintenance and cleaning. Neglecting regular upkeep can lead to subtle issues—clogged shower screens, scale buildup, or worn-out gaskets—that degrade performance over time (source). Spotting these problems early requires a keen eye and understanding of machinery nuances—a skill developed through experience and guided tutorials.
Have you ever fallen into this trap? Let me know in the comments. Mastering the art of home espresso involves more than just good gear; it’s about understanding these hidden factors that make all the difference.
Keep Your Equipment Running Smoothly with the Right Tools
Maintaining your home espresso setup isn’t just about cleaning; it involves having the right tools and knowing how to use them effectively for long-term performance. I personally swear by a high-quality burr cleaning brush and a precise calibration scale. These tools enable me to keep my grinder in top shape and ensure consistent dosing, which is vital for great shots. For cleaning stubborn oils and residues, a specialized water tank cleaning kit has saved me hours. Investing in the correct tools reduces wear and prolongs the lifespan of your gear.
How do I maintain my espresso machine over time?
Regular maintenance is key. Follow the manufacturer’s guidelines for descaling and replacing worn parts like gaskets and shower screens. I schedule a bi-monthly deep clean, including backflushing with approved cleaning solutions, which keeps my machine performing optimally and prevents costly repairs. To streamline this process, I use a calibration tool to fine-tune my grinder after every descale. This ensures consistent extraction and flavor.
Tools I Trust for Long-Term Results
Beyond basic maintenance, certain tools help me troubleshoot issues before they escalate. An infrared temperature gun assists in checking boiler performance, and a water testing kit ensures water quality doesn’t affect taste. Using these, I can catch problems early, significantly extending the life of my espresso machine and accessories.
Balancing Maintenance and Upgrades for Future Growth
While routine care is essential, upgrading key components over time can dramatically improve your setup. For example, replacing worn-out gaskets with high-quality silicone variations not only boosts longevity but also enhances shot consistency. As technology advances, newer models and accessories promise improved durability and features. Staying ahead with regular upgrades ensures your investment continues to pay off. Trends suggest that smart diagnostics, integrated sensors, and IoT-connected devices are becoming more common, offering proactive maintenance alerts and performance tracking.
Experiment with Advanced Maintenance Techniques
I recommend trying detailed calibration of your grinder every few months using a precision calibration method. This might involve adjusting the burr alignment or setting grind consistency, which can significantly improve flavor extraction and reduce wear. Don’t hesitate to experiment; the improved control can make a substantial difference in your daily brew. For inspiration, check out the latest in recommended gear for 2025.
Over the years, I realized that some of my most satisfying barista moments came from tackling simple maintenance tasks that kept my espresso machine singing. Those minor squeaks or stiff lever movements, once signs of neglect, turned into opportunities for learning and improvement, leading to better shots and a more enjoyable brewing process. The key lesson was that becoming familiar with your machine’s inner workings empowers you to troubleshoot confidently and avoid costly repairs, all while deepening your appreciation for coffee craftsmanship.
The Secrets That Only Experienced Home Baristas Know
- Learning to identify the subtle signs of wear, like slight changes in lever resistance or noise, can prevent bigger issues down the line.
- Building a personalized maintenance routine—like monthly lubrication and cleaning—transforms your espresso experience from average to exceptional.
- Understanding which lubricants are safe and effective ensures your machine’s longevity without risking internal damage or flavor contamination.
- Regularly inspecting components such as gaskets and shower screens keeps your shots consistent and flavors vibrant.
- Sharing and exchanging tips within the community often reveals clever hacks that save time and improve results, pushing your skills further.
Tools That Made My Home Barista Life Easier
- A quality burr cleaning brush helped me maintain consistent grind quality, which is crucial for great espresso.
- Investing in a precise calibration scale allowed me to pull shots with consistent dose every time, elevating my skills.
- A reliable gasket replacement kit saved me money and kept my machine performing at its best.
- An infrared temperature gun became invaluable for diagnosing boiler issues early.
What I Wish I Knew Before I Started DIY Maintenance
- Patience and gentle handling during disassembly save you frustration and prevent damage to delicate parts.
- Taking photos at each step provides a helpful guide for reassembly, especially when working with complex machinery.
- Using the right lubricants—like food-grade silicone—ensures safety and maintains flavor integrity.
- Creating a maintenance schedule tailored to your drinking habits prolongs your equipment’s life and improves shot quality.
- Learning to listen for changes in sound or resistance can alert you to issues before they affect taste, making troubleshooting proactive rather than reactive.
Start Small, Dream Big with Your Home Espresso Craft
Whether you’re just beginning your coffee journey or seeking to refine your skills, embracing simple maintenance routines and leveraging trusted tools can dramatically transform your experience. Remember, each small fix is a step toward the perfect espresso, and every challenge is an opportunity to learn something new. Invest in your knowledge as much as your gear, and watch your home barista skills flourish. The future of your coffee adventures is in your hands—so roll up your sleeves and enjoy the process of mastery.
What minor machine tweak has made a significant difference in your brewing routine? Share your stories below!