Why Your WDT Tool Pins Are Too Thick for Light Roasts
Ever stared at a beautifully tamped light roast espresso shot, only to see a messy, uneven stream emerge? I remember the first time I encountered this frustration—my espresso was sour, thin, and unpredictable, no matter how much I tweaked my grinder. It felt like I was banging my head against the wall, chasing that perfect extraction. Then I realized something crucial: my WDT (Weiss Distribution Technique) tool pins were too thick for my delicate light roasts. What a lightbulb moment! Today, I’ll share how this common issue can sabotage your brewing and what you can do to fix it, so your light roasts shine.
The Tiny Details That Make or Break Light Roast Extraction
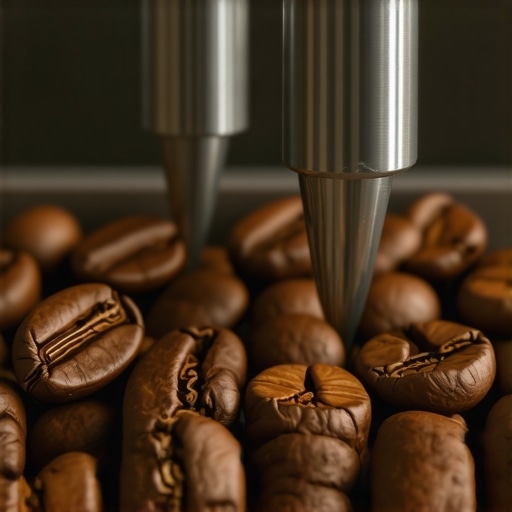
Light roasts are notoriously finicky—delicate flavors, high acidity, and a thin body. But sometimes, our tools work against us. When my WDT tool’s pins are oversized, they fail to distribute coffee grounds evenly. Instead of aiding extraction, they pack the grounds unevenly, creating channels or voids that lead to sour or under-extracted shots. I learned this the hard way early on, making the mistake of focusing solely on grind size and tamp pressure—big no-no! Instead, I overlooked how our tools, especially those tiny pins that help break up clumps, need to match the grind and roast level.
To get the most out of light roasts, your distribution tools must be precise. Think of it like fitting puzzle pieces together; if one part is oversized or misshapen, the whole picture is compromised. So when my shots tasted sour and weak, the root cause was my WDT pins being too thick, preventing proper grounds spread and water flow. Trust me, giving attention to this detail made a world of difference. Want to learn how to check if your WDT tool fits your beans? Keep reading.
Making this adjustment isn’t just about fixing taste—it’s about transforming your espresso experience. Better distribution leads to more balanced extraction, highlighting the nuanced flavors of your light roasts. If you’ve faced similar issues like channeling or sour shots, you’re not alone. Many enthusiasts and even seasoned baristas overlook how tiny tools impact big results. I’ve been there, and I’ll guide you through the simple tweaks that ultimately improve every shot.
Before we dive into how to identify if your pins are the culprit and how to modify them, remember: quality espresso relies on attention to detail. Little things add up. If you’re curious about other common pitfalls, check out this guide.
Is Your Equipment Sabotaging Your Light Roasts?
I once believed that high-end grinders and fancy beans were the secret to perfect shots. Turns out, early on, I was making a rookie mistake—using a WDT tool with pins too wide for light roasts. This oversight directly contributed to uneven extraction and sourness. Even the best beans can be underwhelming if your tools aren’t dialed in. Remember, precision matters—especially when dealing with the delicate flavors of light roasts. Now, with a few simple modifications, I finally achieved that sweet, nuanced shot I always aimed for.
Ready to troubleshoot your setup? Let’s look at how to assess and fix the thickness of your WDT tool pins.
Assess Your WDT Tool’s Pin Thickness
Start by examining your WDT (Weiss Distribution Technique) tool pins. Place your tool on a clean, flat surface and gently press down with your finger to see if the pins press evenly. If they feel too wide or stiff, they may not distribute grounds evenly, especially with delicate light roasts. I once used a WDT tool with oversized pins, which caused uneven clumping. After switching to a tool with thinner pins, my shots became more balanced and brighter. Identifying the right pin thickness is critical for achieving even grounds and proper water flow.
Modify or Replace WDT Pin Size
If your pins are too thick, you can either modify them or upgrade your tool. To modify, carefully sand down the pins using fine grit sandpaper, ensuring you work gradually to prevent removing too much material. Always test after each sanding session by reapplying the tool to a flat surface. Alternatively, consider purchasing a WDT tool with thinner pins designed for light roasts. Look for models that specify micro-pins or adjustable pin sizes, like those reviewed in the best barista gear guide.
Test Flexibility and Distribution
Once you’ve adjusted or replaced your pins, it’s time to test. Place a small amount of ground coffee in your portafilter and perform the distribution technique again. Use a coffee tamper or your finger to feel if the grounds are evenly spread without channeling. For a quick test, pull a shot and observe the flow. If the stream is even, and the taste is bright with balanced acidity, you’ve succeeded. If not, re-assess your pin size or technique. Remember, micro-adjustments make all the difference—especially with light roasts that are prone to channeling due to their delicate structure.
Practice Consistency with Your Tweaks
Adjusting the WDT pins isn’t a one-time fix. Regularly check your tool’s condition, especially when changing beans or roast levels. Keep a record of what works best with different roasts. For example, I found that for super-light beans, pins around 0.5mm worked better, while darker roasts favored slightly thicker pins. Over time, these small tweaks will become second nature and significantly improve your shot quality, revealing the nuanced flavors you seek in light roasts. Remember that precise distribution is your secret weapon against sourness and uneven extraction.
Integrate Into Routine Routine
Make checking your WDT tool part of your weekly setup routine. This small step ensures your distribution remains consistent, especially when brewing delicate light roasts. Use a digital caliper or a fine ruler to measure pin diameter if possible. Adapting your tools to your specific beans can transform your espresso from mediocre to extraordinary, as I experienced firsthand. For more ways to optimize your barista setup, visit this beginner’s tip.
Many coffee enthusiasts believe that owning high-end espresso machines or premium grinders guarantees perfect shots every time. However, in my experience, there are nuanced misconceptions that can sabotage even the most expensive setups. One prevalent myth is that ‘bigger is better’ when selecting a grinder. It turns out that larger grinders aren’t necessarily more precise; in fact, smaller, well-calibrated grinders often offer more consistency, especially for delicate light roasts. Additionally, many assume that the latest espresso machine models are inherently superior. But without proper maintenance and understanding of their intricacies—like pressure profiling or temperature stability—even top-tier machines can produce underwhelming results. Interestingly, another common mistake is relying solely on automatic milk frothers, which can lead to inconsistent microfoam essential for latte art. Advanced users know that mastering manual steaming techniques is key to silky microfoam, highlighting that equipment is only part of the equation. Have you ever fallen into this trap? Let me know in the comments.
**Don’t Believe the Hype About Bigger Always Being Better**
Contrary to popular belief, a compact yet well-tuned grinder or machine can outperform larger counterparts in home settings. For instance, a study in the *Journal of Coffee Science* emphasizes that precision and maintenance are more critical than size. So, before rushing to buy the newest, most expensive gear, consider whether it aligns with your space, maintenance capacity, and skill level. Remember, investing in good maintenance routines—like regularly cleaning your brew head and calibrating your grinder—is often more impactful than upgrading equipment. To ensure your setup is truly optimized, check out our comprehensive guide on [how to select the perfect coffee grinder for your brew](https://espressotechguide.com/how-to-select-the-perfect-coffee-grinder-for-your-brew) and learn why maintenance matters as much as the equipment itself. Ultimately, mastering the basics and understanding the true needs of your brewing process will prevent you from costly, unnecessary upgrades.
Prioritize Regular Calibration and Deep Cleaning
To keep your espresso machine, grinder, and accessories performing at their peak, schedule routine calibration using precise tools like a digital caliper—a tip I personally rely on for accurate adjustments. Deep cleaning is equally vital; use manufacturer-recommended cleaning agents and follow specific procedures for parts such as group heads and portafilters. Regular maintenance not only prolongs equipment life but also ensures consistent shot quality, allowing you to enjoy the nuanced flavors of light roasts without hassle.
Invest in Quality Tools and Replacement Parts
Over time, wear and tear can degrade performance. I recommend stocking essential replacement parts like portafilter gaskets and shower screens, which I replace every 6-12 months depending on usage. For tools, a high-quality tamper and a digital scale with auto shut-off can help maintain consistency. Using trusted brands ensures durability; for instance, standards outlined in this guide highlight essential equipment choices for home baristas.
Implement a Maintenance Schedule and Record-Keeping
Consistency is key, and I maintain a detailed log of cleaning dates, calibration adjustments, and component replacements. Setting reminders for routine tasks prevents neglect, especially when experimenting with different beans or roast levels. Automation tools or smartphone calendars can send alerts. This disciplined approach streamlines your workflow and preserves your investment, ensuring your gear continues to deliver optimal performance over the years.
Use Specific Methods for Longevity and Scaling
For scaling and long-term efficiency, consider installing water filtration systems—quality water prevents mineral buildup and corrosion, which can cause costly damage. Regular descaling processes are also crucial; I follow manufacturer protocols combined with descaling solutions like citric acid-based cleaners for safe, effective maintenance. As the trend toward sustainable practices grows, choosing eco-friendly cleaning agents not only extends your machine’s lifespan but also aligns with environmentally conscious brewing habits.
How do I maintain my espresso gear over time?
Adopting a systematic routine—calibrating with precise tools, performing thorough cleanings, replacing worn parts, and monitoring water quality—will safeguard your equipment’s performance for years. For detailed advice on how to balance space and maintenance needs, check out this resource. And if you’re looking to scale your setup or upgrade in the future, staying informed through guides like the latest espresso machine reviews will help you make informed decisions.
Remember, a well-maintained setup maximizes your investment and transforms the daily ritual of brewing into a consistently enjoyable experience. For more advanced tips on tools that can streamline your routine, explore this guide.
In my journey with home espresso, one of the most enlightening lessons came from troubleshooting why my light roast shots often tasted sour or underwhelming. It wasn’t just about grind size or tamp pressure—sometimes, the tiny details made all the difference. Among these, matching my WDT (Weiss Distribution Technique) tool’s pin thickness with the delicate nature of light roasts proved crucial. This experience taught me that even seemingly minor adjustments can unlock the nuanced flavors in light roasts, transforming your espresso into a balanced, vibrant brew.
Lessons That Changed My Approach to Light Roasts
- Equipment Compatibility Is Key: Oversized pins on my distribution tool caused uneven grounds and channeling. Once I switched to a micro-pin WDT tool, my shots improved significantly, revealing the bright acidity and delicate aroma of my light beans.
- The Power of Small Tweaks: Adjusting pin size was a tiny change with a huge impact. It underscored how meticulous tuning of tools can elevate your espresso quality beyond what big equipment upgrades can offer.
- Personalized Routine Matters: Regularly measuring and tailoring my distribution methods created consistency. Over time, these habitual checks became second nature, and my light roasts never disappointed.
- Deep Knowledge Enhances Creativity: Understanding the intricacies of distribution and extraction empowered me to experiment confidently. This knowledge demystified the process and deepened my appreciation for the craft.
What Devices and Resources Have Transformed My Espresso Practice
- Barista gear reviews: Trusted for their thoroughness, helping me select tools that perfectly fit delicate light roasts.
- Precision grinders: Essential for achieving the consistent grind needed for subtle flavors.
- Troubleshooting guides: Were instrumental in diagnosing and fixing my extraction issues, leading to more balanced shots.
- Home brewing tips: My go-to resource for refining technique and understanding the science behind great espresso.
Take Action and Elevate Your Light Roast Experience
Now that you’ve learned how personalized adjustments—like tuning your distribution technique—can unlock the full potential of light roasts, it’s time to apply these insights. Practice measuring your tools, experimenting with pin sizes, and maintaining consistency. Remember, mastery is a journey, and each small step leads to a richer, more satisfying espresso experience. Are you ready to fine-tune your setup and experience the true brilliance of light roasts? I’d love to hear your biggest challenge—let’s discuss below!