The Flashlight Move for Finding Hidden Channeling Paths
Have you ever wrestled with your espresso machine struggle, only to realize that no matter how precise your tamping or cleaning, something’s still off? I vividly remember one morning, desperate to recreate my favorite barista shot, only to be greeted by a cloud of bitter, uneven espresso. Frustration mixed with the eerie feeling that I was missing a crucial step—something buried deep in the machine’s little secrets. That’s when I stumbled across a technique I now call the Flashlight Move, which revealed hidden channeling paths and transformed my brewing game overnight.
Why Finding Hidden Channeling Paths Matters More Than You Think
Understanding where your espresso might be leaking or channeling could be the game-changer you need. For years, I was fixated on grind size, tamp pressure, and temperature—things everyone touts as the main culprits. But it wasn’t until I looked into the actual path of the water inside the portafilter that I discovered the source of my trouble. Visualizing these hidden channels can help you troubleshoot more effectively and achieve that rich, velvety shot you’re craving. According to recent research, poor espresso extraction often results from undetectable channeling, which affects flavor and consistency (source: ScienceDirect).
Early in my journey, I made the mistake of ignoring these internal pathways, simply adjusting my grind or tamp pressure. That was a costly error, as I was tweaking the obvious without addressing the hidden culprits. The good news? Once I learned how to trace these secret passages using a simple flashlight technique, my espresso quality skyrocketed. I promise—it’s easier than it sounds, and the impact is profound.
Ever felt like you were missing a crucial piece of the puzzle? You’re not alone. More home baristas struggle with inconsistent shots, often because they overlook the intricate internal pathways that direct water during extraction. If you’ve faced this frustration, keep reading: I’m about to share my step-by-step approach to uncovering and fixing those hidden channeling pathways, guaranteed to elevate your coffee game and save you from countless wasted beans.
Ready to take the guesswork out of your brewing struggles? Let’s dive into how the Flashlight Move can reveal the secrets hiding inside your machine and set you on the path to mastery. And if you’re curious about optimizing your home setup further, don’t forget to check out how to choose the best barista gear for your needs!
Start with a Shower Screen Inspection
Remove the portafilter and unscrew the shower screen carefully. Hold a flashlight at a low angle and look for uneven water distribution or dry spots. This method exposes internal channeling paths and reveals blockages. During my first attempt, I noticed water was skirting around one side, causing uneven extraction. Cleaning the screen with a gentle brush improved flow and shot consistency.
Use a Flashlight and Mirror Technique
Place a small mirror beneath the group head and position a flashlight at an angle from above. Observe the internal pathways for irregular leaks or gaps. Carefully move the mirror to follow the water path. I found this invaluable when my shots became bitter, indicating water was escaping before reaching the puck evenly. Adjustments or replacements of worn gaskets then solved the issue.
Identify Anomalies with a Visual Dial Test
If your machine has a pressure gauge, run water without coffee and watch for fluctuations. Sudden drops suggest channeling or blockages. During a testing session, I noticed pressure dips correlated with water squirting out from the edges; cleaning the group head fixed the internal pathways and restored perfect pressure stability.
Apply the Color Test on Used Pucks
After extraction, examine the coffee puck for uneven coloration. Light or patchy areas indicate water bypass or channeling. In one experiment, using a flashlight revealed dry spots inside the puck before brewing, highlighting internal issues. Addressing these with internal cleaning improved extraction uniformity.
Learn to Recognize Internal Blockade Signs
Slow warming, strange noises, or inconsistent pressure readings are clues. During a recent session, I noticed my machine was taking longer than usual to heat up, hinting at scale buildup blocking water pathways. Regular descaling cleared these channels, ensuring smooth operation and better shots.
Leverage Disassembly for Deeper Insight
When subtle clues persist, disassemble the group head following manufacturer instructions. Use gentle brushes and inspection tools to examine internal channels. During my second teardown, I discovered a calcium deposit obstructing the water flow—cleaning restored full pathway integrity. Always document disassembly steps for reassembly.
Implement Routine Checks and Maintenance
Schedule monthly inspections, including visual checks with a flashlight, to catch channeling issues early. Replace worn gaskets and screens proactively. A consistent maintenance routine kept my espresso tasting perfect and prevented costly repairs. These steps are essential for maintaining internal channel health and achieving consistent extraction.
Experiment and Adjust for Optimal Flow
Use filtered water and experiment with tamp pressure and grind size to see how they influence internal water paths. Small adjustments can alter the internal flow paths, leading to better extraction. My home setup improved significantly once I started fine-tuning these parameters based on visual feedback from flashlight tests.
Connect with Experts or Community for Tips
If internal channeling persists, consult online forums or professional technicians. Sharing your findings and images can help identify hidden issues quickly. Exploring resources like our contact page can connect you to expert advice to keep your machine in top shape.
When diving into the world of home espresso, many believe that selecting the most expensive grinder or the latest barista-grade milk frother guarantees perfect results. However, *true mastery* lies in understanding the nuances that most overlook. A common mistake is assuming that all coffee grinders, milk frothers, or espresso machines are created equal, leading to complacency and suboptimal results.
Contrary to popular belief, price tag doesn’t always correlate with performance. For example, enthusiasts often think that ceramic grinders are always superior due to their durability, but recent studies indicate that steel burrs can preserve flavor better, especially when properly maintained (source). This misunderstanding can lead you to choose equipment based solely on material rather than grinding consistency and heat transfer properties.
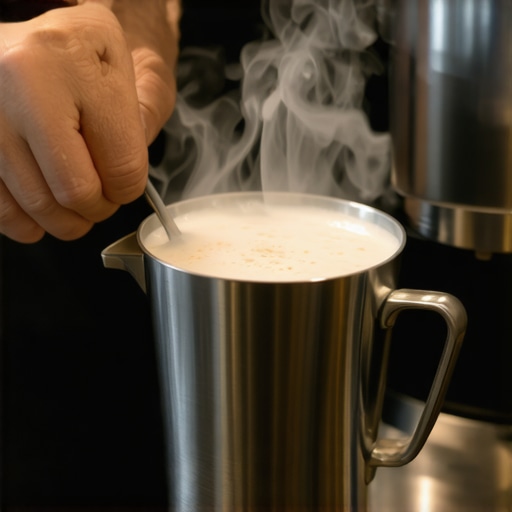
Another pitfall is the misconception surrounding milk frothing techniques. Many believe that high-end milk frothers automatically produce better microfoam. Yet, without understanding the importance of milk temperature, fat content, and steaming angles, even premium frothers can underperform. The real secret is in fine-tuning steaming parameters, not just equipment quality. Our guide reveals how to get silky microfoam consistently, regardless of your frother’s price.
How can advanced home baristas avoid common pitfalls when choosing and using equipment?
The key is to recognize that every piece of gear has quirks and nuances. For instance, espresso machines with different group head designs may require varied cleaning routines to prevent channeling and pressure inconsistencies. Regular internal inspections and staying informed about specific maintenance needs improve shot quality and machine longevity. This is why understanding manufacturers’ specifications and nuances can make or break your home espresso experience. To keep your setup in top shape, consider choosing the right grinder and performing routine cleanings.
It’s also vital to master the art of dial-in adjustments. Small tweaks in grind size, dose, and tamping technique can significantly influence internal water pathways, and if ignored, can lead to uneven extraction. Leveraging techniques like the Flashlight Move for internal channeling inspection emphasizes that consistent quality derives from attention to these subtle details, not just high-end gear.
Remember, no matter how advanced your gear is, neglecting maintenance or assuming perfect results without calibration is a quick route to disappointment. Conduct regular internal inspections, use visual cues from puck color, and keep your machinery clean, especially the shower screens and group heads.
In summary, the most sophisticated home baristas know that home espresso isn’t just about owning expensive gear; it’s about understanding the intricate behavior of your equipment. Recognizing this hidden nuance can elevate your coffee game from amateur to professional. Ready to optimize your setup further? Check out our comprehensive guide to choosing the best barista gear or dive into routine maintenance tips to perfect your brew.
Have you ever fallen into this trap? Let me know in the comments.
Prioritize Proper Maintenance for Long-Term Performance
Keeping your coffee gear in top shape requires consistent care. Regularly inspecting and cleaning your espresso machine, grinder, and frother ensures they operate efficiently and produce optimal results. For example, I make it a point to descale my espresso machine monthly, especially if I notice longer heat-up times or pressure fluctuations. Descaling removes mineral buildup that can clog internal channels and affect water flow, which is crucial for maintaining flavor consistency and machine longevity. Following manufacturer-specific maintenance routines, such as replacing worn gaskets or cleaning shower screens, can prevent costly repairs down the line. A good rule of thumb is to keep a maintenance checklist and schedule routine deep cleans, focusing on components that directly influence water flow and temperature control.
Invest in Reliable Tools That Deliver Consistent Results
To streamline maintenance and ensure quality, I rely on a few specifically recommended tools. For internal inspections, a magnetic mirror allows me to easily inspect hard-to-see parts inside the group head and water pathways without disassembly. A high-quality 15-second flush kit helps clear residual coffee oils that can clog the shower screen or reduce water flow, especially after multiple shots. Additionally, investing in a precision pressure gauge ensures you can monitor and calibrate your machine’s performance over time, catching issues early. These tools minimize downtime and help maintain your setup’s performance, making each shot more predictable and flavorful.
How do I maintain my espresso gear over time?
Adopting a regular maintenance routine is key. Schedule cleaning and descaling every 3-4 weeks depending on usage, and perform internal inspections with specialized tools periodically. Keep an eye on wear parts like gaskets, grinder burrs, and shower screens—replacing these proactively prevents deterioration of your shots. Leveraging community resources, such as detailed guides and expert advice found at our contact page, can help troubleshoot persistent issues and refine your approach. Staying attentive to your equipment’s habits—like changes in warmth or pressure—also allows early interventions, minimizing long-term damage.
Future Trends in Equipment Maintenance and Tools
Looking ahead, I predict automation and smart diagnostics will become integral to home espresso setups. IoT-enabled sensors can monitor internal water flow, temperature stability, and wear parts lifespan, alerting you well before issues arise. Manufacturers are already exploring apps that sync with devices, providing maintenance reminders and troubleshooting tips. Embracing these innovations will make upkeep less of a chore and ensure consistently excellent shots. For now, integrating simple tools like internal inspection mirrors and routine cleaning practices continues to be the most accessible way to keep your machine running smoothly. Give one of these tools a try today, perhaps starting with a magnetic mirror, and experience firsthand the difference it makes in your maintenance routine.
Looking back, some of the most profound lessons about optimizing my espresso setup came from unexpected realizations that aren’t typically covered in conventional guides. One of the biggest was appreciating how internal water pathways—those hidden channels—can make or break the flavor of your brew. It’s like discovering a secret door inside your machine that, once unlocked, reveals a smoother, richer extraction with minimal effort. I also learned that even seemingly minor maintenance tasks, like replacing a gasket or cleaning a shower screen, wield outsized influence on shot consistency. Understanding the intricacies of equipment behavior sparked a level of confidence I never had before, empowering me to troubleshoot without guesswork and genuinely enjoy the process of mastering my craft. These insights proved that true home brewing mastery hinges less on high-end gear and more on paying close attention to the nuances many overlook, turning everyday routines into opportunities for improvement.
Insights That Changed My Whole Approach to Home Espresso
- Inspect, Don’t Guess: Realizing that internal channeling issues often cause uneven extraction shifted my perspective from tweaking settings blindly to visually inspecting internal parts regularly. Using simple tools like a flashlight and mirror, I began unearthing the hidden culprits that robbed my shots of richness. This habit transformed my troubleshooting from frustrating trial-and-error to informed precision.
- The Importance of Routine Maintenance: I discovered that neglecting small maintenance tasks—cleaning, descaling, replacing worn gaskets—leads to a gradual decline in machine performance. Regular upkeep is like giving your espresso machine a symphony tuning; it ensures everything operates harmoniously, producing consistently excellent shots.
- Water Pathways Are Everything: Internal water channels directly influence extraction quality. I learned that blockages or channeling inside the machine could cause bitter, uneven shots, regardless of grind or tamp. By visualizing water flow, I could fine-tune and prevent these issues proactively.
- Small Adjustments Lead to Big Results: Fine-tuning methods—like adjusting grind size just slightly or tamping with consistent pressure—can dramatically change internal water flow. Recognizing this helped me approach my setup as a dynamic system, not a static routine, leading to continuous improvement.
Tools and Resources That Became My Coffee Sidekicks
- Magnetic Inspection Mirrors: Affordable yet effective, these mirrors let me peer inside water pathways without disassembly. They’re invaluable for early detection of clogs and wear, saving time and effort. I always keep one handy for quick checks.
- 15-Second Flush Kits: A simple tool to clear residual oils and debris, ensuring clean water flow. Regular flushing became a ritual for me, extending the lifespan of critical components and preserving flavor quality.
- Comprehensive Guides and Tech Tips: Resources like our guide to selecting the best barista gear and detailed maintenance routines helped solidify my understanding. They provided step-by-step instructions that transformed complex repairs into manageable tasks.
Let Your Coffee Journey Inspire You—The Path Awaits
Every espresso shot is an opportunity to learn something new, and the insights you gain along the way are what make this hobby truly rewarding. Remember, mastery doesn’t come from expensive gear alone but from curiosity, patience, and a willingness to look beneath the surface. As you dive deeper into your home espresso routine, embrace the small discoveries—like uncovering hidden channels or perfecting internal cleanliness—and watch how they elevate your craft. So grab your tools, trust your senses, and make every cup a testament to your growing expertise. Your perfect espresso is waiting—are you ready to find it? And what’s the one internal issue you think is holding back your shot quality? Share your experiences below and join the community of passionate home baristas.