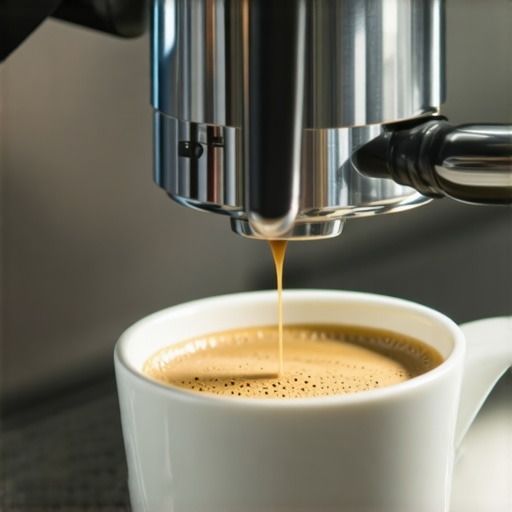
Why your espresso shot slows down midway through the pull
I vividly remember the first time I brewed a shot of espresso at home, only to watch the flow slow to a trickle halfway through. Frustration creeped in as I stared at my machine, wondering what I had done wrong. It felt like my perfect shot was slipping away just when I was about to enjoy that rich, aromatic sip. That lightbulb moment made me realize that this common issue isn’t just a minor annoyance—it’s a sign that something’s off with the setup or technique, and it’s incredibly frustrating for any coffee enthusiast.
Feeling Disappointed When Your Espresso Loses Its Flow
There’s nothing quite like that initial burst of rich espresso, but when it stalls midway, it can ruin the whole experience. The good news? This problem is surprisingly common, and with a bit of troubleshooting, you can often restore that steady, satisfying pour. Together, we’ll dive into the reasons behind this slowdown and share practical solutions that have worked for me and many others in the community.
Is Your Machine Really Breaking? Don’t Jump to Conclusions
Early on, I made the mistake of assuming my espresso machine was on its last legs. It’s easy to panic when your shots falter, but often, the culprit isn’t hardware failure. Sometimes, it’s a matter of adjusting your grind size or tamping pressure. Mastering home espresso techniques helped me realize that small tweaks can make a huge difference, and you don’t necessarily need to buy a new machine to enjoy perfect shots. Interestingly, a study by the Specialty Coffee Association found that poor tamping and inconsistent grind settings are among the top causes of uneven extraction, which can cause that dreaded flow slowdown.
Have you faced this issue yet? If so, you’re not alone. Let’s explore what might be causing your espresso to slow down and how you can fix it to get back that glorious pour every time.
Calibrate Your Grind Size for Consistent Flow
When your espresso flow slows down mid-pour, the first step is to check your coffee grind. A grind that’s too fine can cause overpressure, leading to a sluggish shot. I once spent an entire morning adjusting my grinder, turning the dial just a hair coarser, and the difference was immediate—flow speed increased, and the shot became smoother. Use a consistent, freshly calibrated burr grinder, and regularly revisit your settings, especially when changing beans or roast levels. For beginner-friendly guidance, visit how to select the perfect coffee grinder.
Ensure Proper Tamping Pressure to Prevent Channeling
Uneven tamping can create paths for water to bypass coffee grounds, causing inconsistent extraction and flow issues. I had a clumsy tamping technique that was causing my shot to sputter. Now, I apply firm, even pressure—about 30 pounds—and use a tamper with a textured handle for better grip. Keep the coffee level and compress it evenly, similar to pressing a pancake batter—thick enough to hold shape without breaking apart. Practicing this ensures uniform resistance, crucial for steady pour. To improve your tamping technique, check out using spring-loaded tampers.
Clean and Maintain Your Equipment Regularly
Mineral buildup or old coffee residues can obstruct water flow in your machine’s pathways. I once ignored cleaning, and my shot slowed to a trickle. A thorough descaling and cleaning with the right brushes restored flow. Pay attention to the group head, portafilter, and water pathways. Use a soft brush or a cleaning pin to clear out coffee clogs and scale deposits. Also, check the shower screen and gasket for signs of buildup. For routine maintenance tips, see cleaning tips for your espresso gear.
Adjust Pump Pressure if Needed
If your machine allows, improving pressure can be necessary. Some home machines have adjustable pump pressure—aim for around 9 bar for optimal extraction. I tested my pressure using a simple gauge method, which revealed I was operating at 8 bar. Slight adjustments made a world of difference, ensuring a steady, fast flow. Consult your espresso machine’s manual or manufacturer support before tinkering with internal settings, and consider professional service if unsure.
Check Bean Freshness and Storage
Old or stale beans can cause uneven extraction or clog the grinder. I once stored beans in a humid cabinet, and my shots started sputtering. Always store beans in an airtight container away from moisture and light. Use fresh beans within a month of roast date, and pre-grind only what you need. If your grinder or machine is sluggish after using stale beans, replacing them often restores proper flow and flavor. For tips on storing beans, see bean storage advice.
Many coffee enthusiasts believe that investing in high-end equipment guarantees perfect espresso every time, but this is a misconception. The truth is, even top-tier barista gear won’t compensate for technique errors or maintenance neglect. For instance, some assume that a more expensive espresso machine automatically produces superior shots—yet, many models have quirks or require specific calibration. It’s vital to understand that equipment is only as good as the user’s knowledge and care, especially when it comes to coffee grinders and milk frothers.
A common myth is that all home espresso machines are capable of professional-quality coffee. While they can approach this level with proper use, many models are designed for convenience rather than precision. Overlooking the importance of steam wand maintenance or failing to calibrate grinder grinders accurately can undermine the potential. Remember, consistent results depend more on technique mastery and understanding your gear’s nuances, like calibration practices than on the equipment alone.
Are you falling for the myth that pricier gear equals better coffee?
It’s easy to fall into the trap of thinking that newly released, high-priced espresso machines or intricate coffee grinders will automatically improve your brew quality. However, studies show that user error and improper maintenance contribute more significantly to poor extraction than the machine’s sticker price. A 2021 report by the Specialty Coffee Association highlights that many quality issues stem from improper tamping, grind adjustment, or inconsistent cleaning routines—areas where even entry-level gear can excel if used correctly. So, before splurging, invest time in mastering key techniques and understanding your gear’s specific quirks. Have you ever fallen into this trap? Let me know in the comments.
Another frequently misunderstood aspect involves milk frothers. Many think they need the latest gadget to achieve barista-quality foam, but often, the real challenge is proper steaming technique and regular cleaning, not the equipment itself. Advanced users focus on the nuances—such as tips for preventing bubbles—which can dramatically enhance the final texture of your milk. Remember, the secret lies in understanding and honing your skills, not just upgrading your toolkit.
Maintaining your coffee equipment is crucial to ensuring consistent performance and extending the lifespan of your barista gear. I rely heavily on specific tools and routines that make upkeep manageable and effective. One indispensable item in my toolkit is a high-precision calibration scale, like the compact digital scale, which allows me to measure exact doses and monitor shot weight, ensuring every brew stays consistent over time. Regular descaling solutions, such as citric acid-based descale kits, are embedded in my routine to combat mineral buildup, especially if you live in hard water areas.
For cleaning, I swear by a dedicated group head brush and a soft, lint-free cloth. Clear water alone isn’t enough; residues can affect flow and taste. I also use a blind filter insert combined with a cleaning tablet to run weekly backflushing routines without dismantling my machine fully. This approach saves time and maintains optimal water pathways, reducing the risk of flow issues like the one discussed in this detailed guide.
On the technical side, I keep a portable pressure gauge to verify my espresso machine’s pump pressure quarterly. Accurate pressure ensures even extraction and prevents harsh or underwhelming shots. As this expert article notes, consistent pump pressure is vital for reliable results, especially with more complex setups.
Handling your grinder requires its own set of tools. I use a fine-bristled brush and a vacuum to clear coffee grounds from burrs and chute daily. Once a month, I replace the burrs according to manufacturer recommendations, which enhances grind consistency and reduces clumping, as outlined in this comprehensive guide.
If you want to go a step further, consider investing in an inline water filter to protect your machine from scale and impurities, and schedule regular professional servicing—especially for heat exchangers and boilers, where unseen deposits can impair performance. Trend predictions suggest that smart monitoring tools, like IoT-enabled sensors, will become commonplace, enabling real-time alerts for maintenance needs and automation of routine checks.
To truly keep your gear in tip-top shape, I recommend setting a maintenance schedule and sticking to it religiously. Try integrating a weekly backflush with cleaning tablets and a monthly burr exchange—small efforts that yield long-term benefits. For a quick tip, use a small brush designed for grinder crevices to keep parts moving smoothly. Proper maintenance isn’t just about preserving equipment; it’s about consistently unlocking the best flavor your setup can deliver. Ready to elevate your routine? Start by calibrating your grinder with a digital scale today and notice the difference in your shots.
The Hardest Lesson I Learned About barista gear, coffee grinders, home espresso, espresso machines, milk frothers
One of the most profound realizations came when I discovered that my frustration with slow or inconsistent espresso flow was rarely about the equipment but often about technique and maintenance. I once blamed my costly espresso machine for every hiccup, but after deep dives into mastering the art of home espresso, I learned that small details like tamping consistency or grind calibration hold the key to reliable flow and flavor. This taught me to look inward before blaming my gear.
3 Myths About barista gear, coffee grinders, home espresso, espresso machines, milk frothers That Held Me Back
- Expensive is always better: Many assume higher-priced espresso machines automatically produce superior results. Yet, I found that even budget-friendly gear, if properly maintained and used, can rival luxury setups.
- Good equipment replaces technique: Even the best barista gear needs skilled handling. My early shots suffered from neglecting proper tamping and calibration, proving technique trumps equipment quality.
- Maintenance isn’t urgent: Regular cleaning can seem tedious, but delaying maintenance leads to flow issues, clogged ports, and flavor degradation. A quick routine keeps everything flowing smoothly, and I aim for weekly backflushing with cleaning tablets.
Always Question What You Think You Know
Throughout my coffee journey, I realized that many so-called ‘truths’ are simply myths. For example, a common misconception is that once you’ve bought a perfect grinder, your work is done. Not so. Continual calibration, routine cleaning, and understandingBean freshness can elevate your espresso from good to exceptional. The more I learned, the more I appreciated that mastering espresso is a blend of science, art, and ongoing curiosity. If you’re ever unsure, revisit the basics and don’t hesitate to experiment—sometimes, a small tweak can transform your entire experience.