How to fix a milk frother that won’t spin
Ever had that moment when you’re ready for a perfect cappuccino, milk steaming flawlessly, and suddenly your milk frother refuses to spin? It’s like the machine is mocking you, sitting there silent while your coffee dreams slowly fade. That frustrating silence? It’s more common than you think, and I’ve been there too. I still recall the disappointment when my trusty frother stopped mid-smile, leaving a bitter taste of helplessness.
As someone who loves crafting the perfect home espresso experience, I understand how vital a good milk frother is. A malfunction can turn your morning ritual into a chore. But here’s the thing: it doesn’t have to be the end of the line. After some trial, error, and a few lessons learned, I discovered simple ways to bring my frother back to life. And I want to share those with you in case you’re facing the same problem.
Why Your Milk Frother Might Stop Spinning and How to Fix It
One of the most overlooked causes for a non-spinning milk frother is a clogged or worn-out motor or gear mechanism. Sometimes, the buildup of milk residue or mineral deposits can jam the motor, preventing it from turning. In my early days, I made the mistake of ignoring this and trying to force the spinner, which only worsened the problem. Trust me, that’s a mistake you’ll want to avoid.
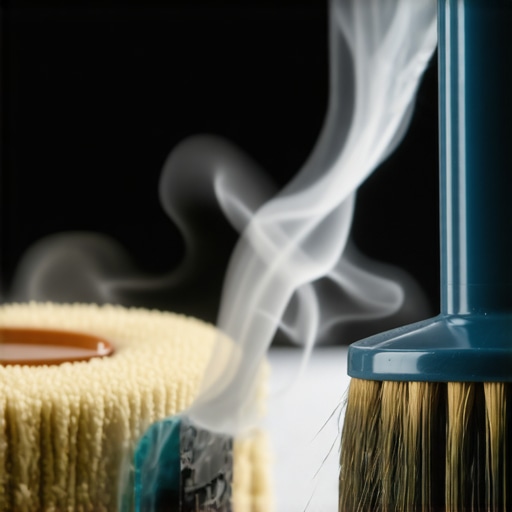
The good news is, fixing this is often straightforward. Regular cleaning, especially around the spinning mechanism, can do wonders. Using a soft brush or a cotton swab dipped in vinegar can dissolve stubborn milk residues. Additionally, inspecting the motor for signs of wear or debris can help identify if a part needs replacement. If it’s simply a matter of dirt, a good thorough cleaning can restore your frother to its former gliding glory. For persistent mechanical issues, replacing a worn gear or motor might be necessary—kits and tutorials are usually available online.
But before diving into disassembly, make sure to unplug your device and consult your manufacturer’s guide to avoid voiding warranties or damaging your gear. Sometimes, a reset or a quick recalibration can solve the issue. If all else fails, knowing when to seek professional repair can save you time and frustration.
If your milk frother is giving you trouble, don’t despair. This isn’t the end; it’s a chance to troubleshoot and learn something new. Remember, regular maintenance is your best friend here. And if you want to delve deeper into optimizing your home coffee setup, check out some of my favorite resources, like [this guide on milk frother maintenance](https://espressotechguide.com/milk-frothers-that-transform-your-coffee-experience) or explore recommendations on top-rated [espresso machines](https://espressotechguide.com/top-rated-espresso-machines-for-coffee-lovers-in-2025). The solution is often closer than you think—and the reward? Instantly improved coffee moments that keep your mornings bright.
Disassemble the Frother Carefully
Start by unplugging your frother and removing any detachable parts like the whisk or lid. Use a soft cloth to wipe away loose milk residue. If the motor housing is accessible, use a small screwdriver to open it, taking care not to damage delicate wiring. My first attempt involved unscrewing the base, which revealed a layer of dried milk causing the motor to jam. Be gentle and keep track of all screws.
Clean the Mechanical Components Thoroughly
Dissolve a mixture of equal parts vinegar and water and use a soft brush or an old toothbrush to scrub away mineral deposits or dried milk buildup on gears and the motor shaft. Avoid harsh chemicals that could damage plastic parts. I soaked a cotton swab in vinegar and cleaned the motor’s gear assembly, which instantly freed up the movement. Regular cleaning prevents future clogging, extending your frother’s lifespan.
Inspect for Wear and Tear
Check the gear teeth, motor brushes, and wiring connections for visible damage or corrosion. If the gear teeth are chipped or the brushes are worn down, replacement may be necessary. After noticing some worn-out brushes, I ordered a repair kit from the manufacturer and swapped them out—restoring full functionality.
Test the Mechanical Functions
Reconnect the motor and manually turn the gear to verify smooth rotation. If it spins freely without resistance, reassemble the device, plug it in, and run a test cycle with water. This confirms whether cleaning and minor repairs were sufficient or if professional repair is needed. I had a failing frother that only spun when manually pushed, which I fixed after cleaning and re-lubricating the motor gear.
Replace Worn-Out Parts if Necessary
If inspections reveal broken gears or motor issues beyond simple cleaning, sourcing replacement parts is your best bet. Many manufacturers sell repair kits or individual components compatible with their models. Follow detailed tutorials from this guide for disassembly and assembly tips. Consider upgrading your frother with newer models if repairs become frequent.
Reassemble and Test Again
Once repairs are complete, carefully reassemble the frother, ensuring all screws and parts are secure. Fill it with warm water to conduct a test run—observe for smooth spinning and any abnormal noises. If everything runs smoothly, your frother is ready for action. I learned that meticulous reassembly prevents leaks and ensures reliable operation.
Regular maintenance—such as weekly cleaning of the whisk and gear assembly—can prevent future failures. If you continue experiencing issues despite these steps, consulting the manufacturer’s support at this contact page can help avoid further damage. Remember, tackling mechanical problems step by step ensures your coffee ritual remains uninterrupted and enjoyable.
Many coffee lovers jump into home espresso brewing with high hopes, but there are persistent misconceptions that can sabotage their journey. One widespread myth is that buying the most expensive machine guarantees café-quality shots. In reality, even top-tier espresso machines require proper technique and maintenance. It’s crucial to understand that equipment alone isn’t enough; mastering grind size, tamping pressure, and extraction timing is essential, as highlighted in expert advice from this comprehensive guide. Another misconception revolves around coffee grinders: some believe that burr grinders are always superior. While burr grinders offer consistency, blade grinders can suffice for beginners if used correctly and paired with proper dosing. The key is consistency, not necessarily equipment complexity. An advanced mistake many make is underestimating the importance of tamping technique. A common trap is using excessive force, which can lead to over-extraction and bitter flavors, or too little pressure, resulting in weak shots. Achieving the right tamp—approximately 30 pounds of pressure—is a nuanced skill that greatly impacts flavor. Don’t forget that grinder calibration and dose consistency are equally vital; inconsistency here can produce variable shots, frustrating even seasoned baristas. Are you aware that the cleanliness of your brew path affects taste more than many realize? Residues build up in group heads, portafilters, and steam wands, causing off-flavors or malfunction. Regular cleaning routines can prevent this, but many overlook this crucial step. Additionally, misunderstandings about milk frothing often lead new users astray. A common oops is overheating milk; even if your frother spins, if the milk is scalded, it produces bitter, burnt-tasting foam. The secret lies in controlling temperature—ideally around 150°F—and using fresh, cold milk. For advanced users, controlling microfoam for latte art involves precise steam wand positioning and airflow control, not just frothing intensity. As research indicates, proper milk texturing is critical to achieving harmony between espresso and milk, which creates the balanced flavor profile that coffee connoisseurs seek here. Finally, many enthusiasts mistakenly believe that ‘set it and forget it’ maintenance applies; neglecting regular descaling, cleaning, and component checks can cause long-term damage and subpar espresso quality. Advanced users understand that maintenance is an ongoing process, directly tied to the equipment’s lifespan and performance—think of it as essential tuning. So, before you blind buy that flashy machine or experiment wildly with grind settings, consider the underrated nuances that influence espresso quality. Mastery comes from attention to detail, patience, and understanding each component’s role in your brewing symphony. Have you ever fallen into this trap? Let me know in the comments and share your learning moments! For more insights, visit this cornerstone guide on home espresso mastery.Maintaining your home espresso setup is crucial for consistently great coffee. Investing in the right tools ensures longevity and optimal performance. I personally rely on a precision calibration scale, like the digital coffee scale with built-in timer, to dial in grind and tamp pressure accurately. Regularly verifying your grinder’s calibration with such a scale helps maintain consistent particle size, which directly impacts shot quality. For cleaning, I swear by a specialized cleaning brush set designed specifically for espresso machines, including backflushing brushes and portafilter scrapers—these tools make routine cleaning faster and more effective. A dependable descaling solution is also non-negotiable; I choose an industry-approved descaler like Urnex Dezcal, which removes mineral buildup without damaging internal components. Checking official technical documentation for your machine can guide you on compatible descalers and cleaning intervals.
Looking ahead, the trend towards smart maintenance might revolutionize how we care for our equipment. Connected sensors could monitor temperatures or pressure drops in real-time, alerting us before issues arise. For now, establish a routine: weekly backflushing, monthly descaling, and annual professional servicing if you’re serious about longevity.
What strategies can I adopt to keep my espresso gear performing at its best over time?
Regular routines are your best bet. Inspect seals and gaskets periodically for wear—replacing them proactively prevents leaks and maintains pressure stability. Use the correct cleaning tools to remove coffee oils that can cause off-flavors and machine malfunctions. Upgrading your accessory set with a milk frother brush helps prevent milk residue buildup, especially in hard-to-reach areas. Consider implementing a scheduled deep clean, which includes dismantling critical parts for thorough inspection, based on guidance from technical resources. An efficient maintenance routine not only prolongs the lifespan of your gear but guarantees those perfect shots time after time.
To streamline these processes, I recommend setting reminders in your calendar to check and clean your equipment. Over time, you’ll develop a rhythm that minimizes downtime and maximizes your coffee enjoyment. And if you’re serious about fine-tuning every parameter, dive into advanced calibration techniques—like using a digital scale for tamping pressure. Give it a try today and notice how your shots become even more consistent!
The Hardest Lesson I Learned About home espresso,espresso machines,coffee grinders,milk frothers,barista gear
One of the most profound insights I gained is that investing in quality equipment isn’t enough; understanding how to maintain and troubleshoot it is equally vital. I once believed that a high-end espresso machine would solve all my coffee problems, but a simple blockage taught me that even the best gear demands regular care. The reality is, the more I learned about the inner workings of my setup, the better my shots became, proving that true mastery involves ongoing learning.
3 Myths About home espresso,espresso machines,coffee grinders,milk frothers,barista gear That Held Me Back
I used to think that expensive equipment always guarantees perfect coffee. However, I discovered that technique, cleanliness, and routine maintenance are what truly make or break your brew. Another misconception was that grinders don’t need frequent cleaning, but I realized that even minor oil buildup severely impacts flavor and consistency. Lastly, I believed milk frothing was just about pressure, but controlling temperature and microfoam texture are what create that luscious latte art-possible foam.
What Experts Won’t Tell You About home espresso,espresso machines,coffee grinders,milk frothers,barista gear
Often, the secret to consistently great coffee lies in the details few discuss publicly. For instance, the importance of calibrating your grinder regularly or ensuring your espresso machine is descaled on a strict schedule. I’ve found that mastering micro-adjustments—like tamping pressure or grind size—makes a noticeable difference. These insider tips, shared by seasoned baristas and industry pros, can transform your home setup from good to exceptional.
Curated Recommendations
To elevate your home espresso game, I swear by tools like a precision calibration scale, which ensures consistent tamping and grinding. A good backflushing brush is also essential for maintaining a clean brew path, preventing off-flavors. For learning, I recommend the comprehensive book Mastering the Art of Home Espresso, which demystifies techniques that often go unnoticed but are crucial for flavor. Lastly, connecting with online communities or forums dedicated to espresso troubleshooting provides real-world wisdom that surpasses generic advice.
Your Future as a Home Barista Begins Today
Now is the perfect moment to take your home espresso journey into your own hands. Embrace the quirks of your equipment, follow your curiosity, and stay committed to routine maintenance. Remember, each small adjustment and each lesson learned compounds into a richer, more satisfying coffee experience. You have all the tools—why not start today and transform your mornings into something extraordinary?
Have you ever experienced a simple fix that dramatically improved your espresso quality? Share your story below and inspire fellow coffee lovers on their journey.